Capturing Long Exposures with the Project Indigo Camera App
by Florian Kainz, Principal Scientist, and Marc Levoy, Adobe Fellow
November 18, 2026
|
|
|
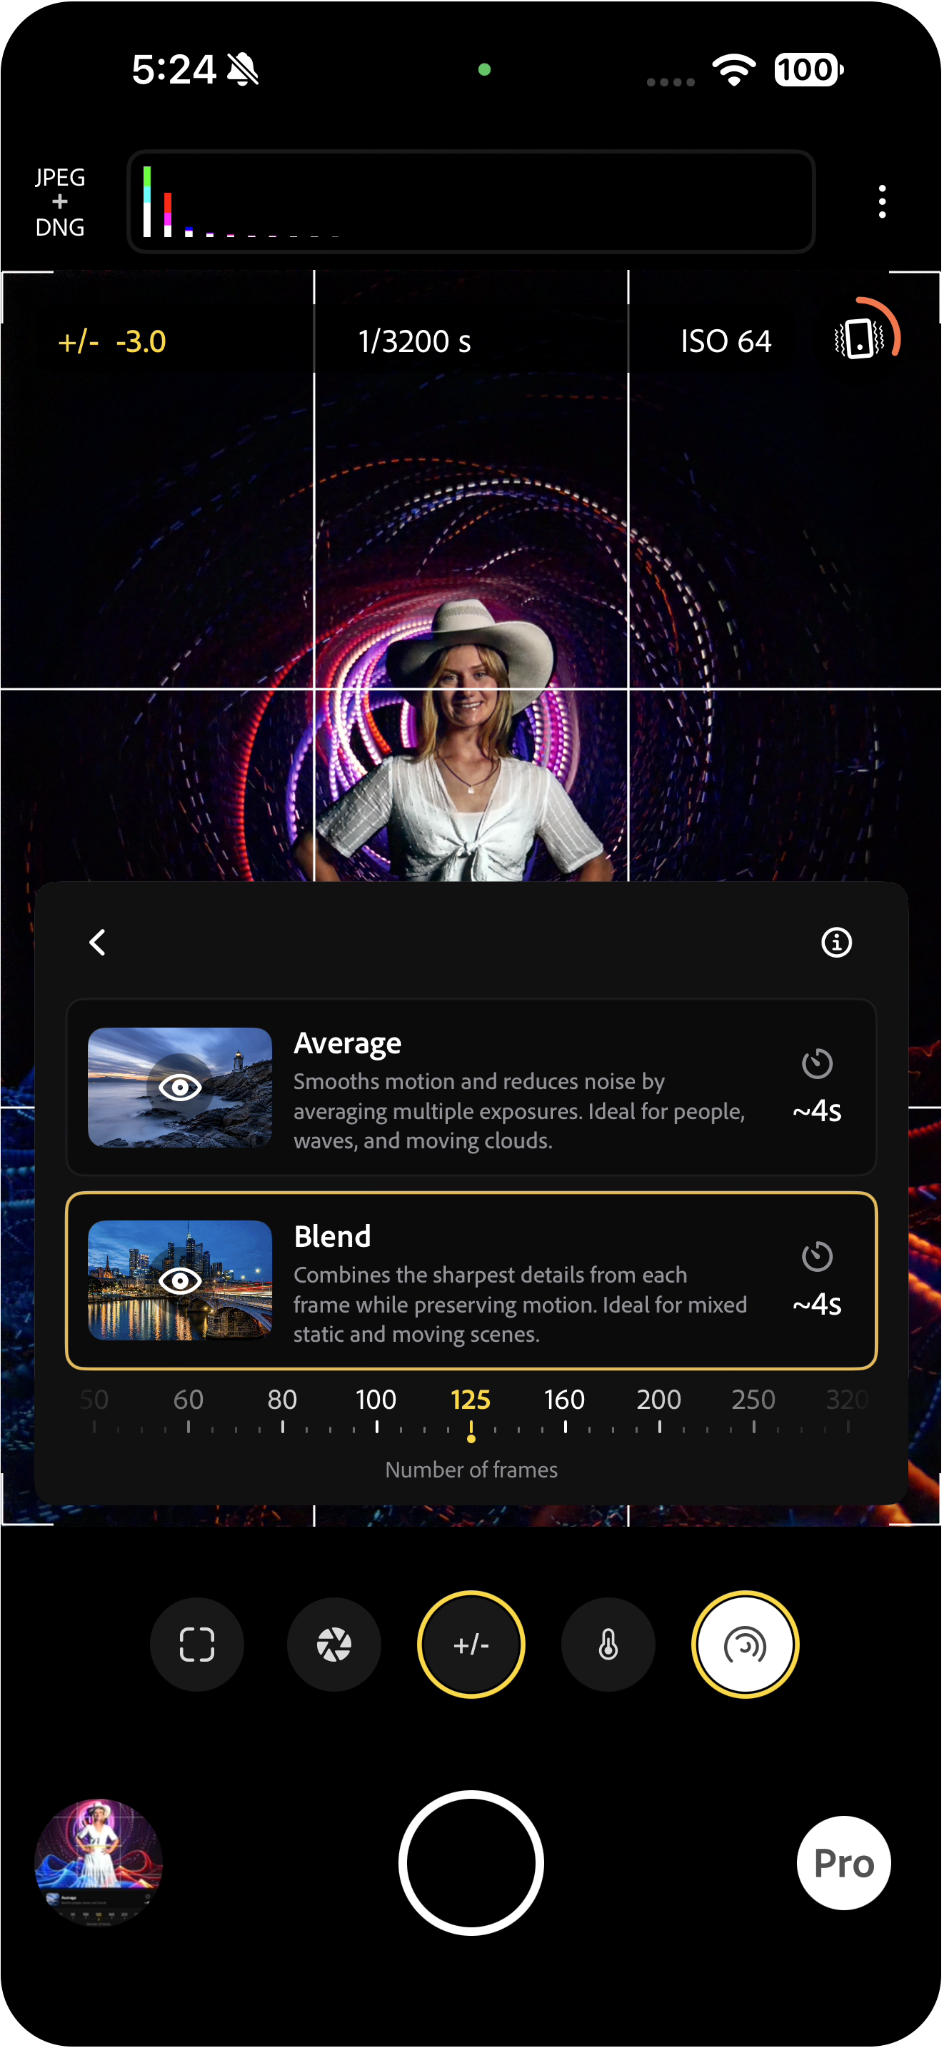
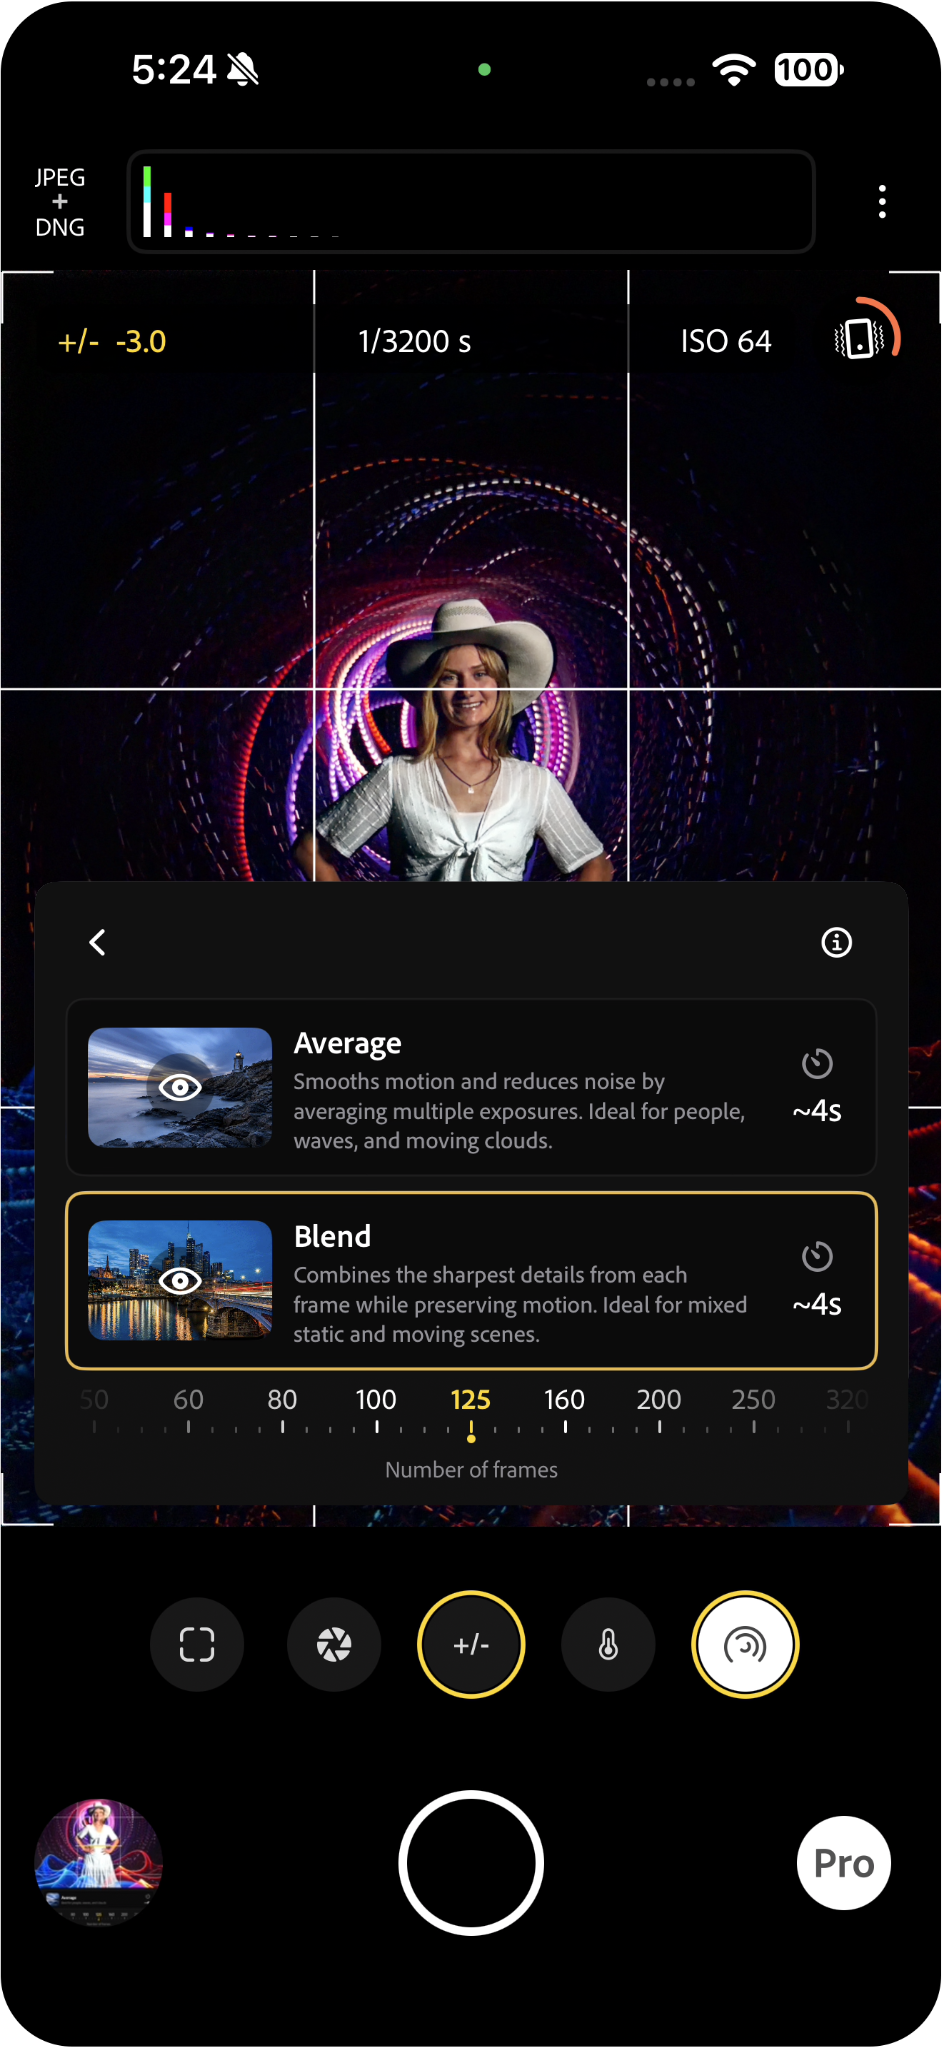
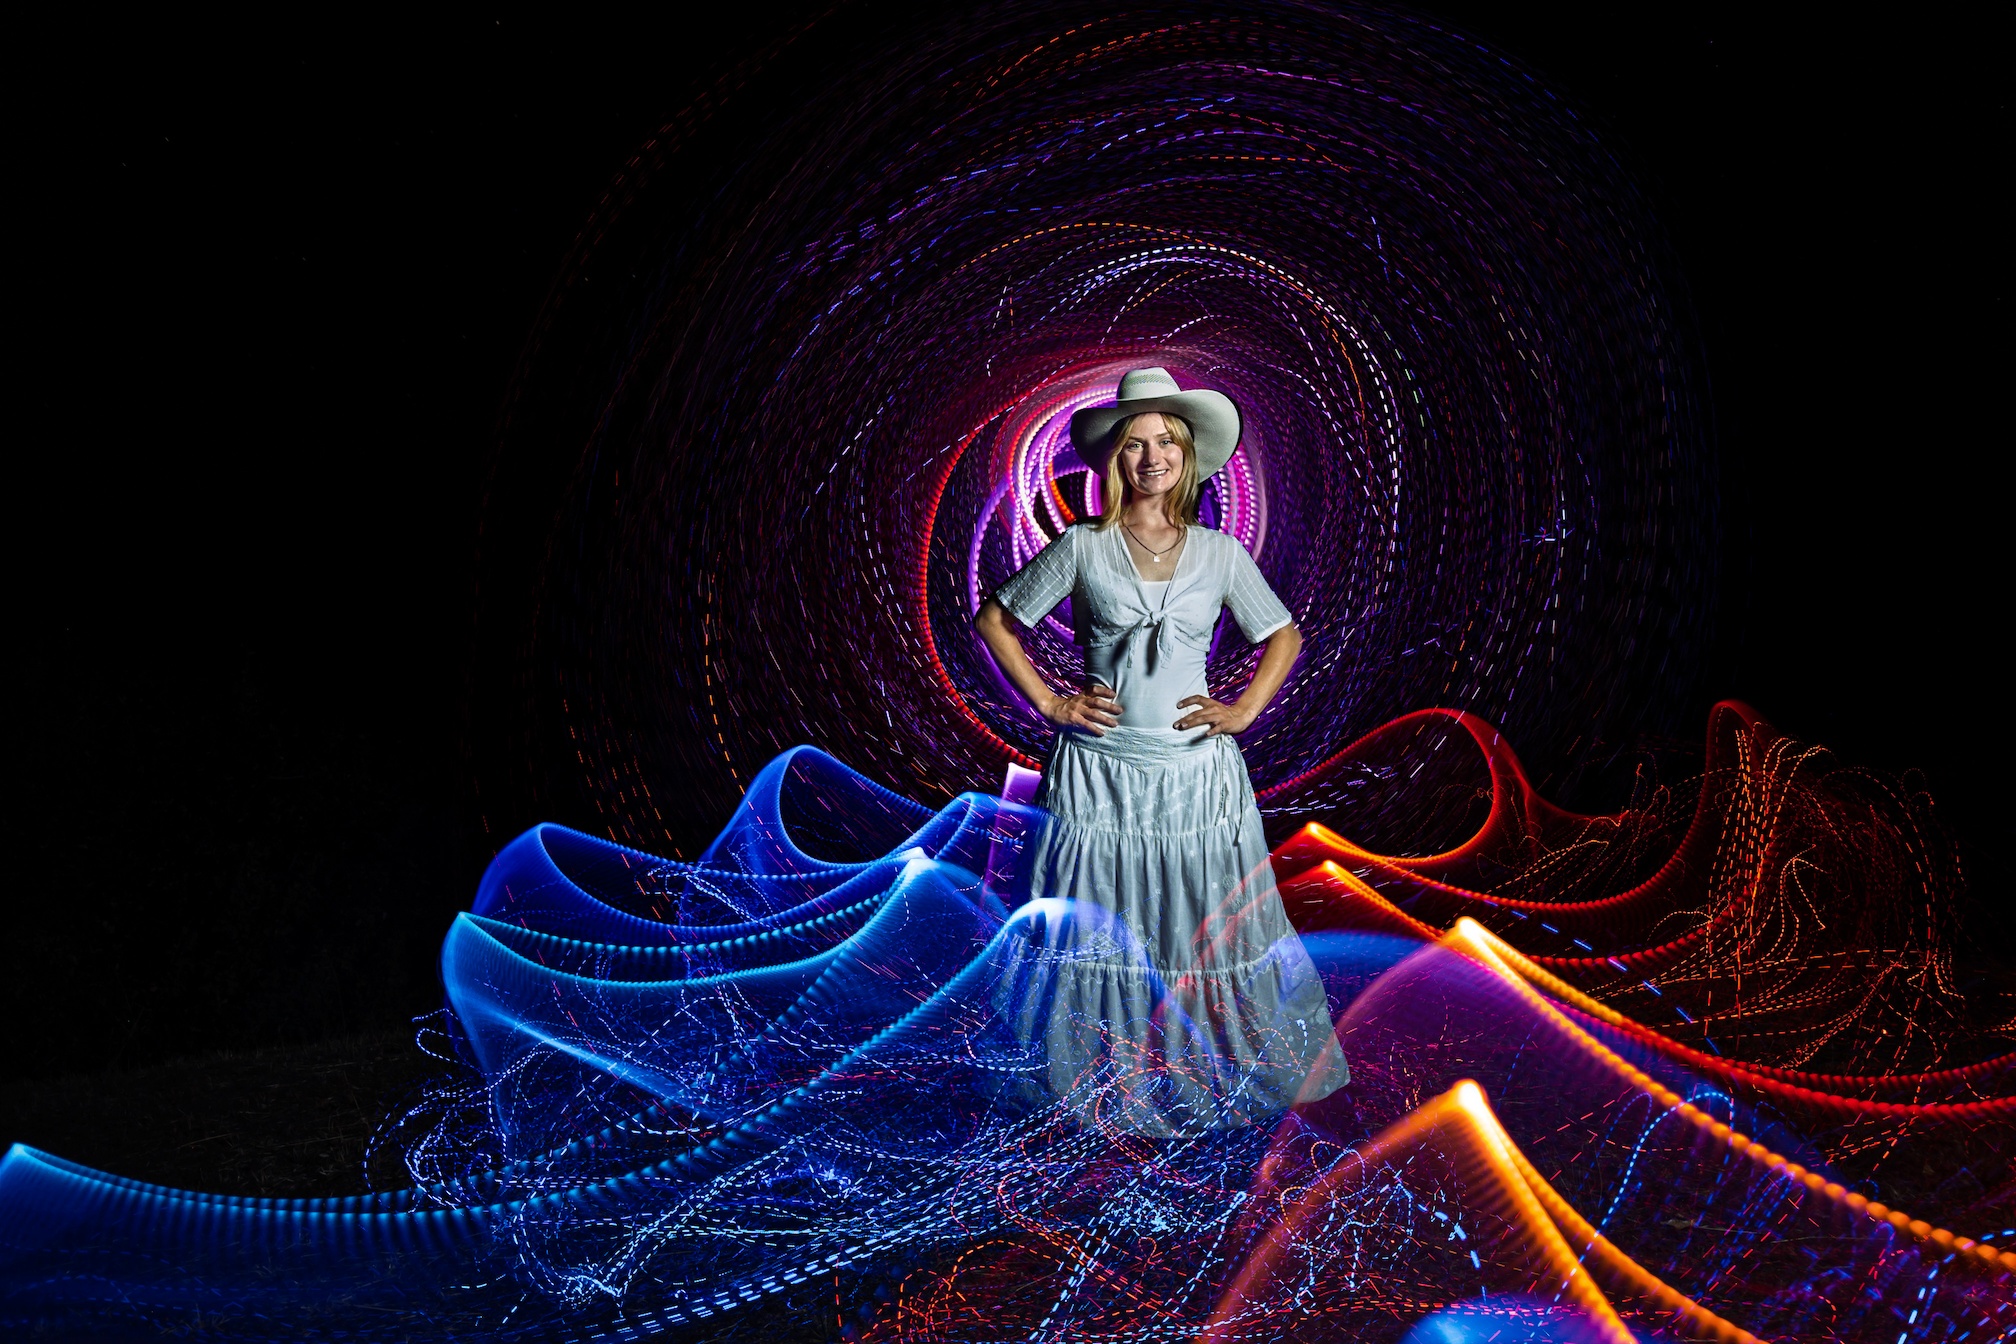
At left is the user interface of Indigo's new Long Exposure mode, running on an
iPhone 18 Pro Max. It shows the two long exposure styles we currently offer:
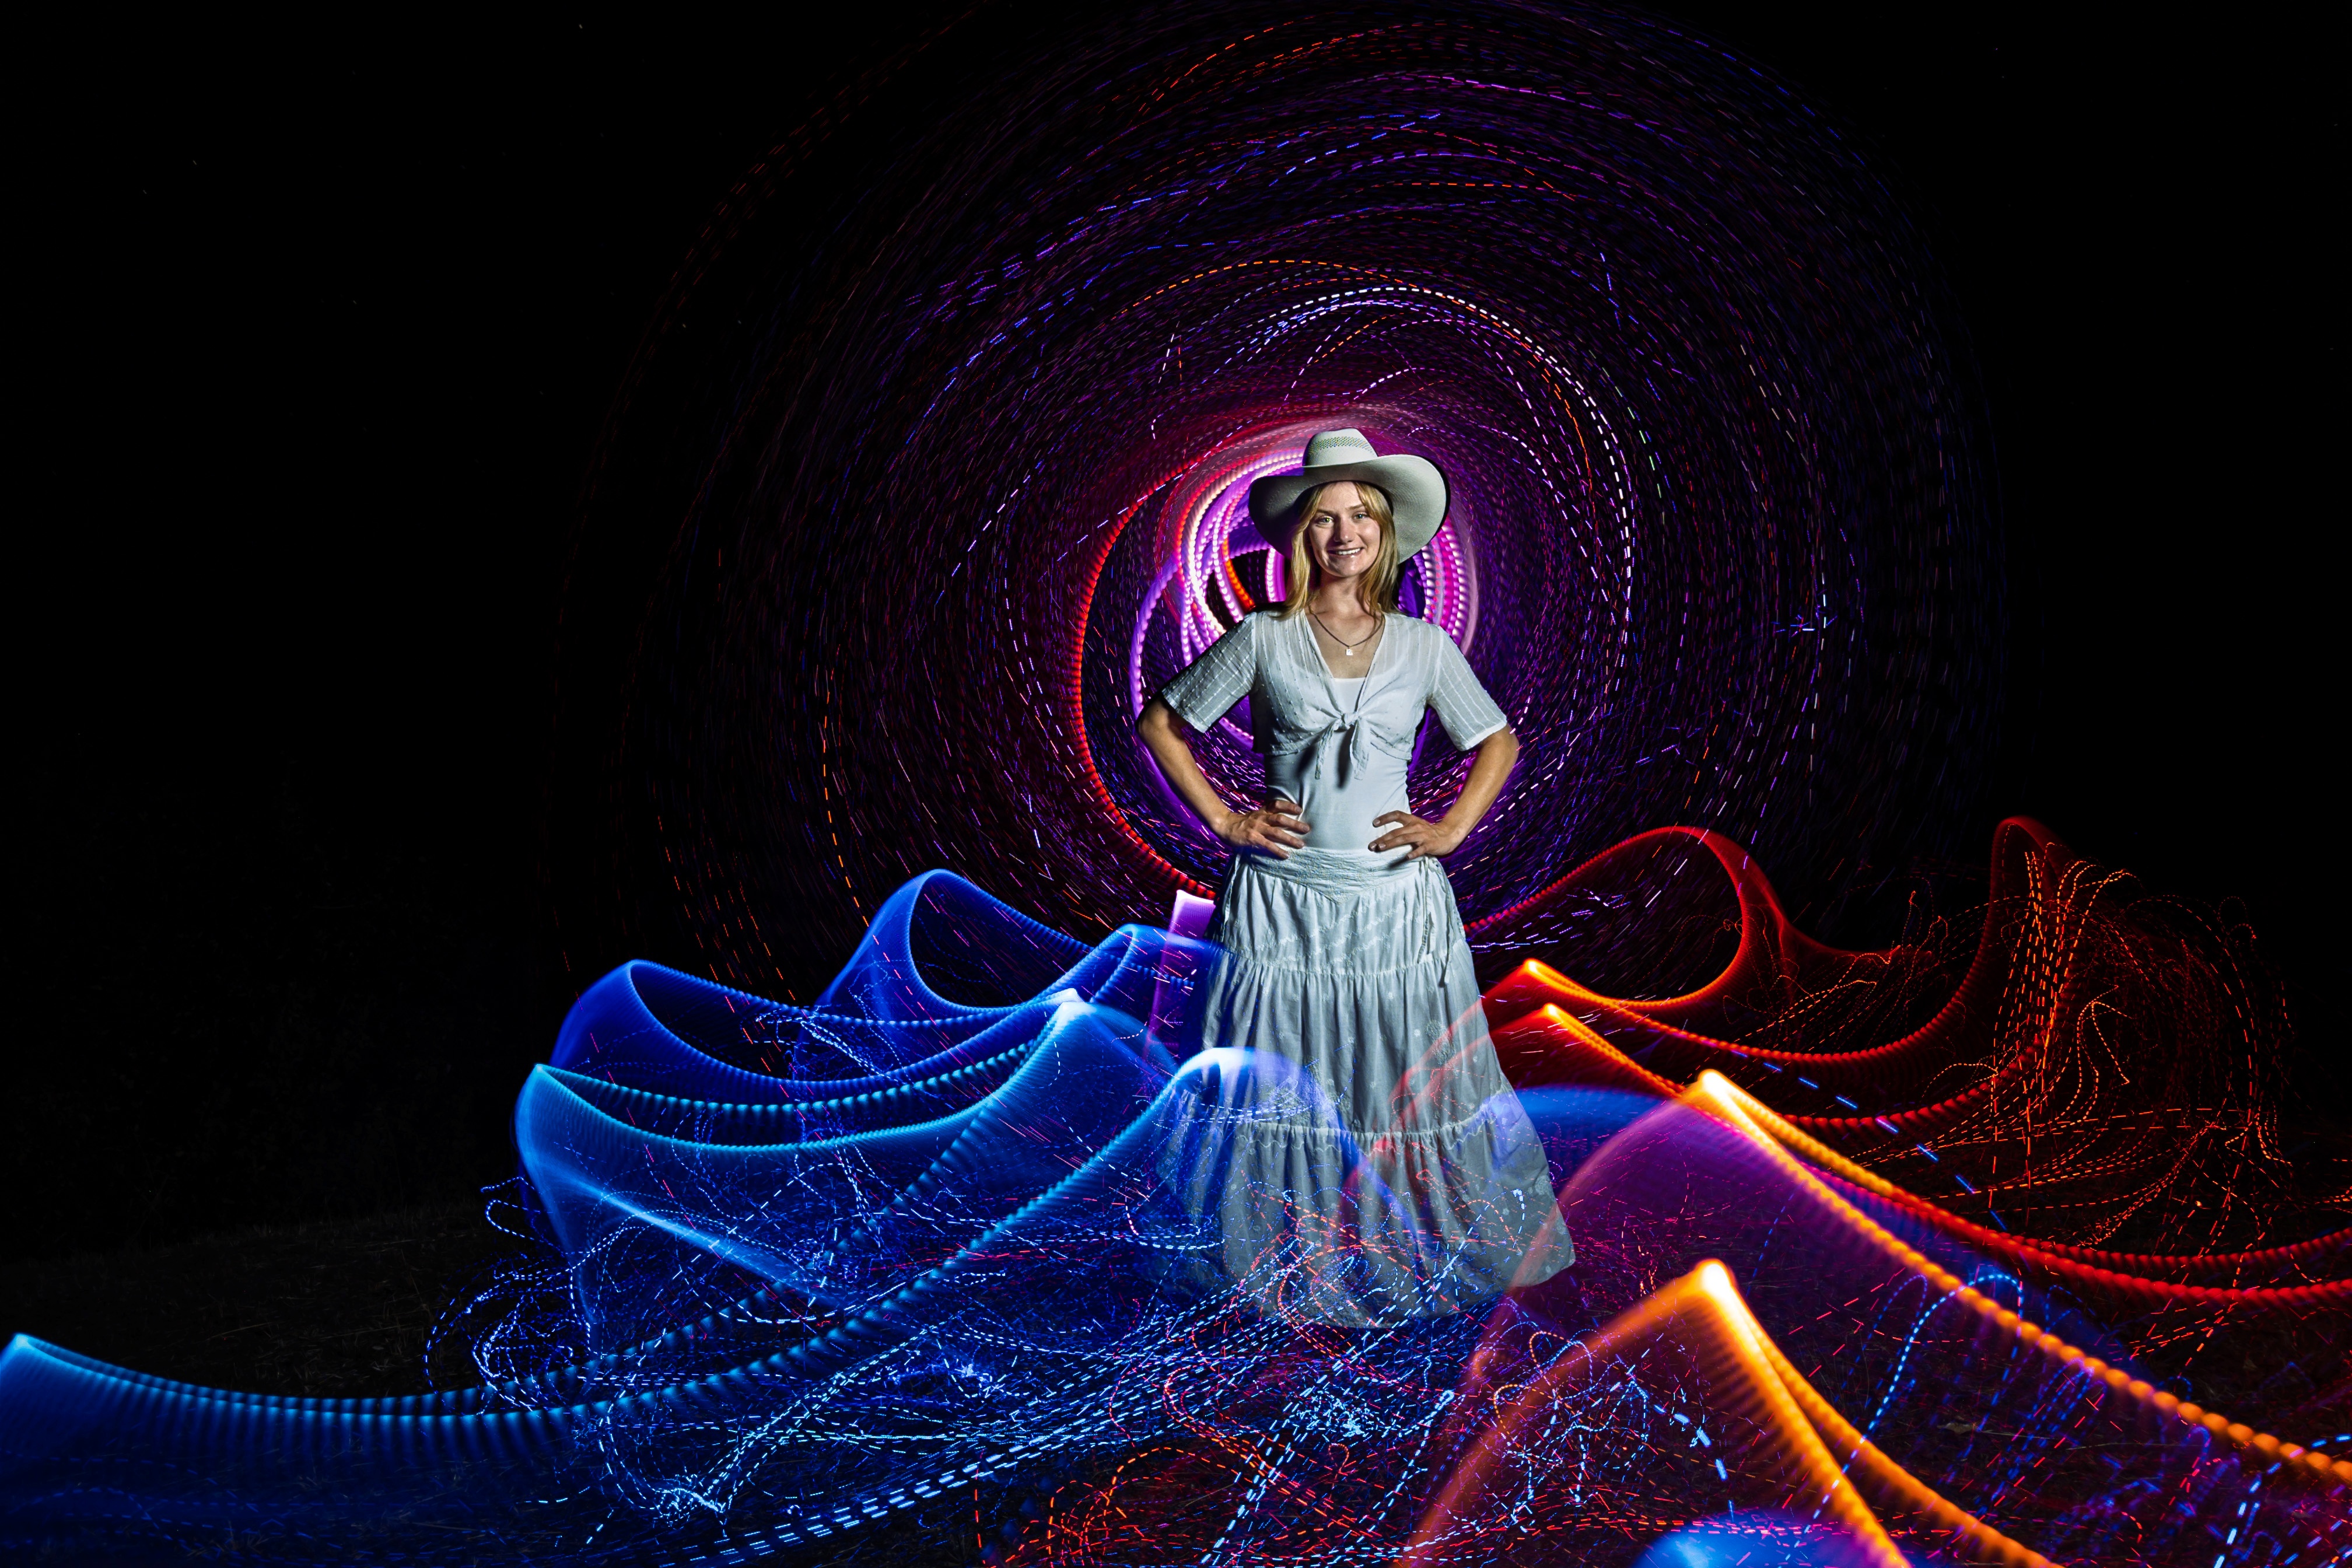
Average and Blend. At right is a light-painted nighttime scene captured by Susan
Magnano using the Blend style. Click on any image in this blog to view it in HDR
(on a compatible display) and at full resolution
|
In our previous blog post we explored the uses of generative AI
in the Indigo camera app. Here we return to our roots in photography, by
concentrating on the capture process, and controlling it in creative ways. When
Project Indigo was launched in 2025, the app’s Night mode
included a simple Long Exposure feature. The latest release includes a few
interesting upgrades: Long Exposure has become its own mode, alongside Photo and
Night; within the Long Exposure mode there are two separate capture styles -
Average and Blend; and the viewfinder now shows a live preview of the captured
photos as the exposure builds up. Below we explain how Long Exposure works, we
show a variety of long exposure photos, and we explain how they were captured.
This album contains a selection of long exposure images,
including the ones shown here.
What is Long Exposure?
When a photographer presses their camera’s shutter button, the shutter opens,
exposing the image sensor to light from the scene in front of the camera. Once
the sensor has collected enough light to form a clear image, the shutter closes,
ending the exposure. The duration for which the shutter remains open is called
the shutter speed or exposure time. When the scene contains a moving subject
such as a person, or the camera is handheld, a fast shutter speed (short exposure
time), usually a small fraction of a second, is desirable because nothing in the
scene can move very far while the image sensor collects light. Motion is frozen
and the captured picture looks sharp. When the shutter speed becomes slower, for
example, because the scene is dark and it takes longer to collect enough light,
objects can move further during the exposure, leading to motion-blurred photos
that often don’t look good.
However, strong motion blur can be used creatively. Exposure times in the range
from one to a few seconds can convey an impression of speed. With even longer
exposures one can make flowing water look like fog, make people in a busy place
all but invisible, turn car head- and taillights into glowing trails, or create
various other effects.
Unfortunately, while mirrorless and DSLR cameras allow exposures up to many
minutes, the small image sensors in cellphone cameras cause image quality to
deteriorate quickly as exposures become longer. Thus, most phones do not allow
exposures longer than a few seconds. On iPhones, the slowest shutter speed is
one second. To get around this limit, one can capture and combine multiple
shorter exposures, thereby creating a virtual long exposure. This is the idea
behind Indigo's new Long Exposure mode.
Long Exposure in Indigo
Start by updating
to the latest version of the
Project Indigo camera app, available for free in the App Store. (You can
also reach Indigo from
Lightroom Mobile, if you have enabled it via App Settings > Early Access >
Tech Preview.) Within Indigo you'll see a new mode in the carousel,
called Long. When you take a regular photo with Indigo in Photo or Night modes,
Indigo rapidly captures multiple images, called “frames," and aligns them before
merging them into a single, high-quality photo. This align-and-merge procedure
increases image quality and reduces motion blur. In the new Long Exposure mode,
no alignment takes place before merging. To get a clear picture of the static
parts of the scene, the phone must not move at all when a photo is taken.
Mounting the phone on a sturdy tripod is ideal, but propping it up with a rock or
whatever else is available works, too.
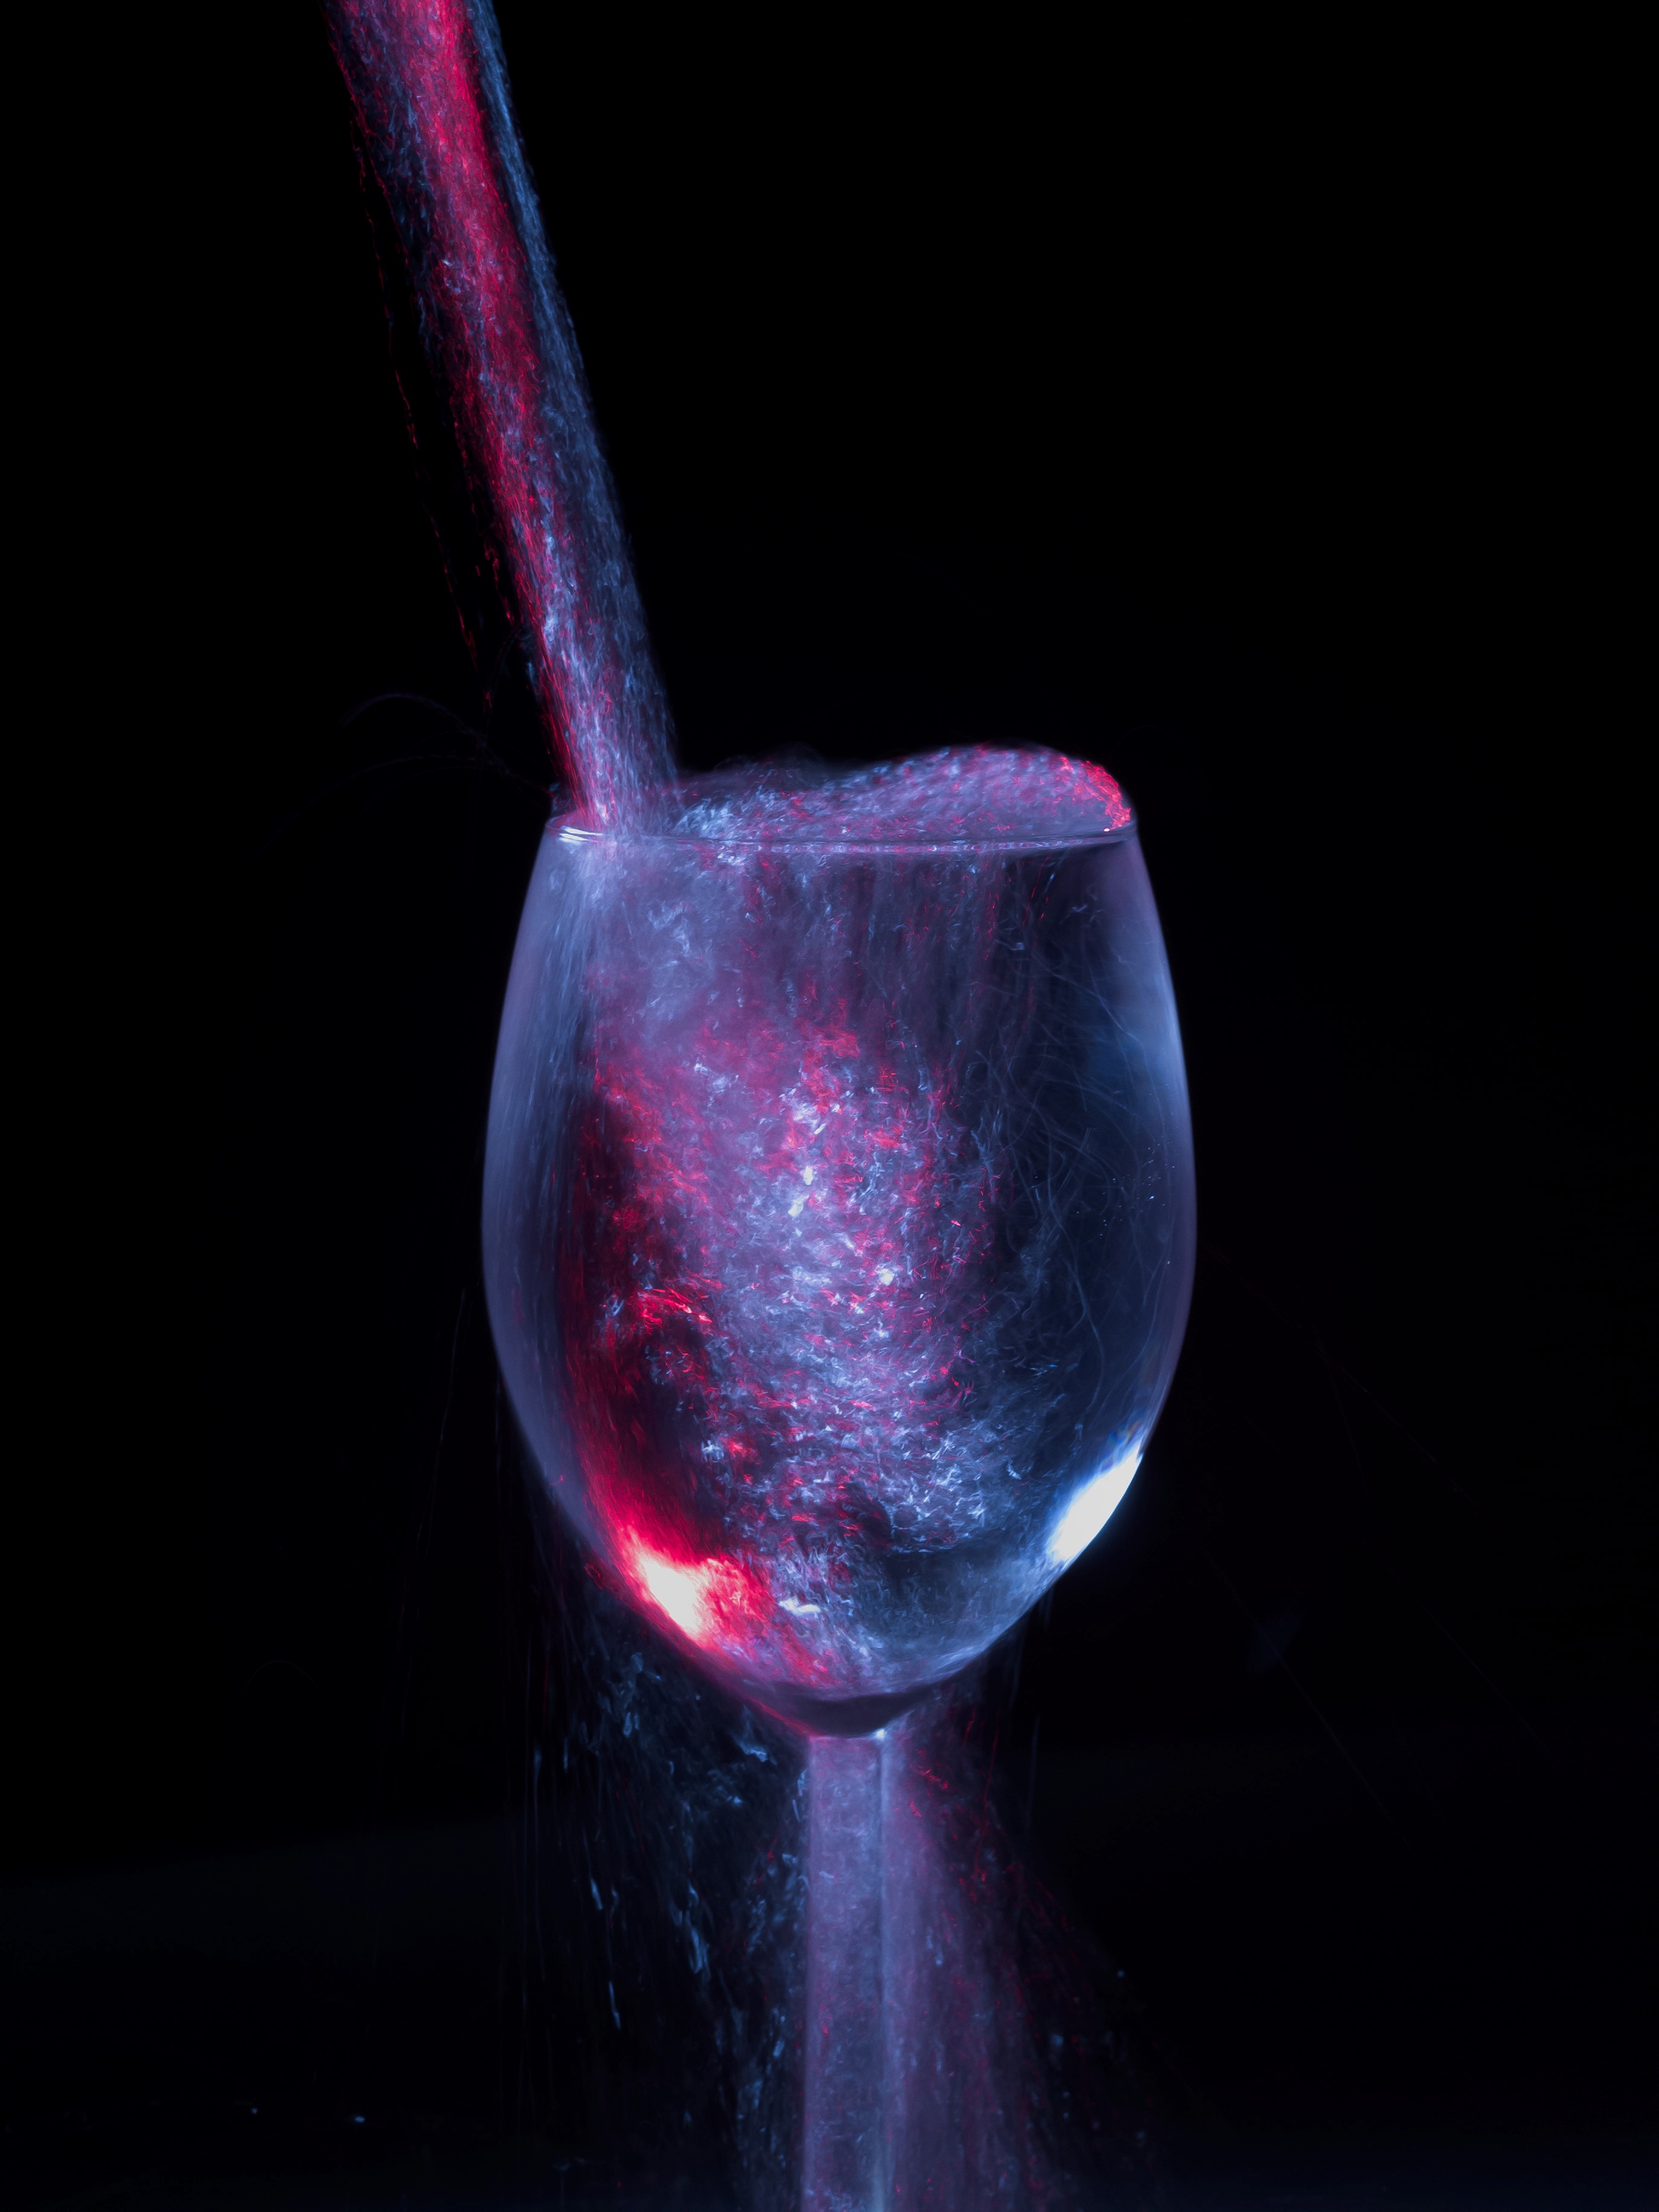
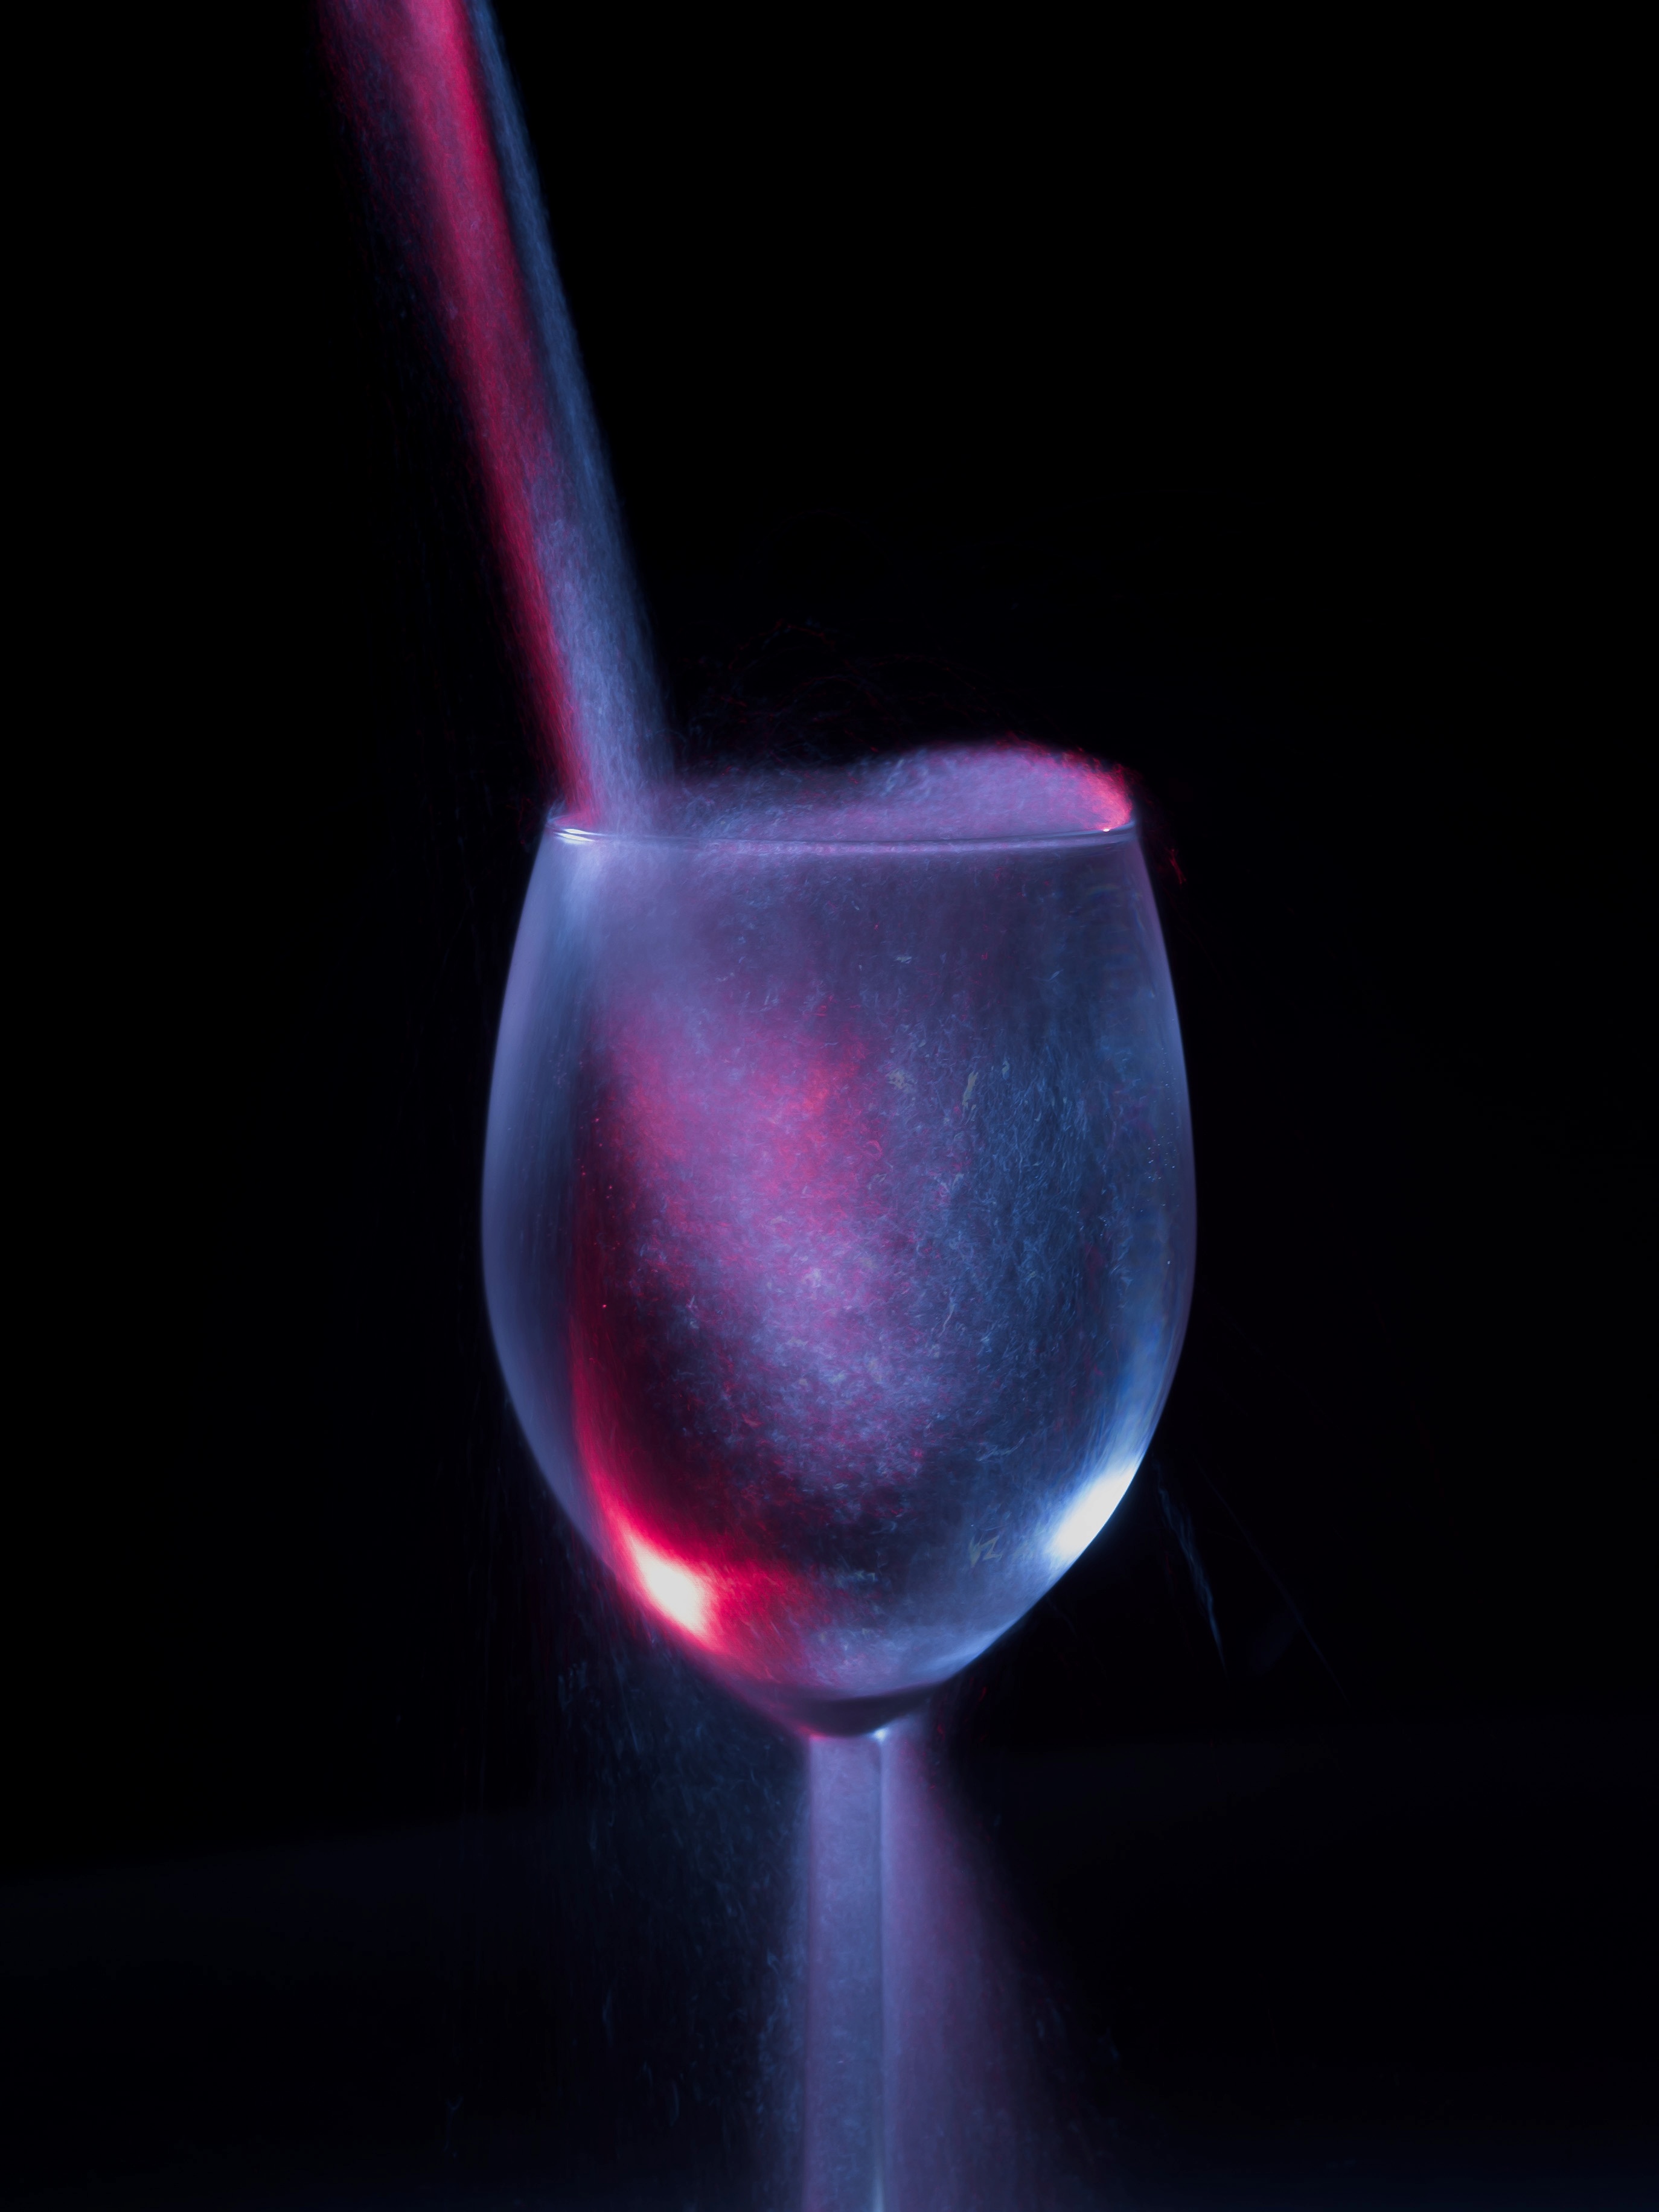
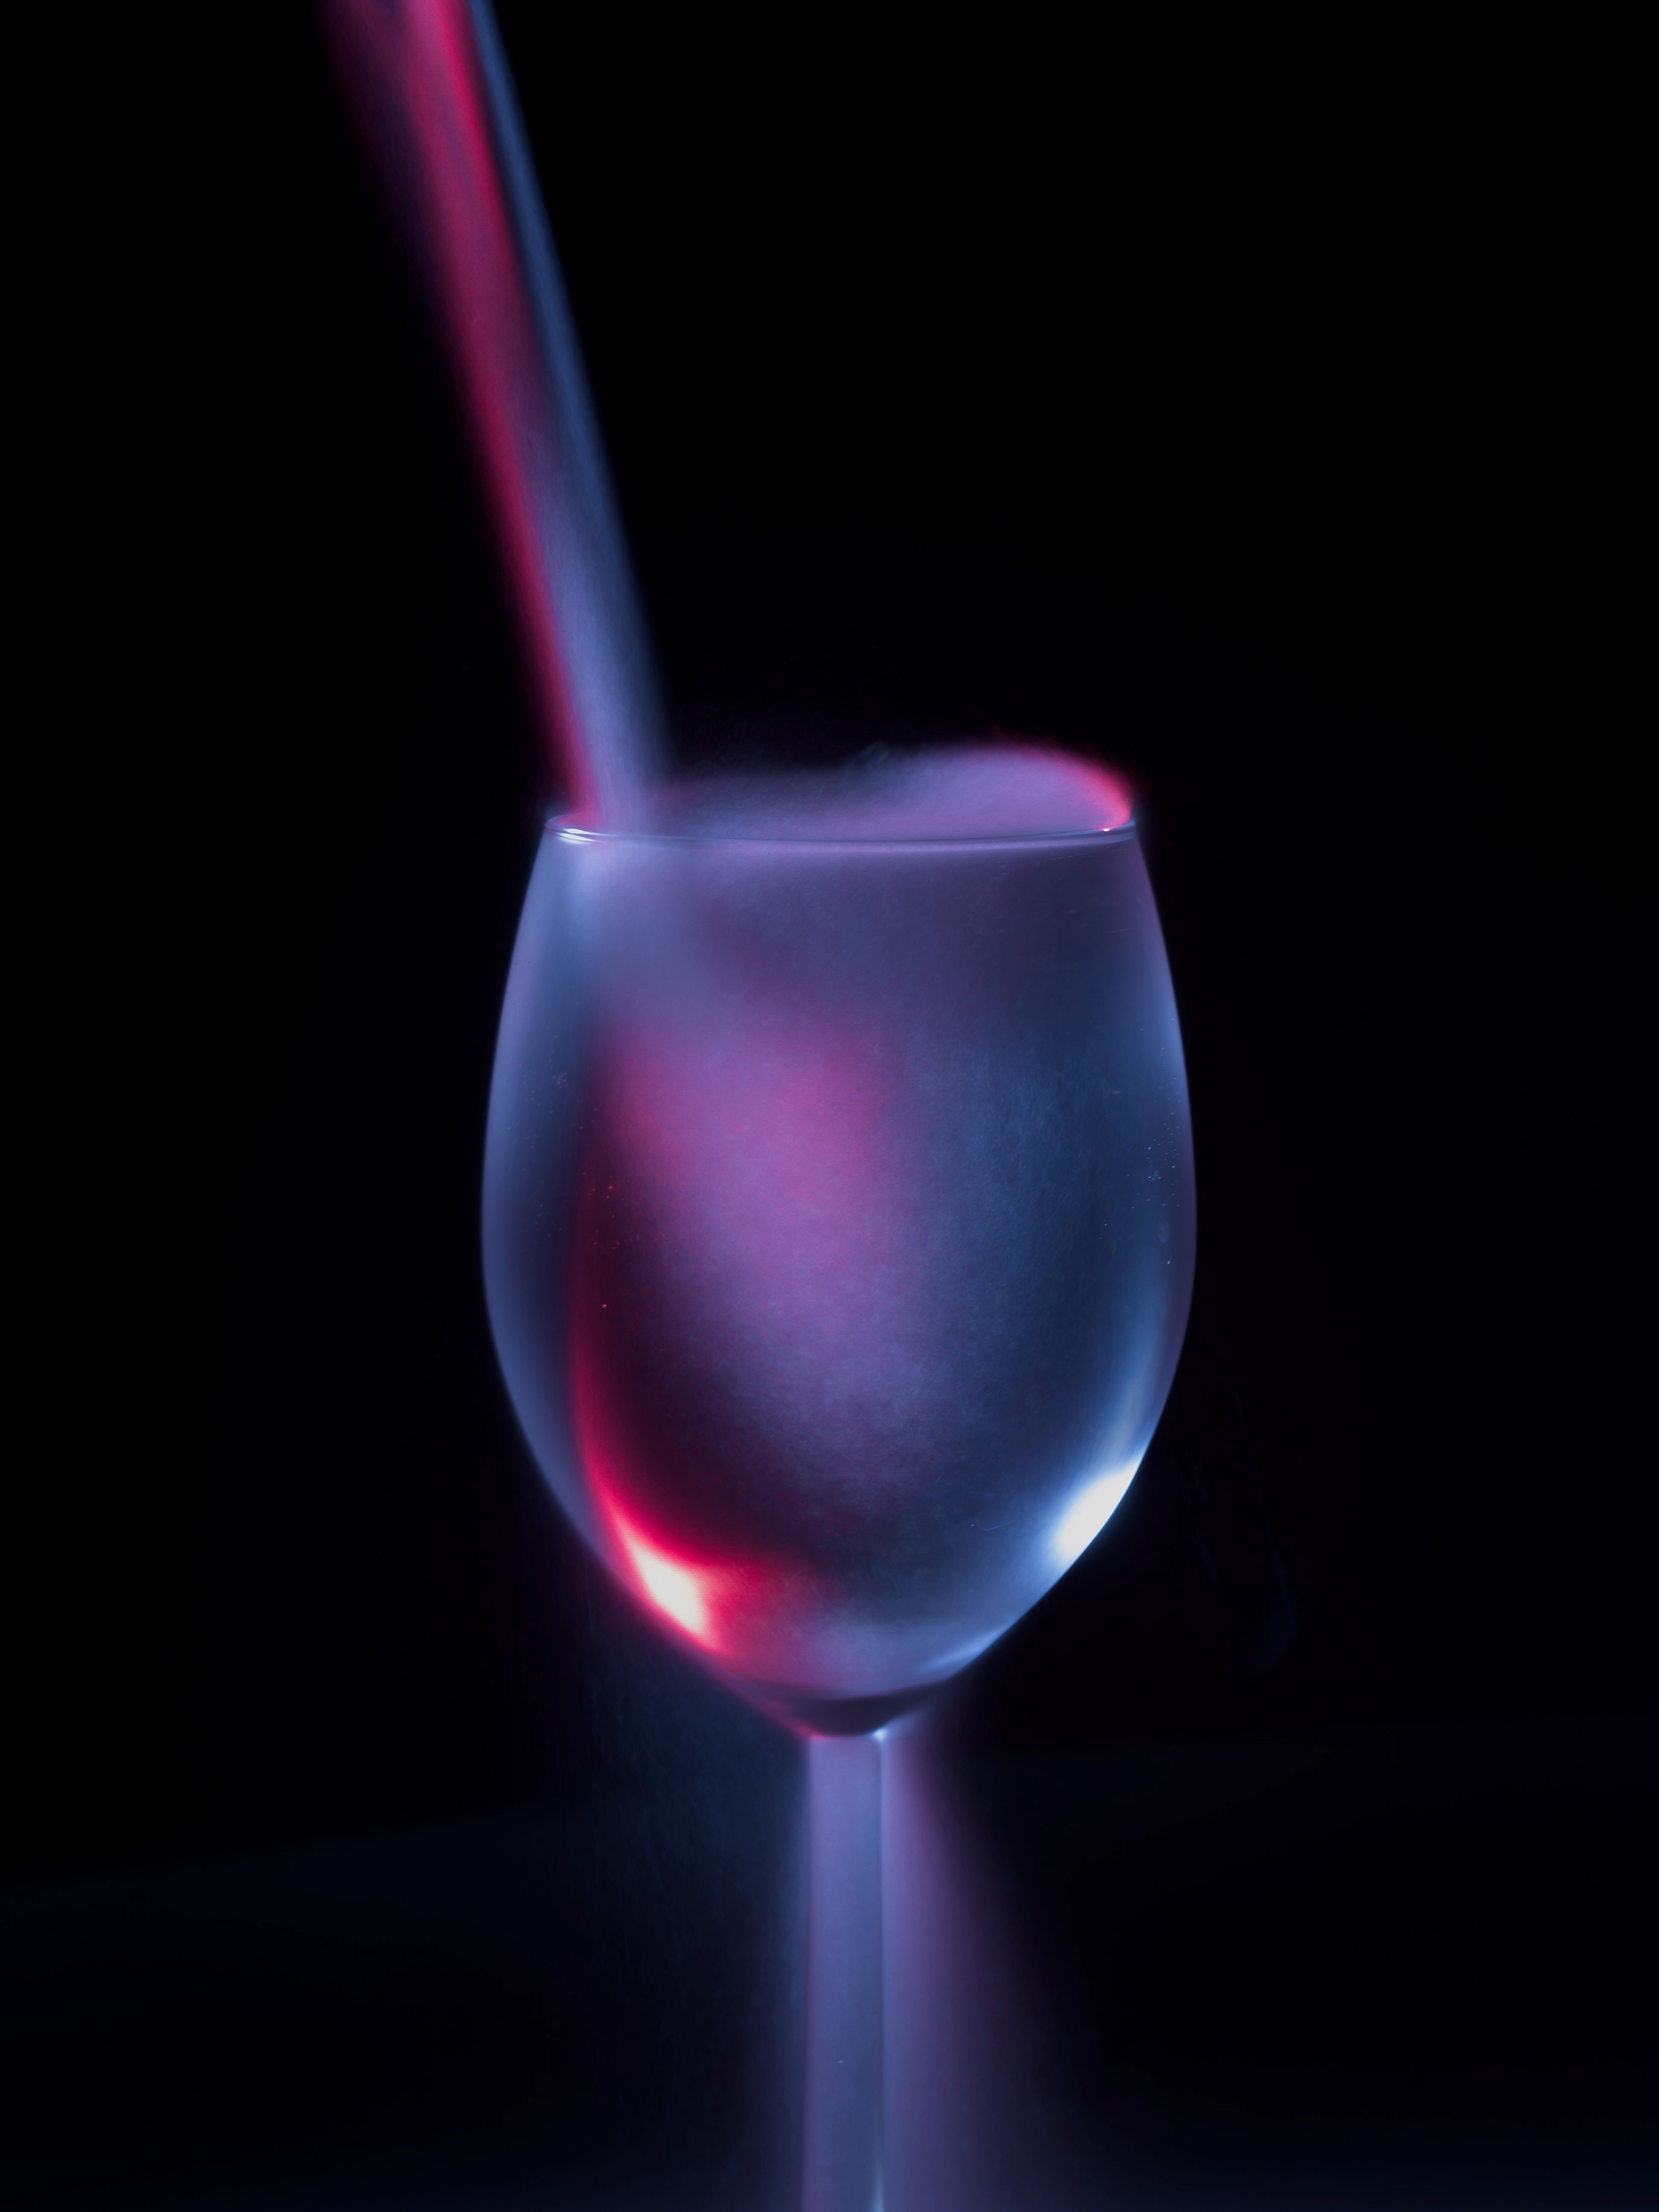
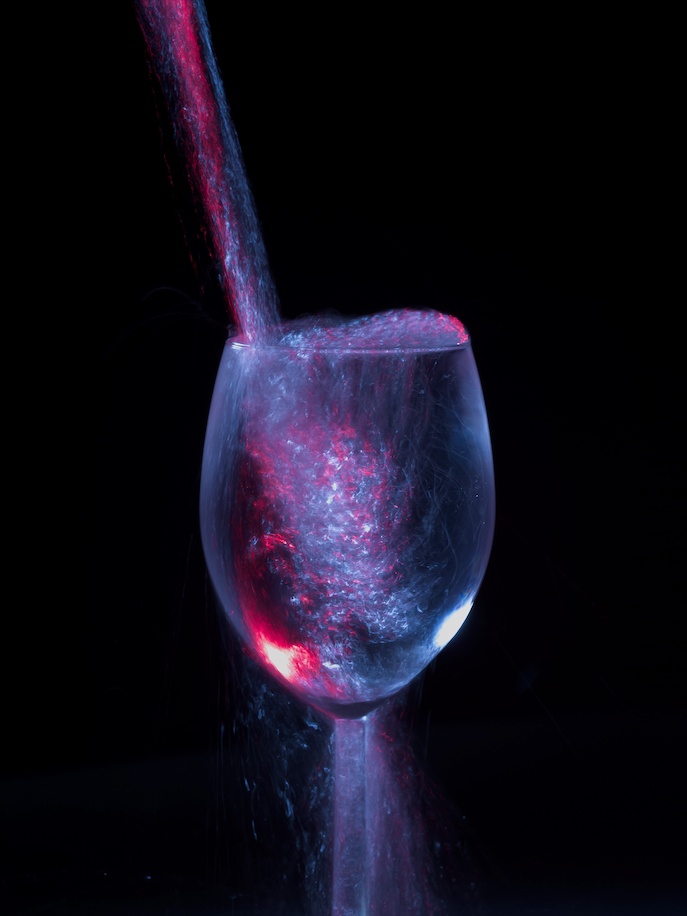
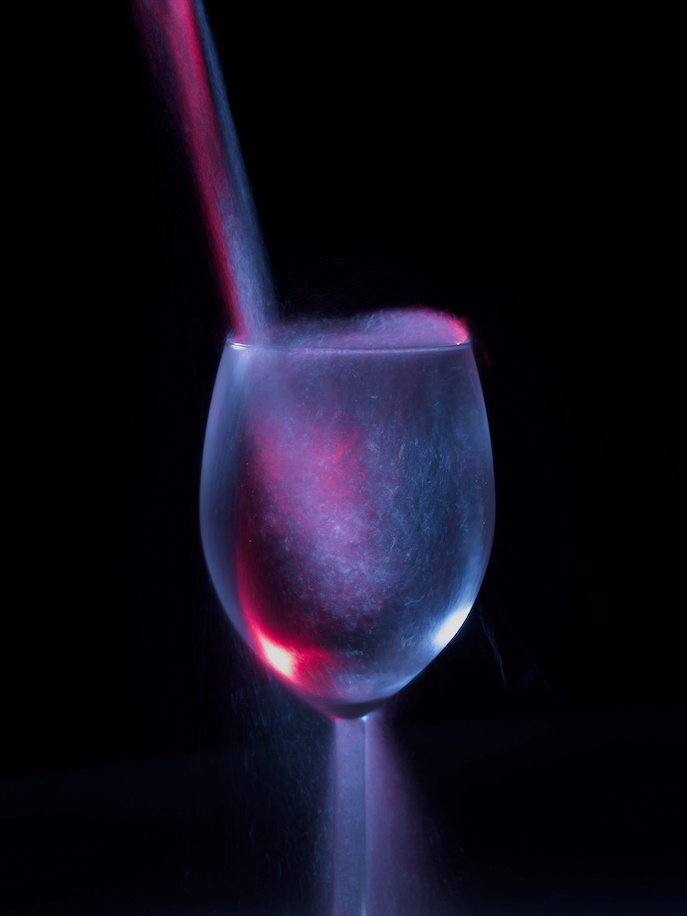
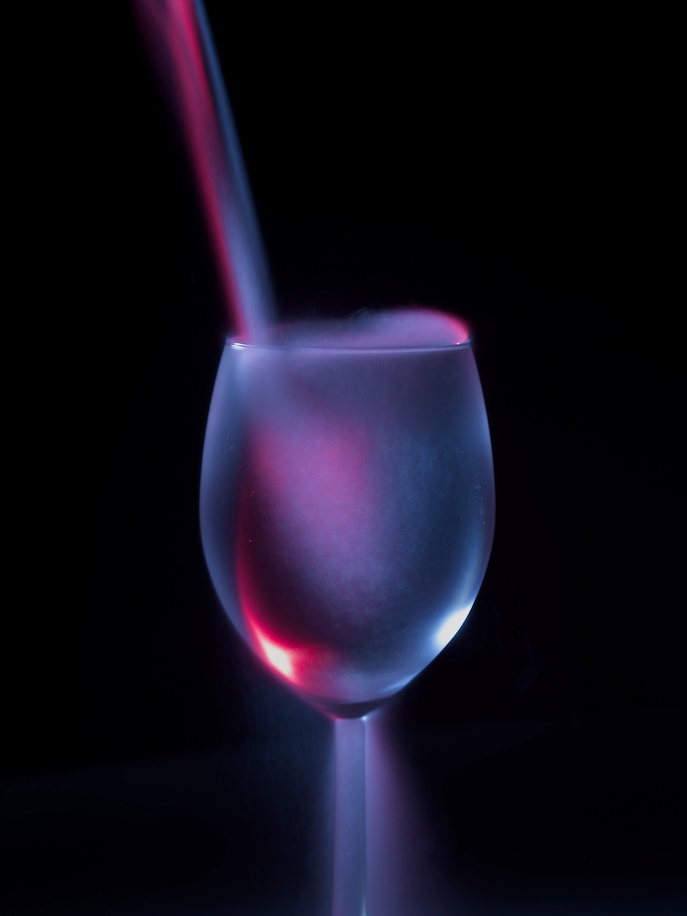
In Long Exposure mode you get to choose how many frames are captured and merged with each shutter button press. Increasing the number of frames makes the contribution of each individual frame to the final image less obvious, and the virtual long exposure looks more and more like a single frame captured with a very slow shutter speed. The three photos below demonstrate this effect.
|
Creating a virtual long exposure of water being poured into a glass by merging
multiple frames captured with a fast shutter speed. From left to right, the
photos show a single frame versus merging a few dozen and over a thousand frames,
respectively, all using Project Indigo’s Long Exposure mode.
|
In Long Exposure mode, captured frames are merged using one of two styles:
Average - Indigo calculates the per-pixel arithmetic mean of all frames. The contribution of an individual frame to the final picture diminishes uniformly as more and more frames are gathered. This style works great for flowing water or fast-moving clouds, or when you want to remove vehicles or people from a busy place.
Blend - Indigo calculates the per-pixel mean and per-pixel maximum of all
frames, then blends the mean and maximum images, giving more weight to the
maximum where the maximum is bright, and more weight to the mean where the
maximum is dark. This style is best for when you want to preserve transient
bright highlights, such as trails from car headlights, fireworks, or lightning.
Using Long Exposure Mode
Unlike Indigo’s Photo and Night modes, Long Exposure mode is not intended for quick snapshots. It works best for pictures taken with deliberate intent. With their extreme amounts of motion blur, Long Exposure photos look different from what you see in the real world. Experimentation, an active imagination, and trying to visualize the shot you want to take will help you get great results. As you take more and more Long Exposure pictures you will get a better feeling for what types of shots work best. Below we show you some examples.
Average Style
Let’s start with an effect that is often referred to as “water to silk,” where
moving water takes on a silky or foggy appearance. Capturing such a picture is
particularly easy: Find a waterfall, a fast-moving creek, a lake on a windy day,
or go to the beach on a day with high surf. Place your phone on a tripod, select
Long Exposure mode, and Average merging style. Set the number of frames to
capture to around 300, frame the shot, and press the shutter button. The shutter
button turns blue; next to it there’s a counter that tells you how many frames
Indigo has collected so far.
Once the capture stops the shutter button turns white again. Take a look at the
photo; the water should look like fog, while the landscape next to it should be
sharp. If the water doesn’t look foggy enough, try capturing more frames. To
capture more than 1000 frames, select ∞ (“infinite”). Then press the shutter
button to start the exposure, wait until the desired number of frames have been
collected, and press the shutter button again to stop the exposure. If the
landscape isn’t sharp, then the phone moved during the capture. Make sure your
phone is stable, and that it’s not affected by vibrations due to wind.
Indigo’s Pro Controls work in Long Exposure mode, but for water-to-silk shots you
probably won’t need them; auto exposure, autofocus and auto white balance usually
work well here. When you frame the shot, try to minimize reflections of the sun
and other extremely bright highlights in the picture; otherwise you may end up
with featureless white spots in the photo. Here are a few pictures we have
taken with the Average merging style:
|
|
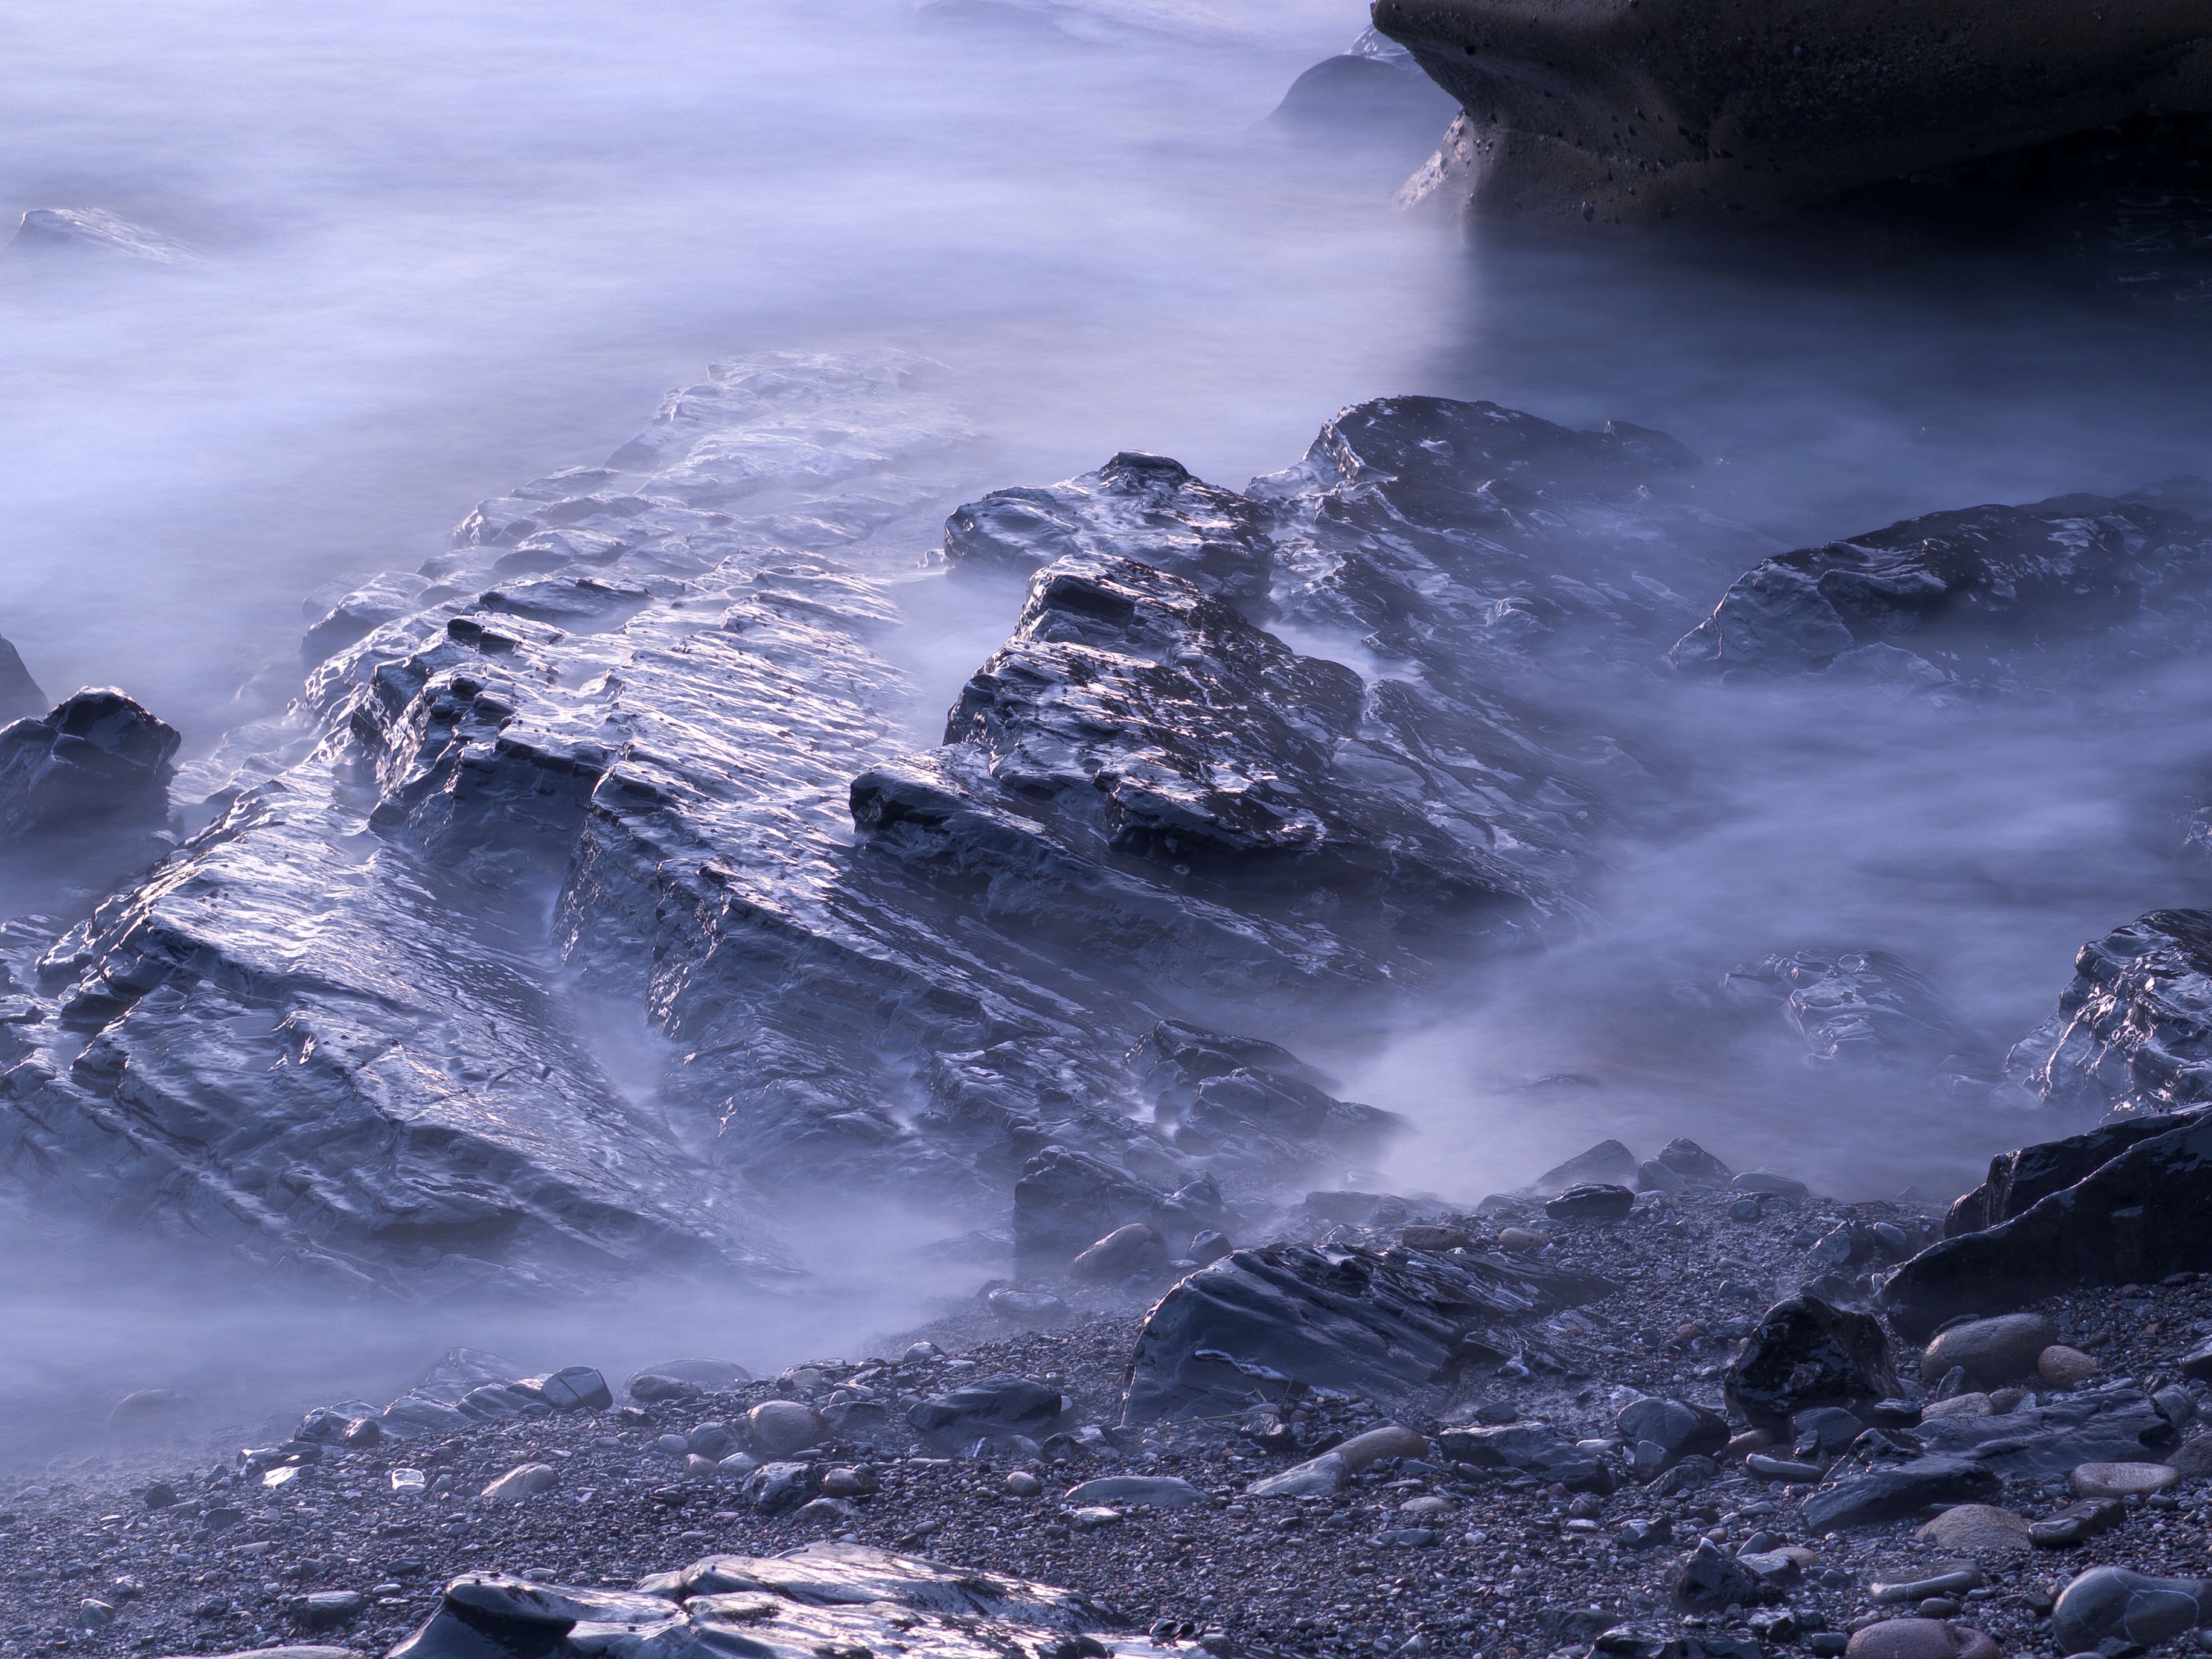
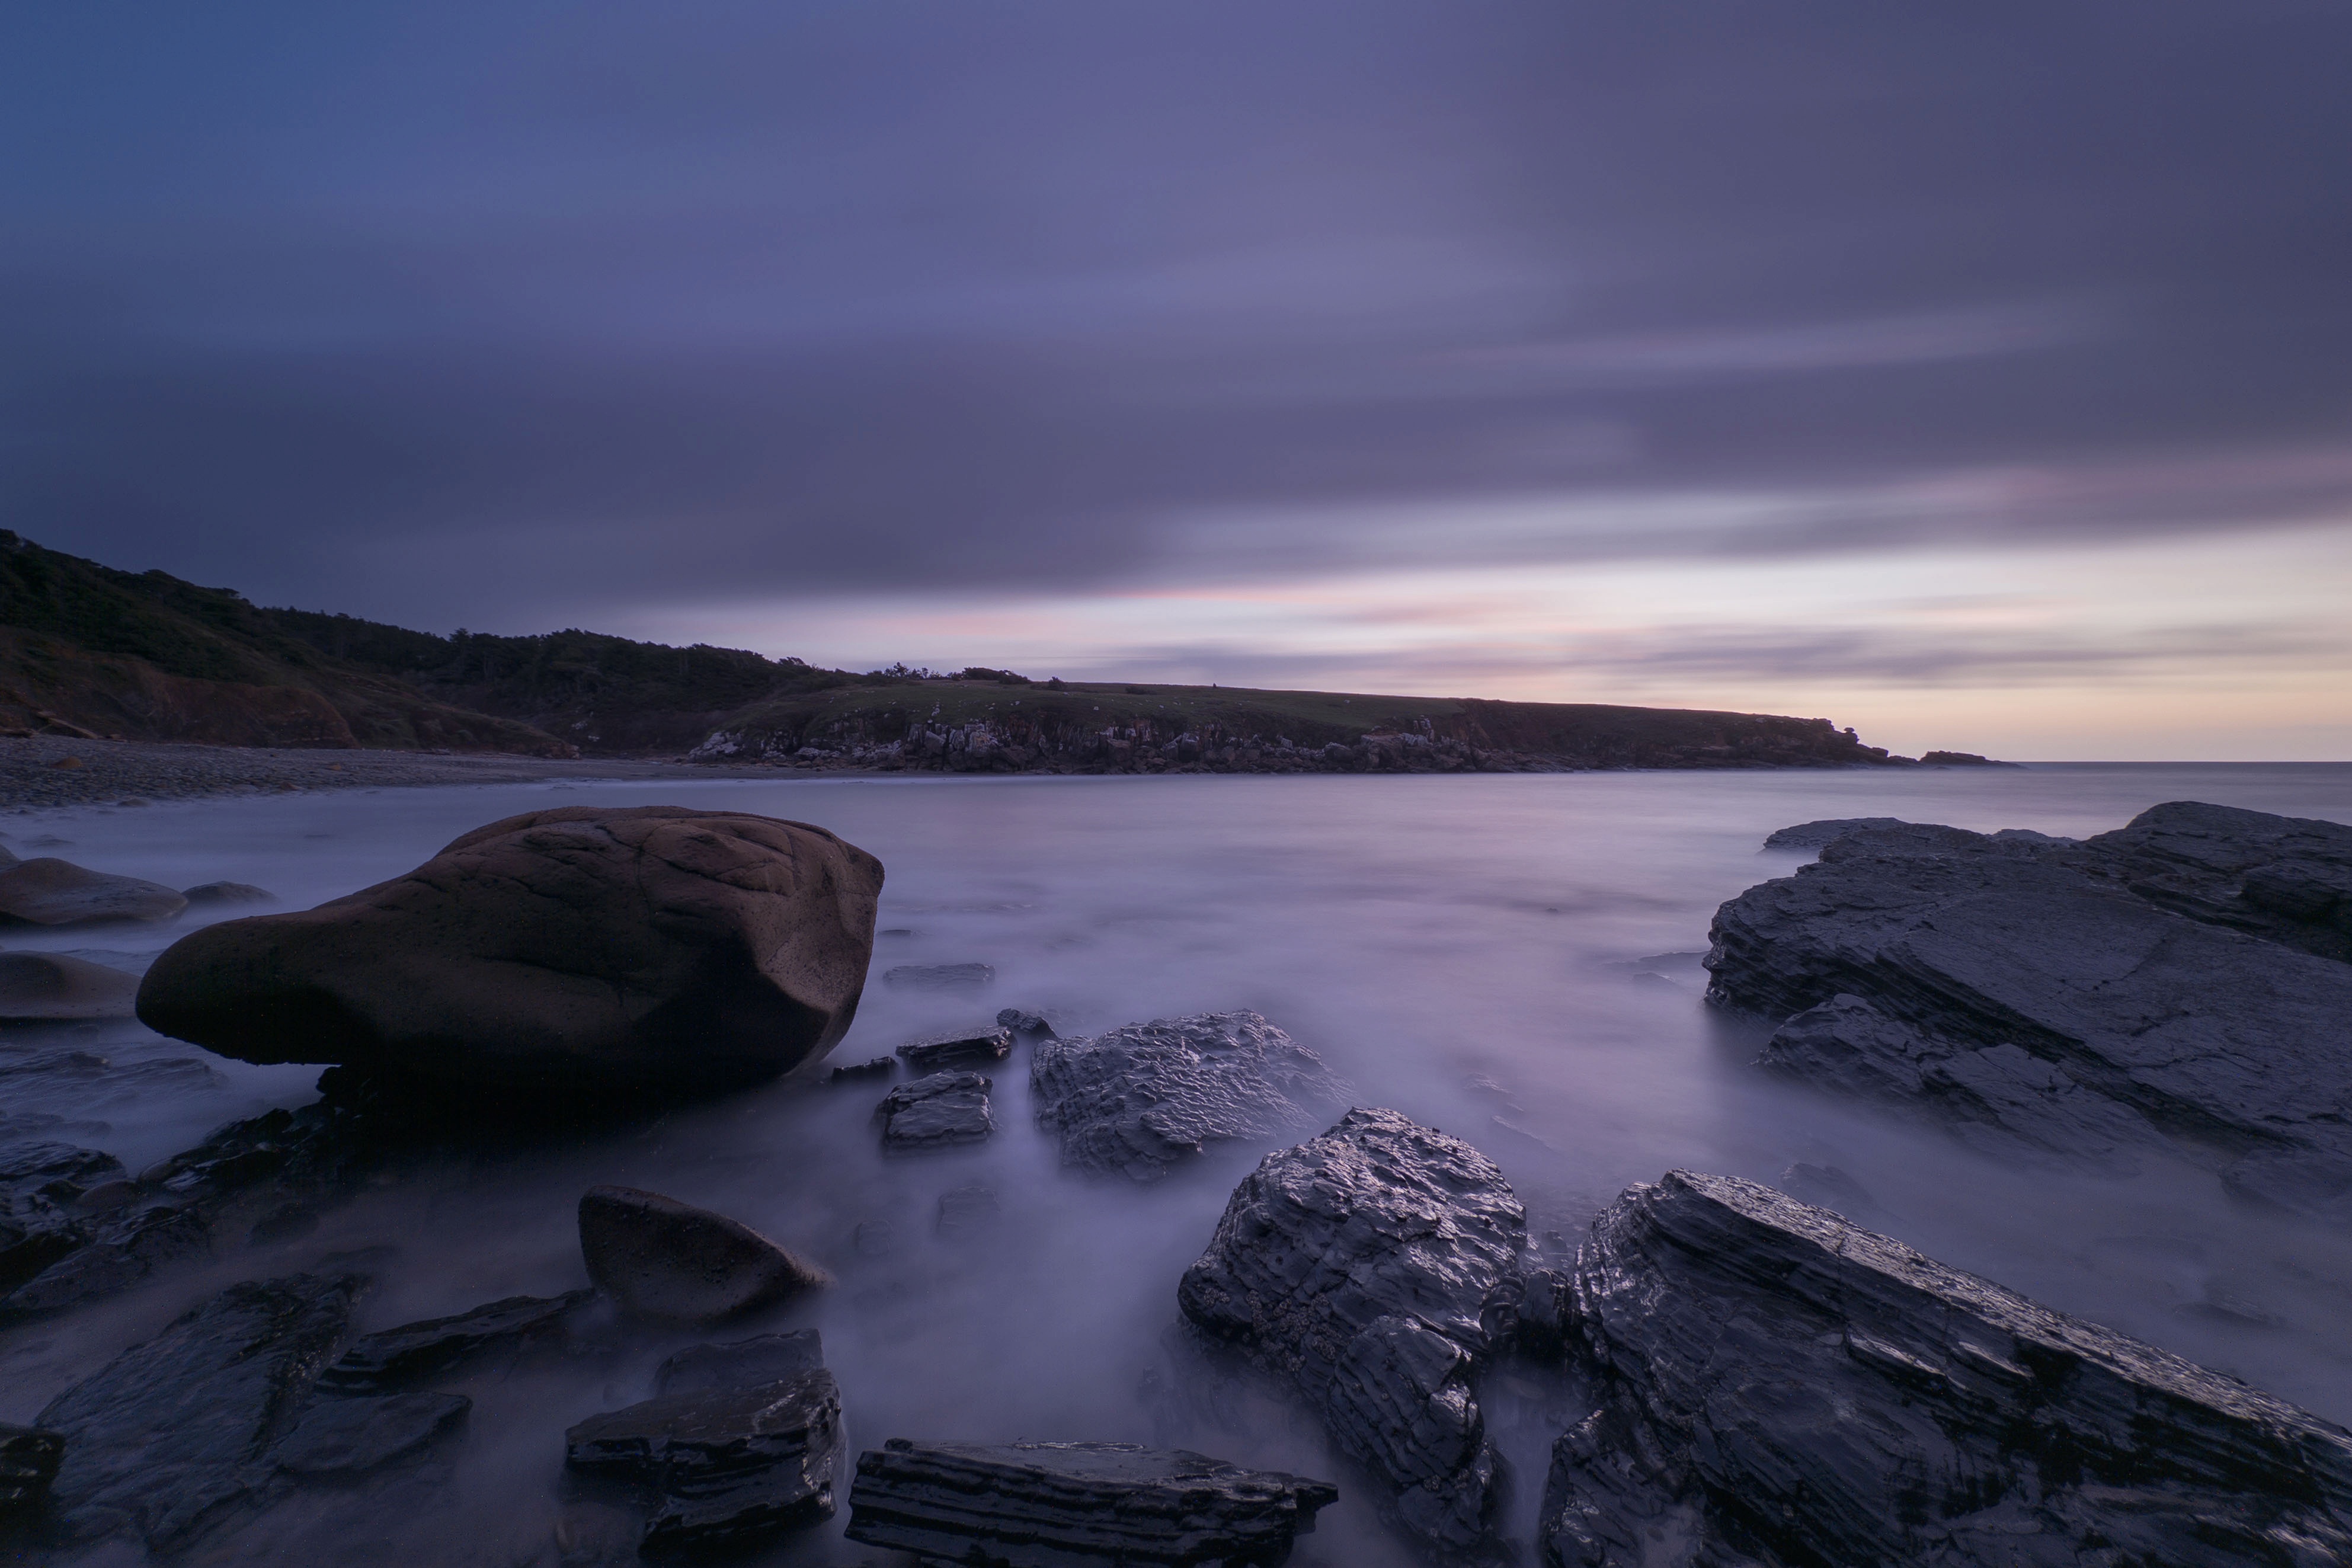
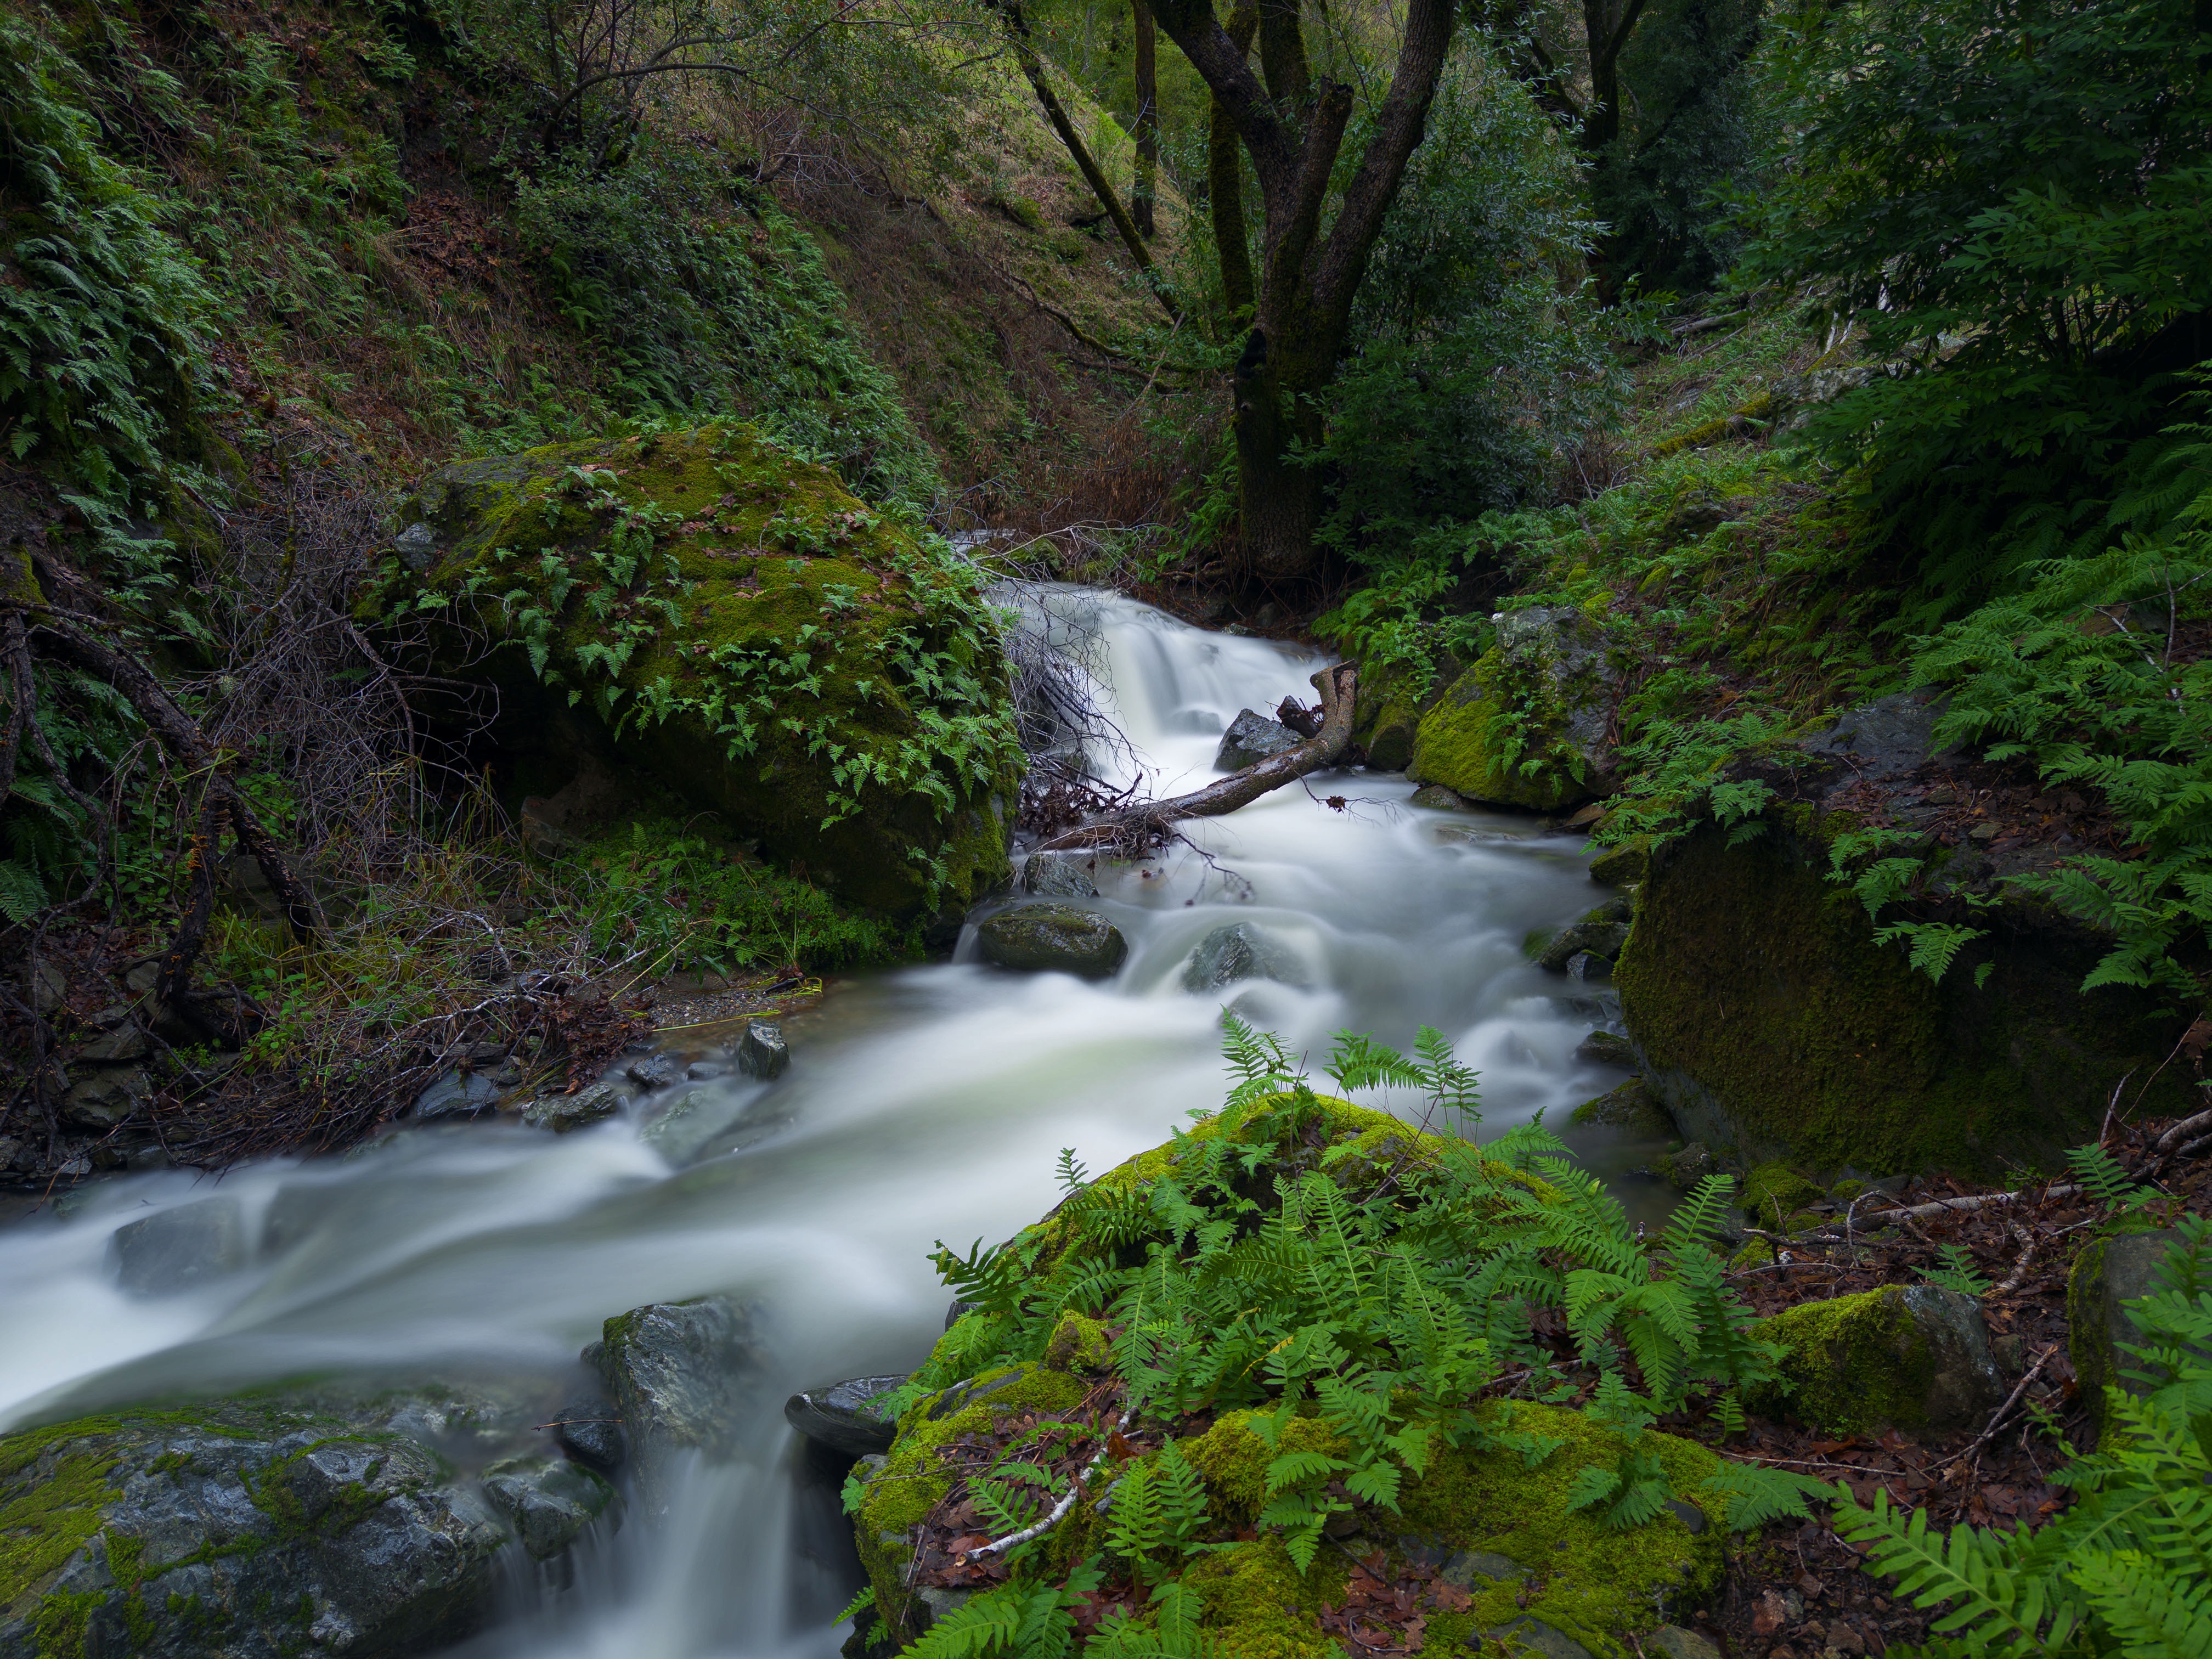
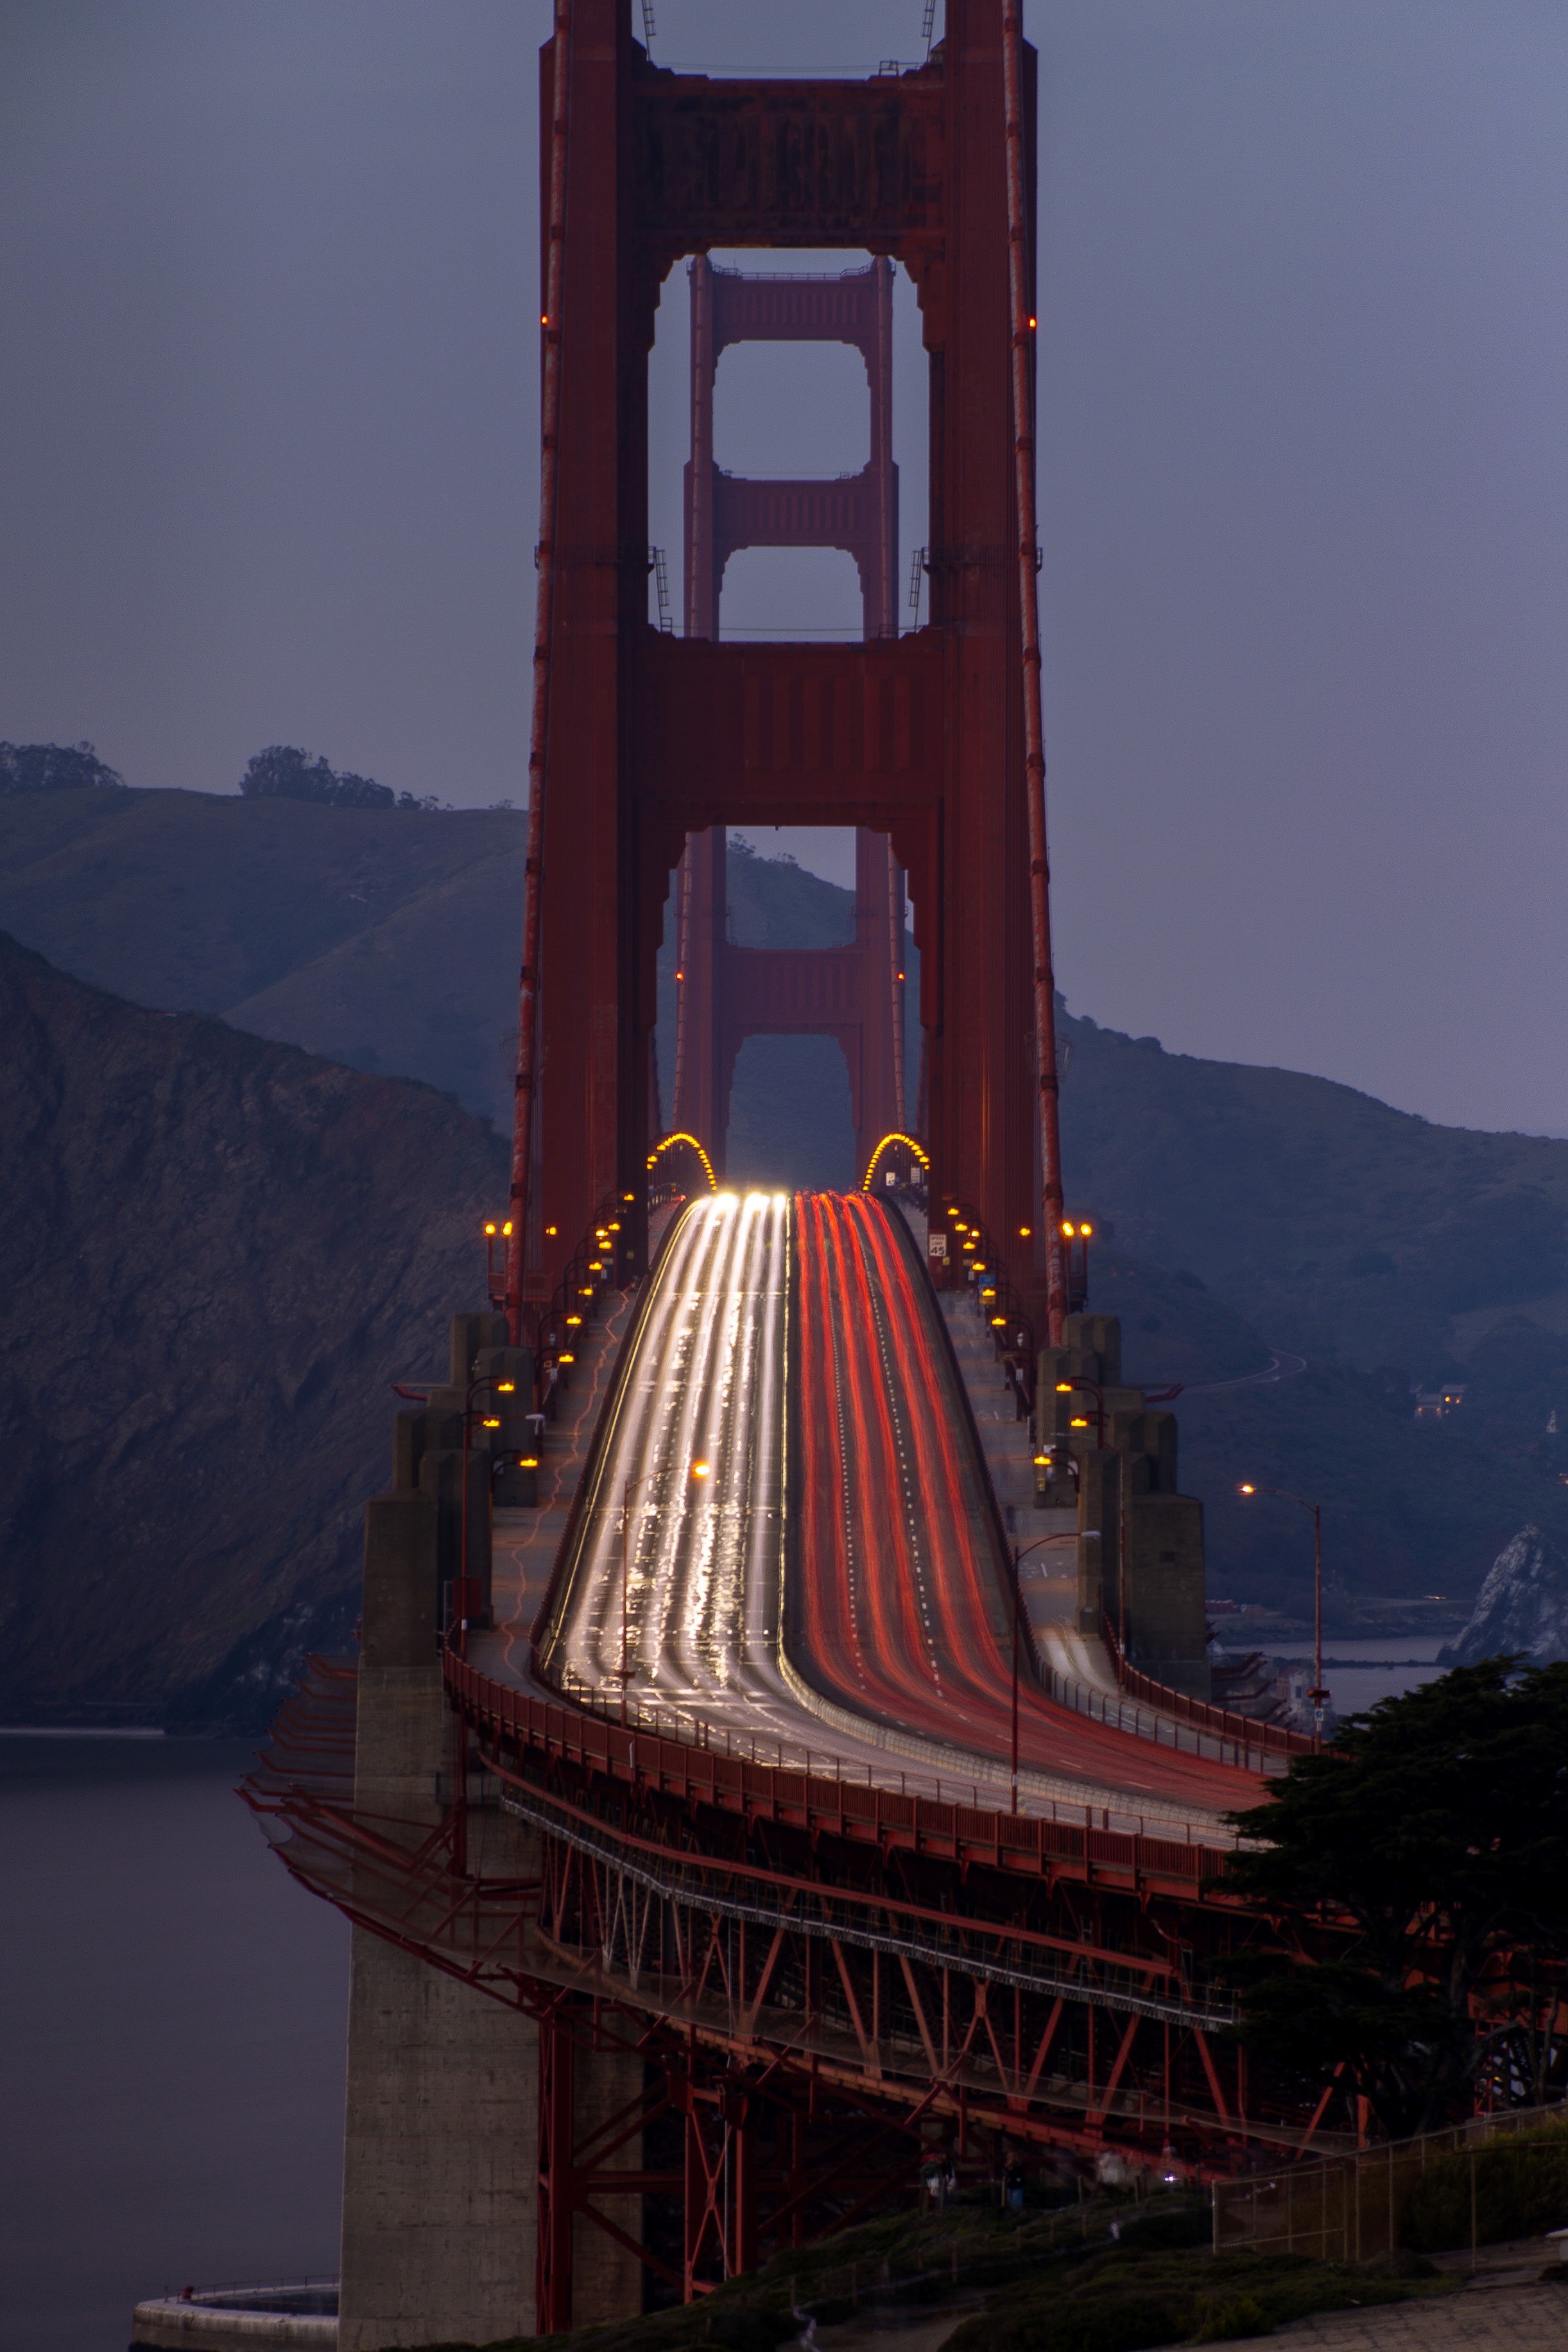
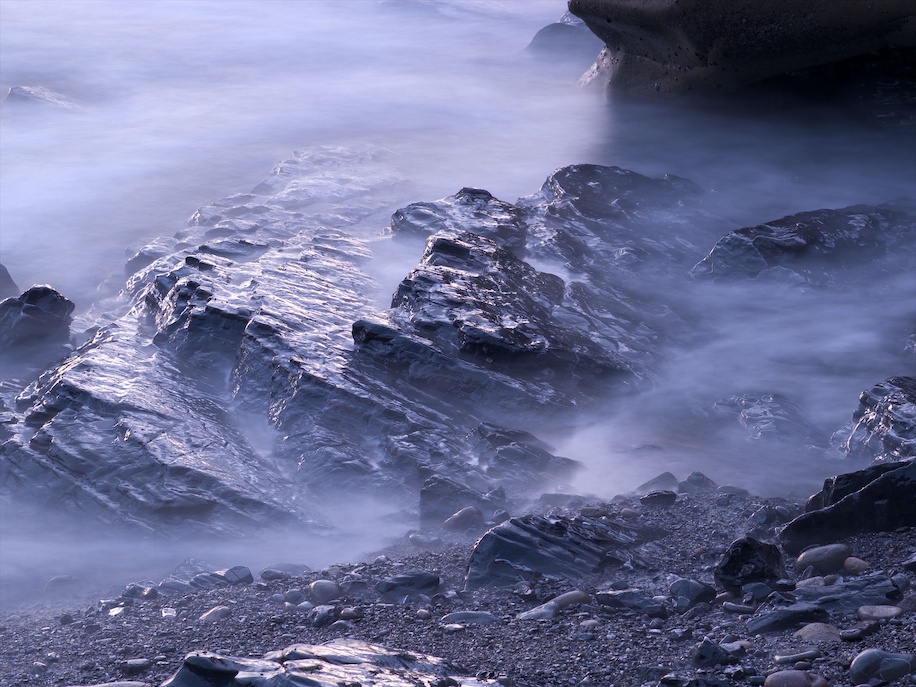
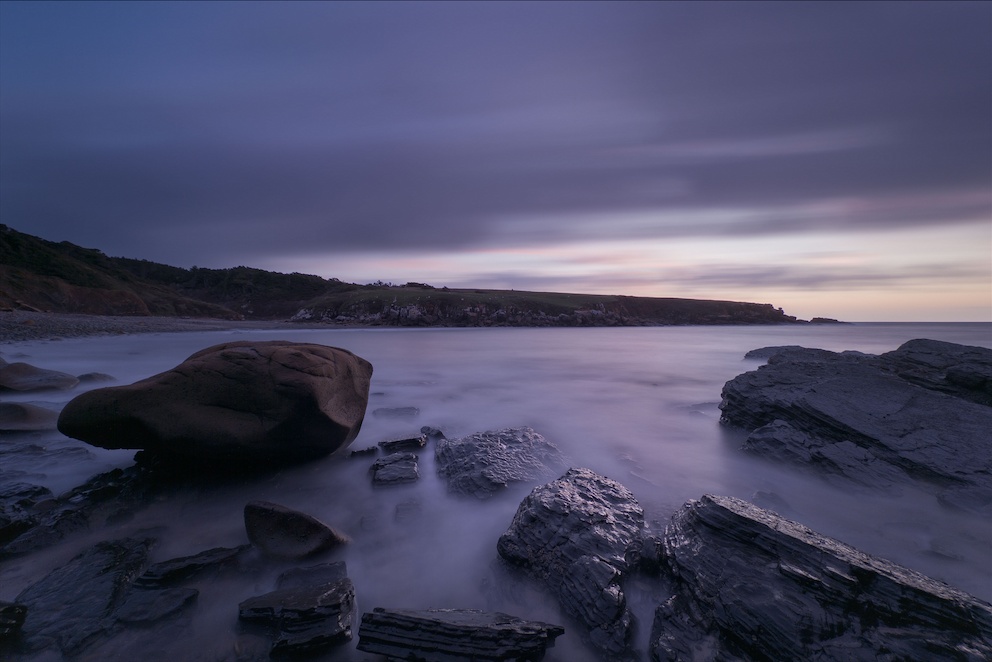
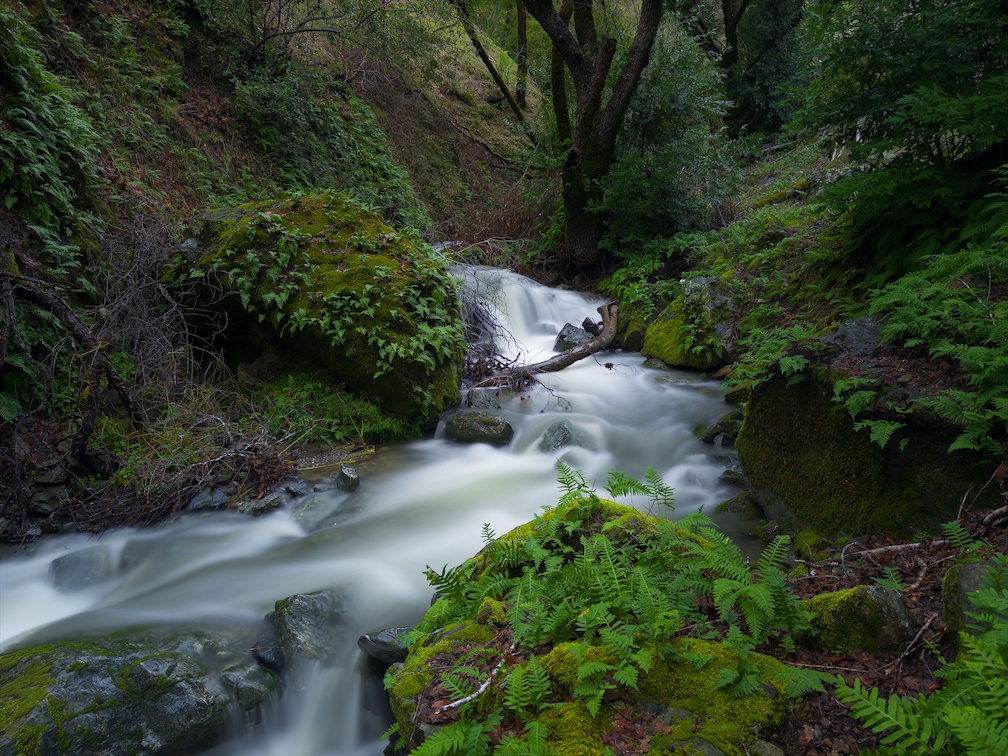
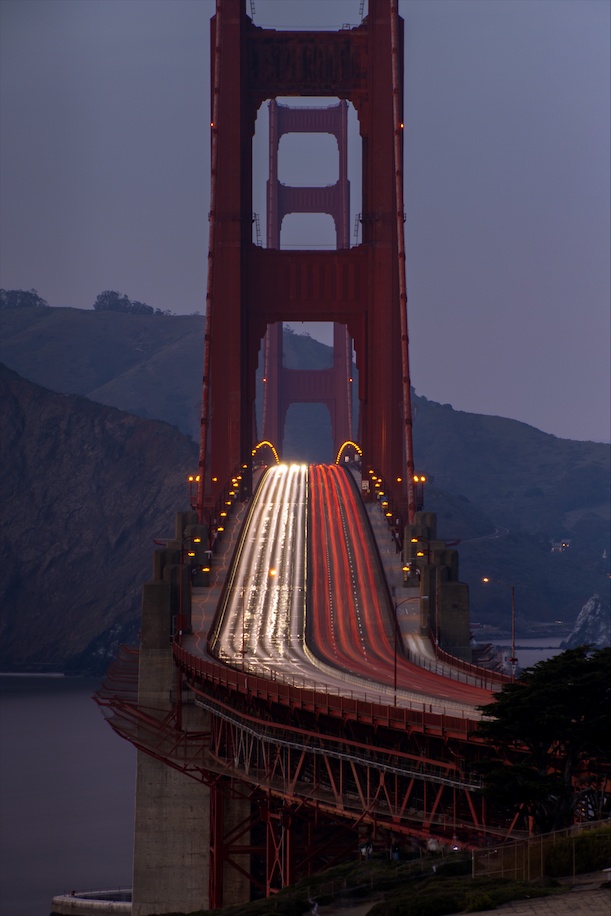
A selection of photos captured with Project Indigo’s Long Exposure mode using
the Average style: the surf at the beach (top left and right), a creek in the
forest on a rainy day (bottom left), and evening rush hour traffic crossing the
Golden Gate Bridge (bottom right).
|
Blend Style
Capturing the pictures above, we were aiming for a smooth, silky look, where an
individual frame’s contribution to the final image is so small that it is hardly
noticeable. For example, the total exposure time for the cars on the Golden Gate
Bridge was about two minutes, divided up into several hundred frames. Each frame
showed a few hundred short red and white dashes created by the head- and
taillights of the cars driving across the bridge. After merging the frames, the
individual cars’ lights are no longer recognizable, but together they form
several diffuse glowing bands. What if there isn’t a lot of traffic, and you
have to expose for a long time to capture the light trails of only a handful of
cars? You don’t want the trails to gradually fade away as more and more frames
are captured. This is a job for the Blend merging style, where the brightest
parts of all frames are preserved, no matter how many frames are merged.
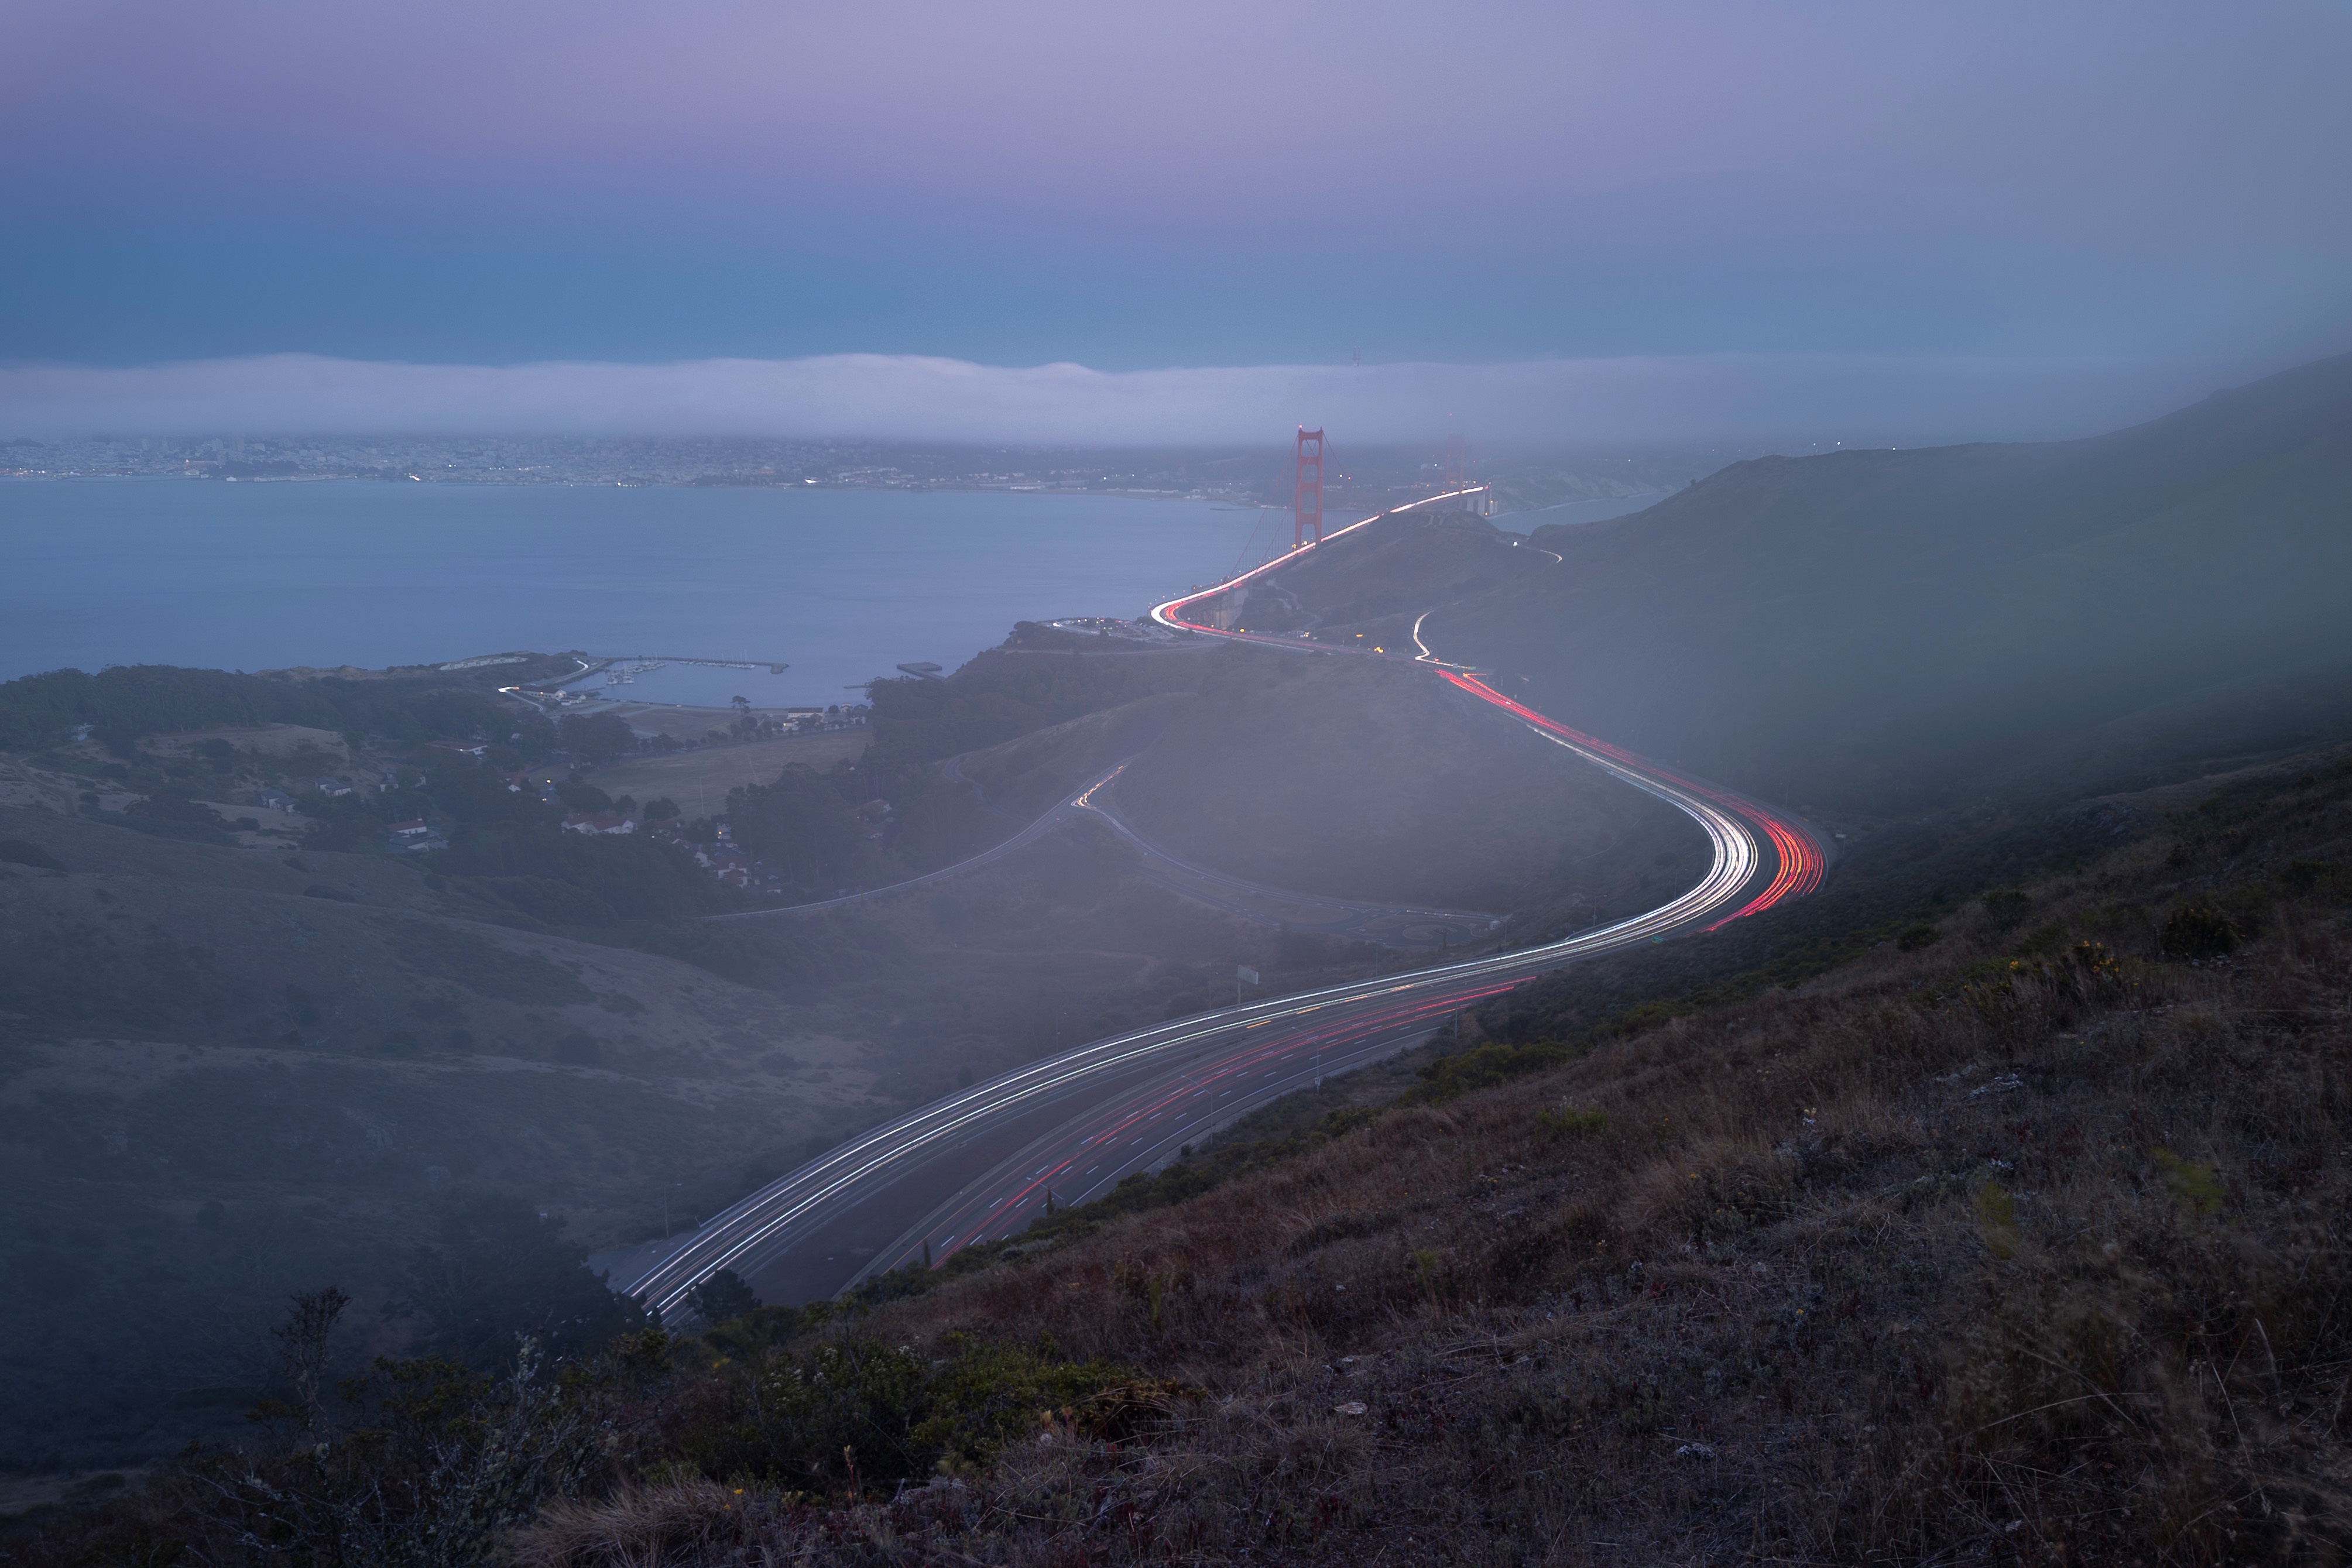
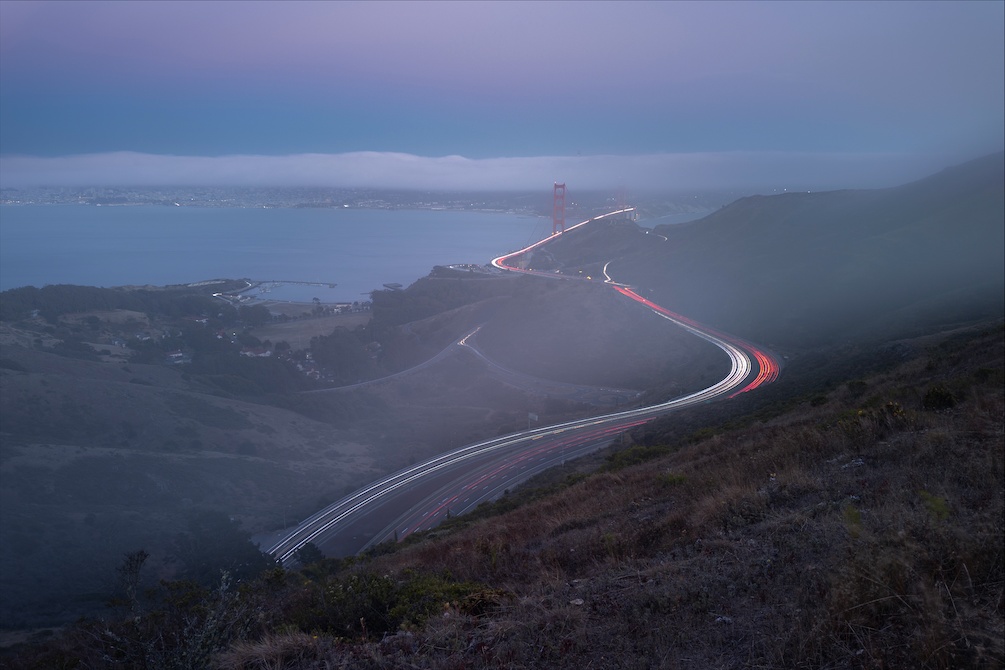
To capture light trails of individual cars, as in the photo at left below, set up
your phone as for the water-to-silk case, but switch the style to Blend, and
verify that the shutter speed is slower than 1/30 s. Indigo can expose at most
30 frames per second; if the shutter speed is faster than 1/30 s, then there will
be gaps between exposures, which translates into noticeable gaps in any captured
light trails. If you do notice large gaps, use Indigo’s Pro controls to lower
the ISO setting and use a slower shutter speed. If you are already at the lowest
ISO, you may need to use a Neutral
Density (ND) filter. An ND filter reduces the brightness of the light
reaching the camera and allows slower shutter speeds without overexposure. ND
filters come with various densities, typically reducing light by a factor
somewhere between 2 and 1000. Variable ND filters with an adjustable density are
also available. By the way, on iPhone 18 Pro and Pro Max the main back camera
features an adjustable lens aperture that allows the user to control how much
light reaches the sensor. By default, the F-number is set to f/1.8. Changing it
to f/2.8 or f/4.0 using Indigo’s Pro Controls reduces the amount of light by a
factor of 2.4 or 4.9, respectively. For some types of shots this can eliminate
the need for an ND filter.
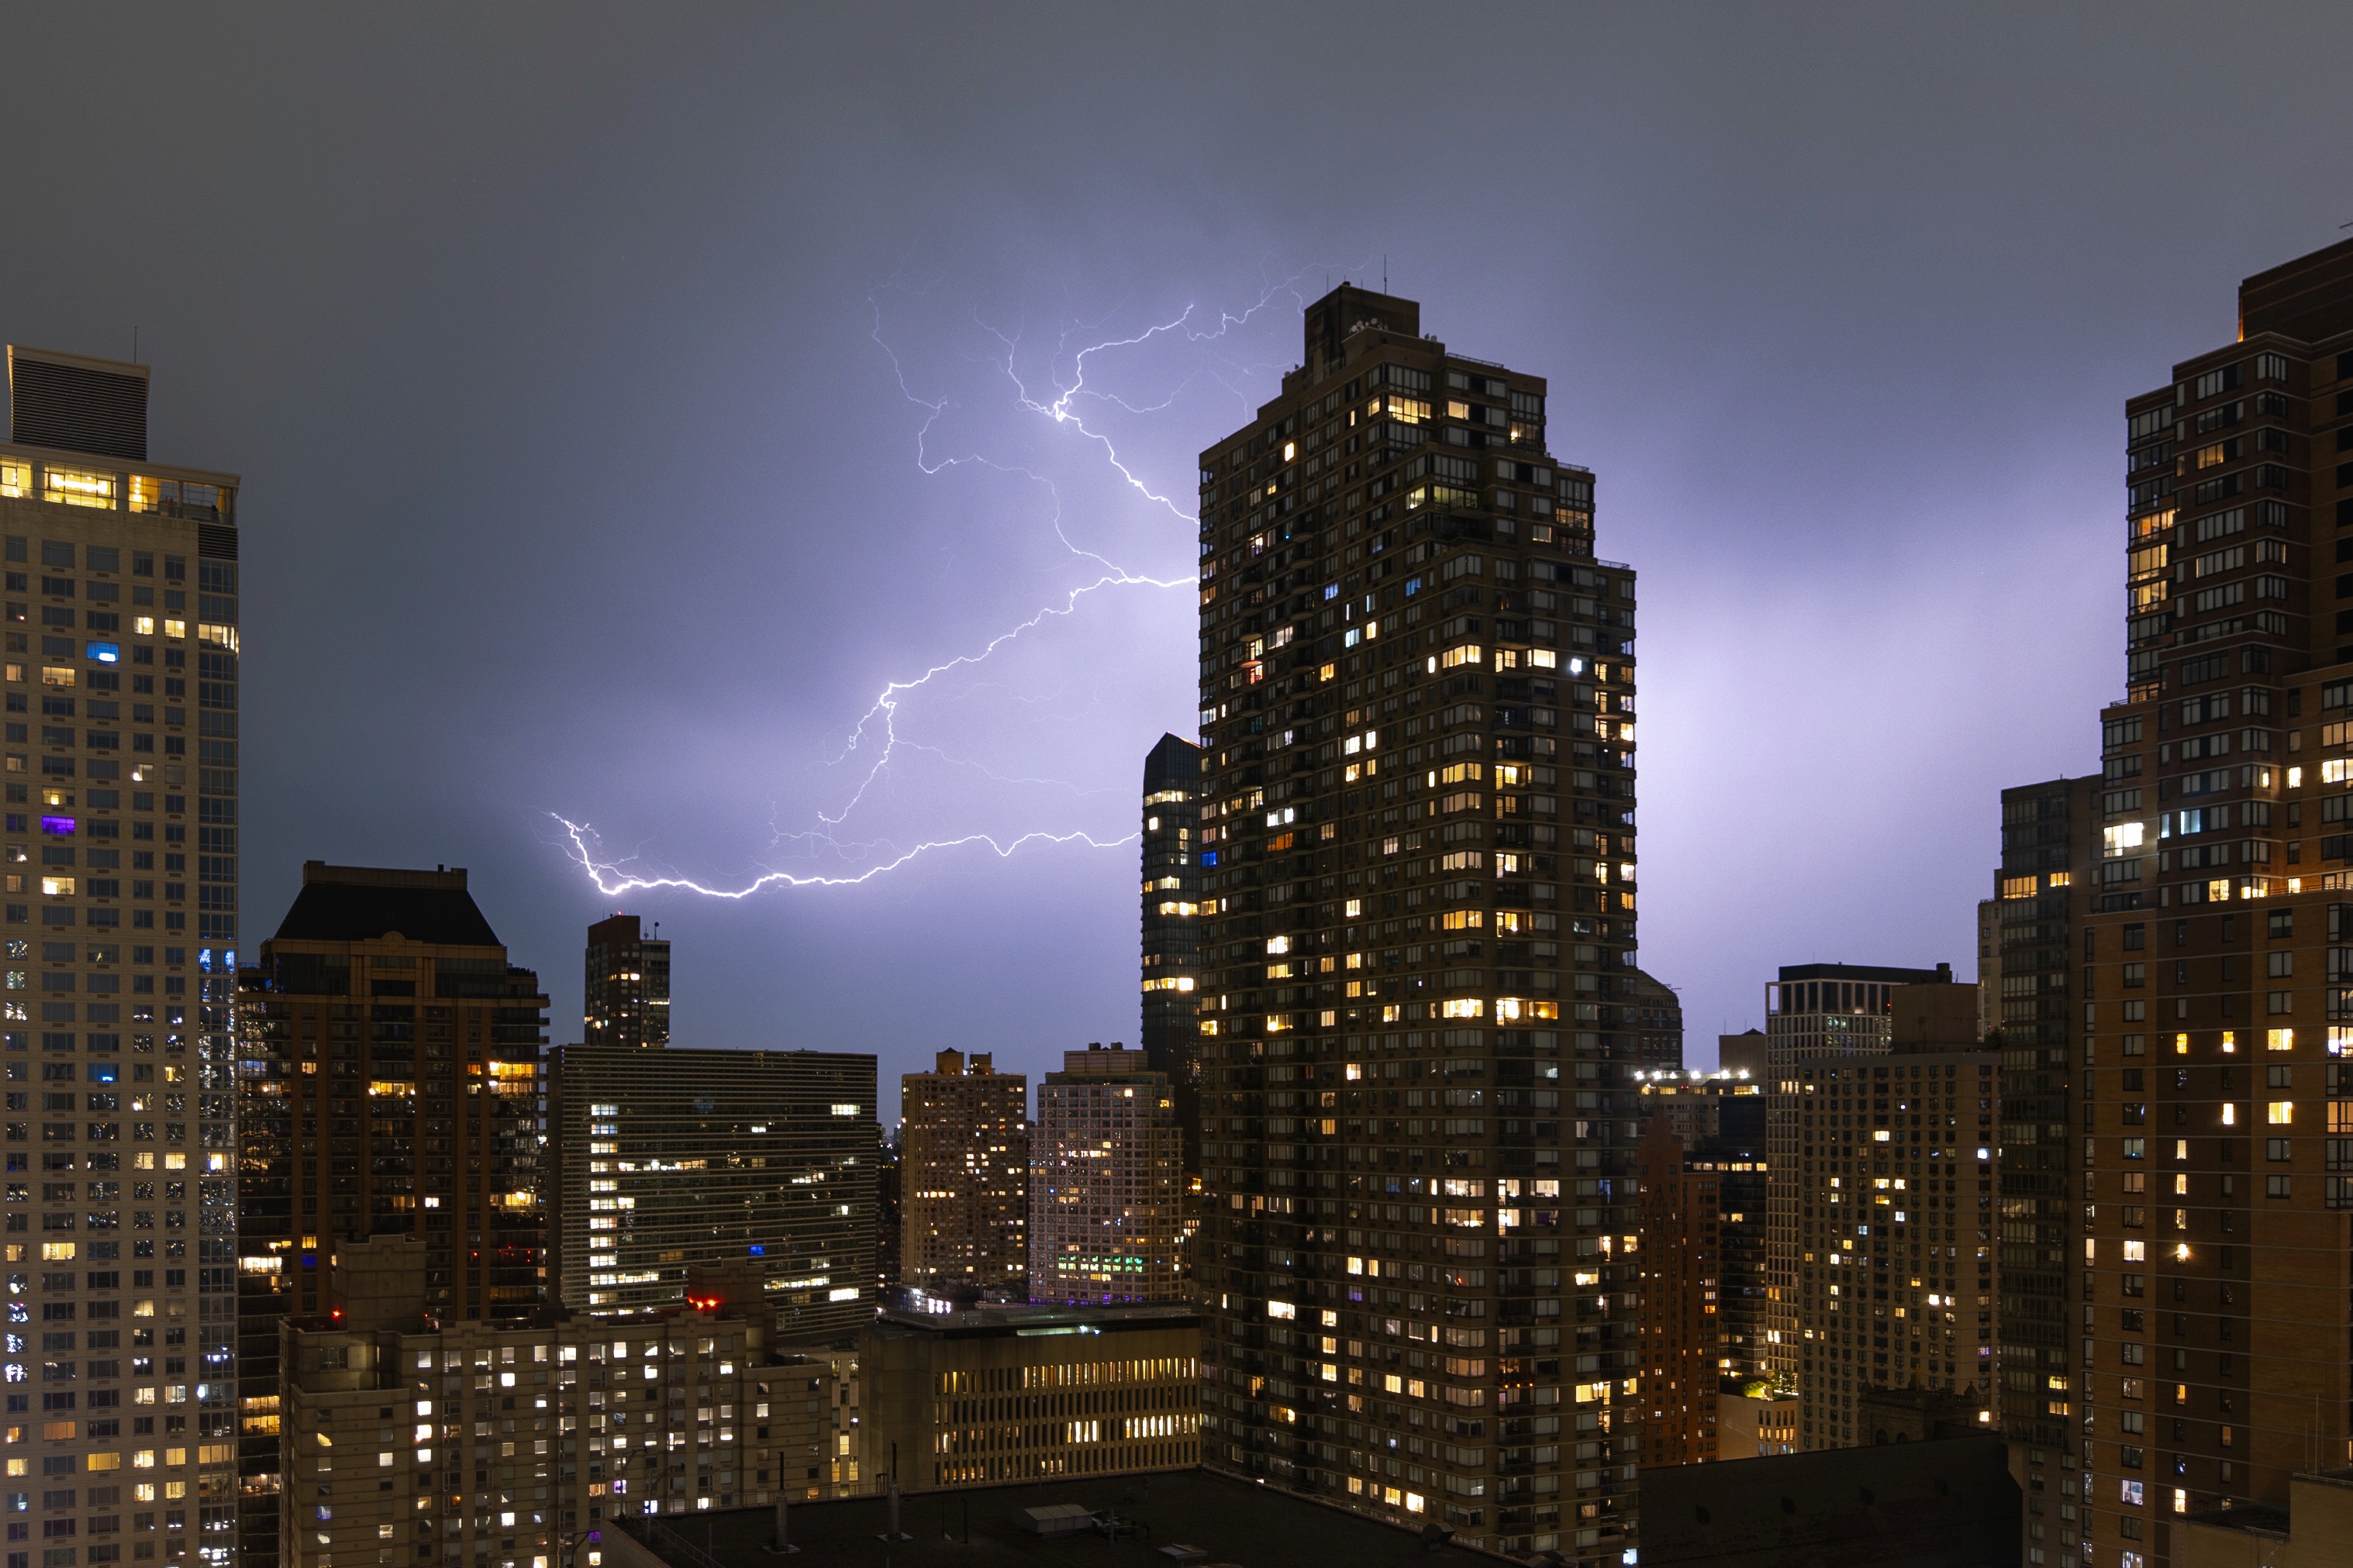
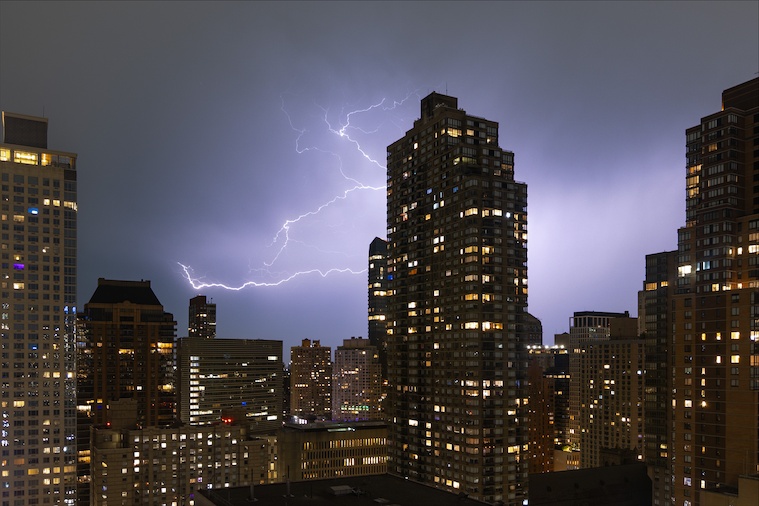
Blend style is also useful to capture transient events like lightning, as in the
photo at right below. Set the number of frames to ∞, start the exposure, wait
until one or a few lightning bolts occur within the camera’s field of view, and
stop the exposure. As with car light trails, make sure that the shutter speed is
slow enough to avoid significant gaps between frames; any lightning that occurs
between frames will not show up in the final image.
|
Examples of Long Exposure's Blend style. At left are car light trails captured
at dusk. At right are lightning bolts at night, captured by Susan Magnano.
|
Pro Controls
So far we haven’t had a reason to use Pro Controls for Long Exposure shots, other
than perhaps adjusting ISO. However, there are situations where autoexposure,
autofocus and auto white balance are not likely to work because what the camera
sees before a shot is taken differs from what happens during the shot. This
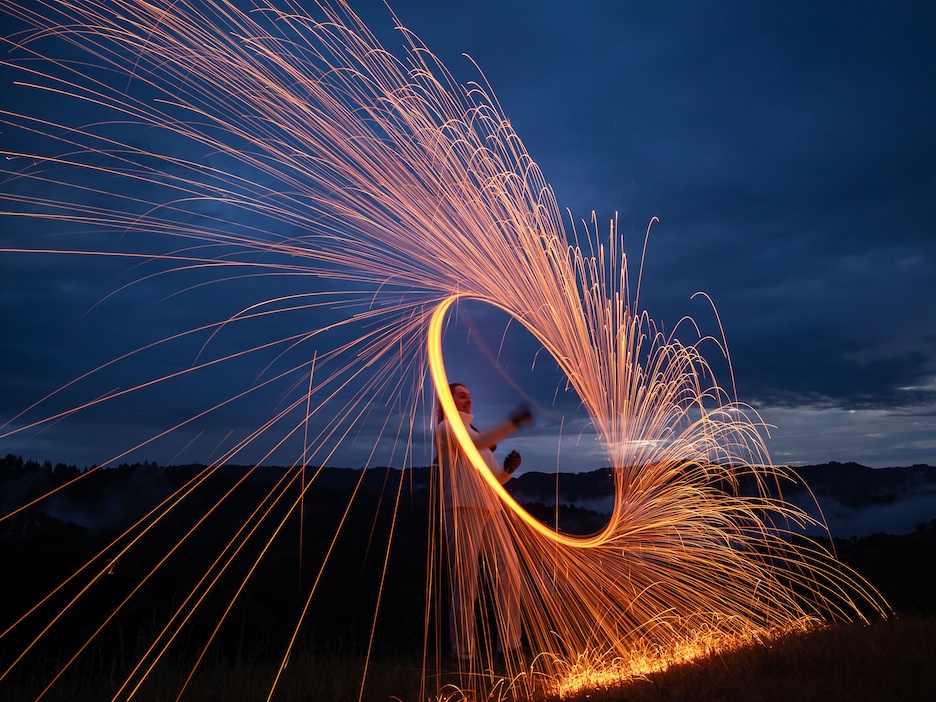
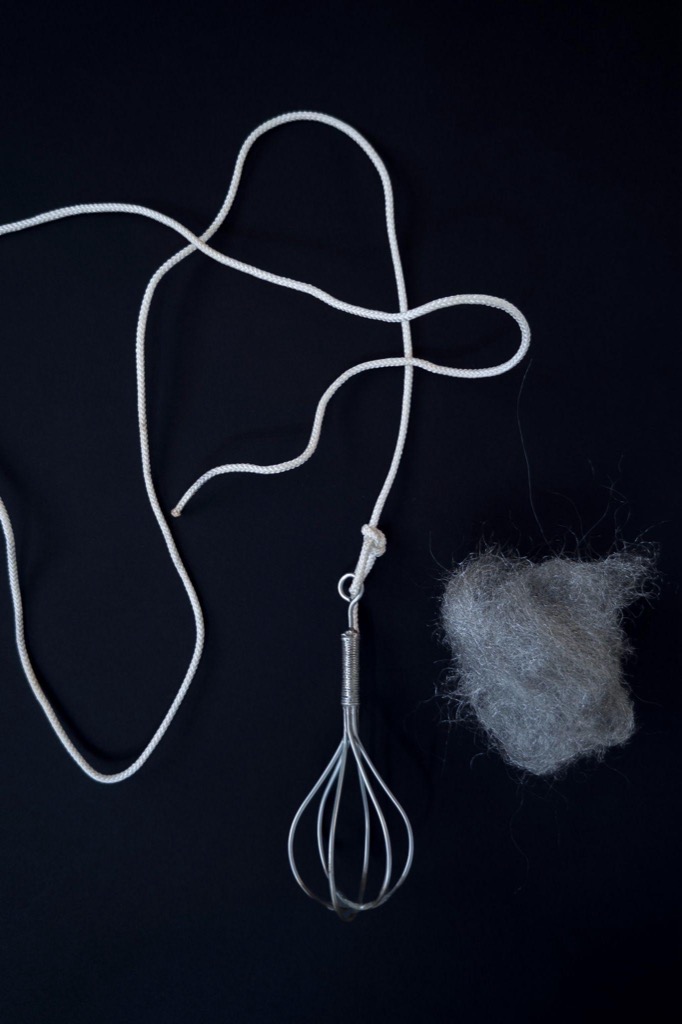
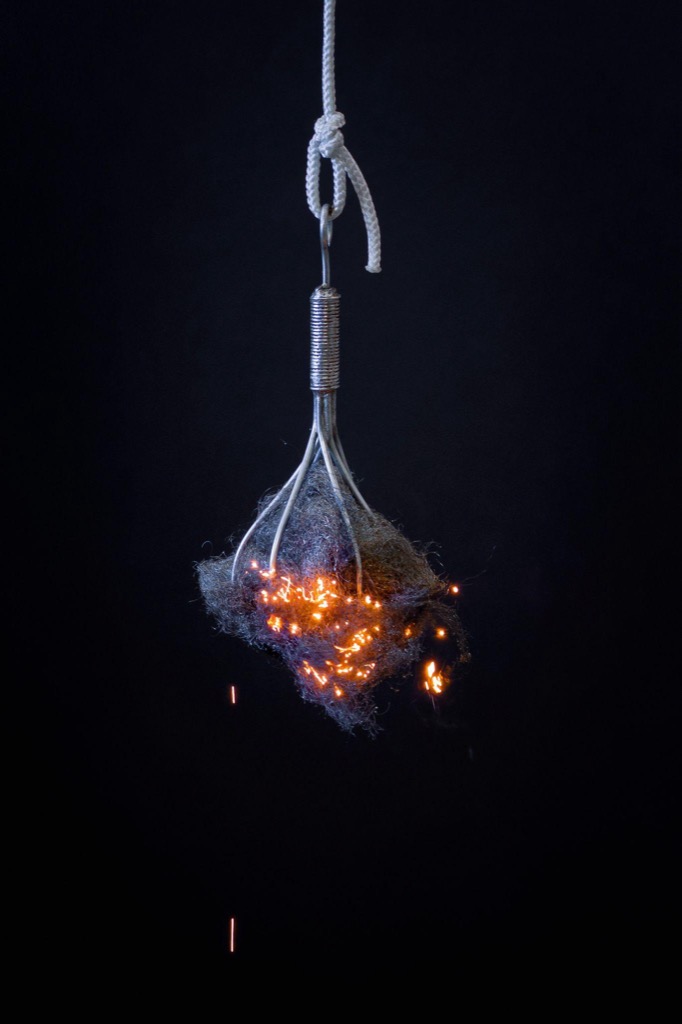
occurs, for example, when you capture light trails created by burning steel wool:
|
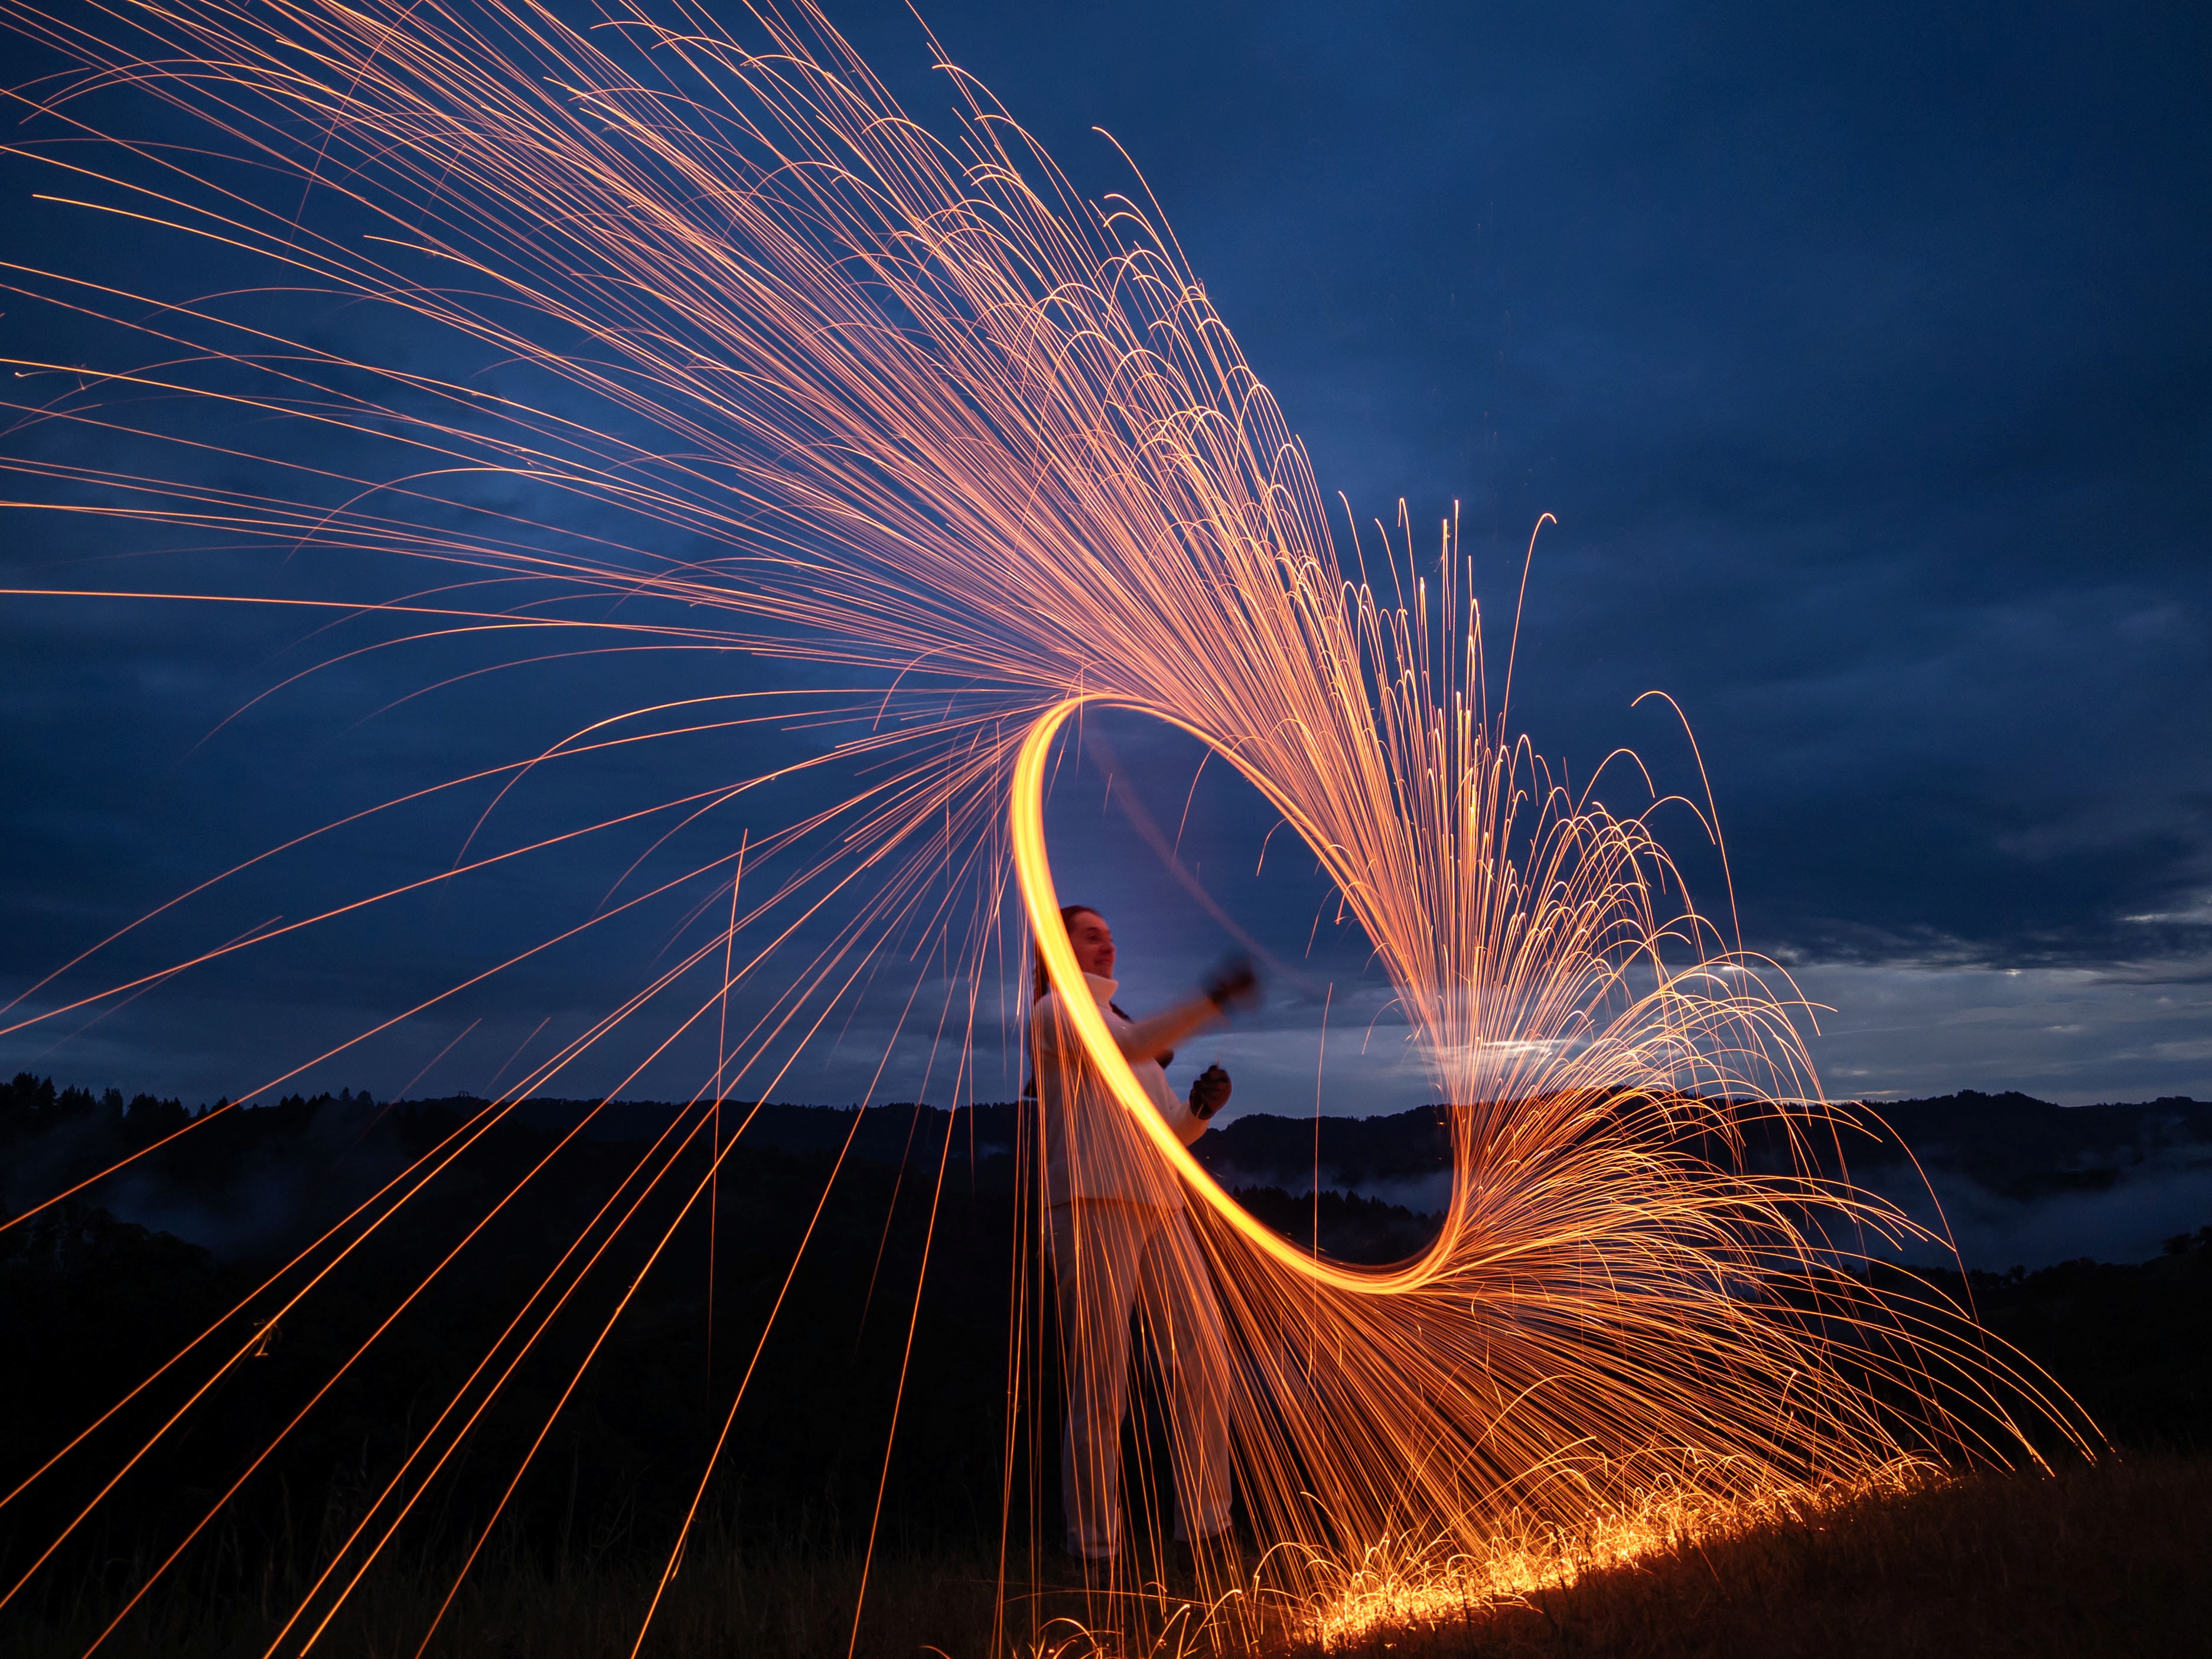
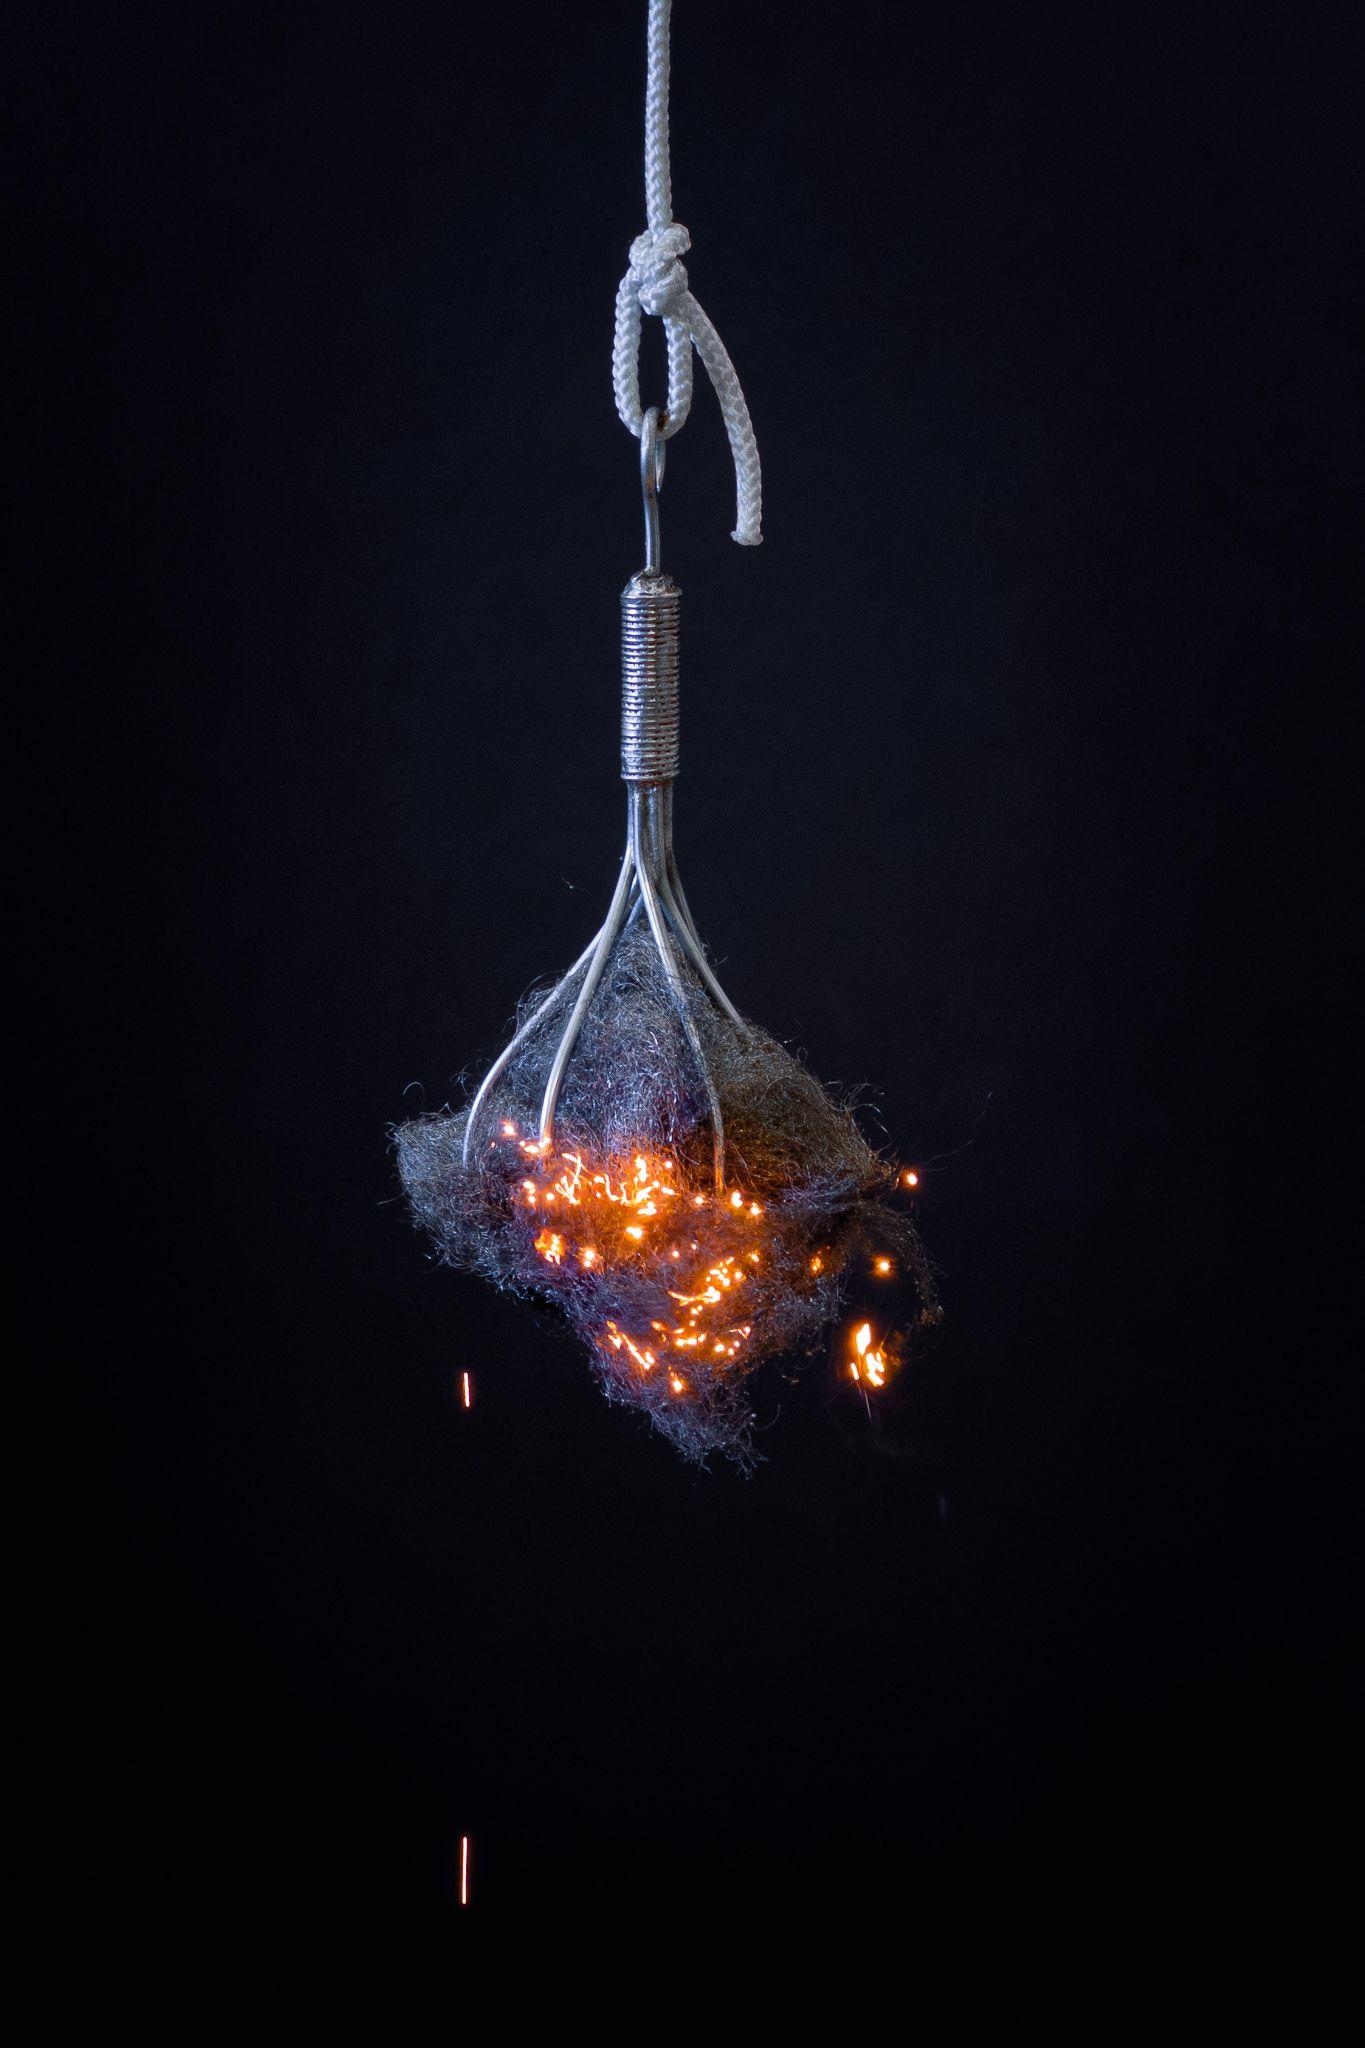
A Long Exposure photo of burning steel wool, captured with Blend style. Focus,
shutter speed and ISO were set using Pro Controls. A neutral density filter was
mounted in front of the camera lens to avoid overexposing the light trails. The
effect was produced by spinning a wire cage containing the steel wool and tied to
the end of a string. See the text for detailed instructions.
|
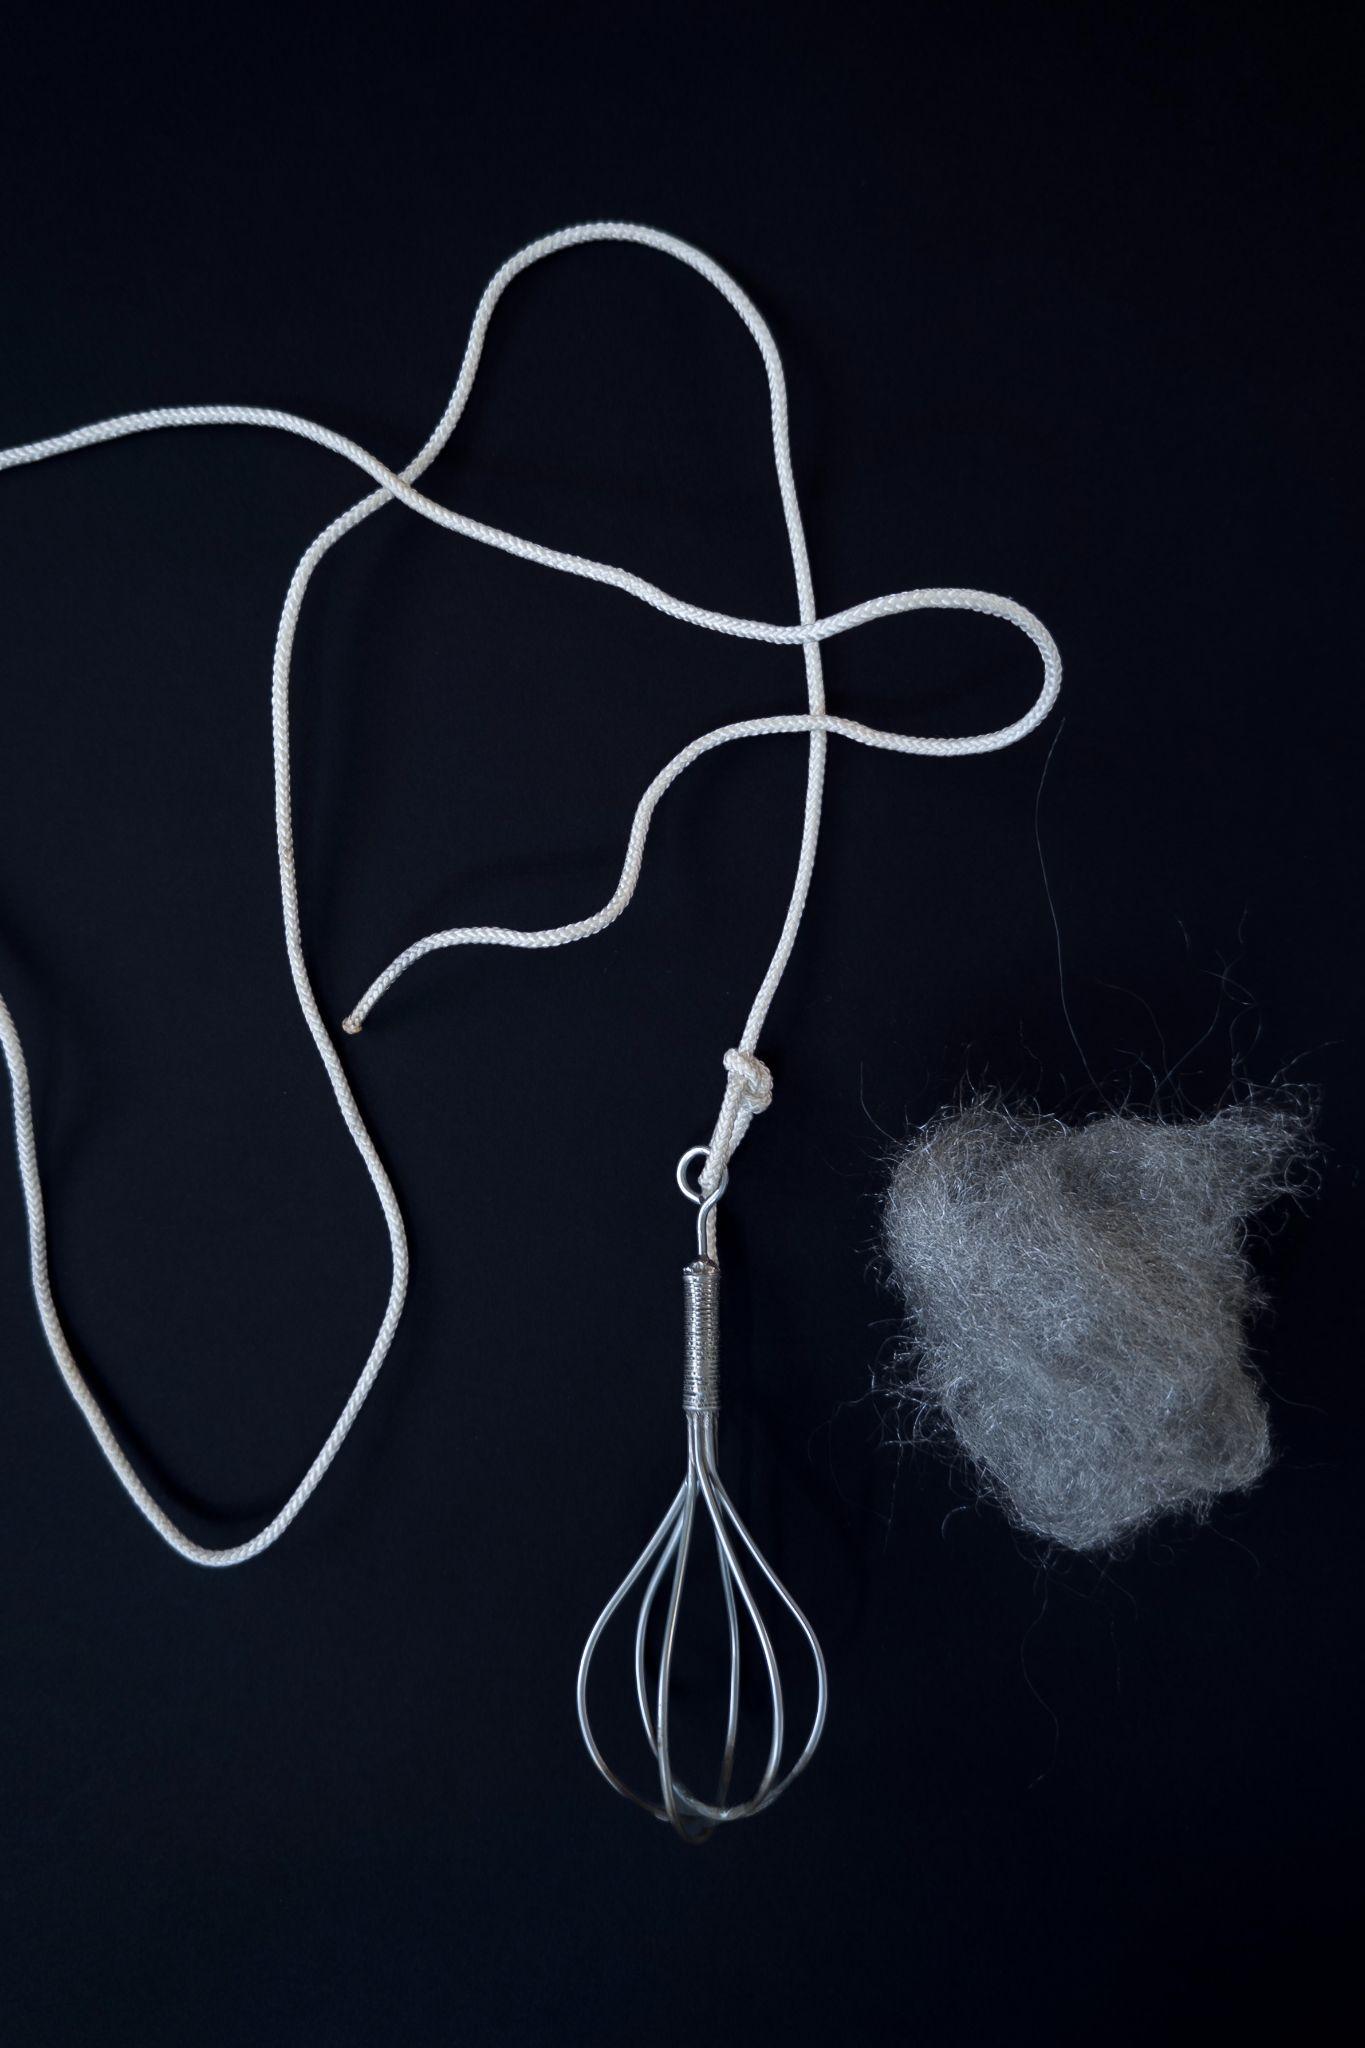
Here’s how you can take pictures like these: Look for a spot with dim lighting to make the light trails stand out from the background. Since this involves fire and flying globs of molten metal, find an area where it’s impossible to unintentionally ignite anything. Wear clothing made from natural fibers (nothing that can melt and stick to your skin). The person operating the camera must wear eye protection because bits of hot, burning metal will come flying at them.
To create the light trails, you’ll need some extra fine (grade 000) steel wool.
You’ll also need a string about 3 feet long, and something to hold the steel
wool. We made a small cage out of stiff wire, but a stainless steel kitchen
whisk will work just fine. Securely tie the holder to one end of the string, and
stuff a clump of steel wool, about the size of an egg, into the holder. Using a
lighter, set the steel wool on fire. Grab the free end of the string and quickly
swing the holder with the steel wool in a circle in front of you or over your
head. As the metal burns some of it melts and forms brightly glowing drops that
rapidly fly away.
Photographing the trails requires a careful setup, and probably a bit of
experimentation. First, get focus and framing right. Mark a spot on the ground
and have your model stand there. Place your phone on a tripod and frame the
shot. Turn on Long Exposure and the focusing Pro Control. Manually focus on the
model’s face. Use the viewfinder
loupe if necessary. For nice, orange light
trails, set the white balance to daylight (temperature 5000 to 5500 K, tint 0 to
10), switch the frame merging style to Blend, and set the total exposure duration
to ∞. Set ISO to the lowest setting (usually 64 for the phone’s main back
camera) and the shutter speed to 1s.
Now take a test shot: Load the holder with steel wool, and have the model stand
at their designated spot. Light the steel wool, and have the model spin it in a
circle. Start the exposure as soon as you see sparks flying; stop it when there
are no more sparks. Take a look at the captured image and check the brightness
of the light trails and the model. The brightness of the light trails created by
the flying metal drops depends on the size and speed of the drops and on their
distance from the camera, but not on the shutter speed. If the light trails are
too dim, you can make them brighter by increasing ISO. If they are overexposed,
dim them by lowering the ISO; if you are already at the lowest ISO, dimming the
trails any further requires an ND filter. The shutter speed does, however,
affect the brightness of the model; if their face looks too bright, select a
faster shutter speed; if it’s too dark, consider using an additional light
source, for example, a flashlight. For the photo above, we used an ND 0.9
(3 f-stop) filter with a 1 s shutter speed and ISO 64. We did not use artificial
light other than the burning steel wool; shooting at dusk kept the landscape in
the background visible.
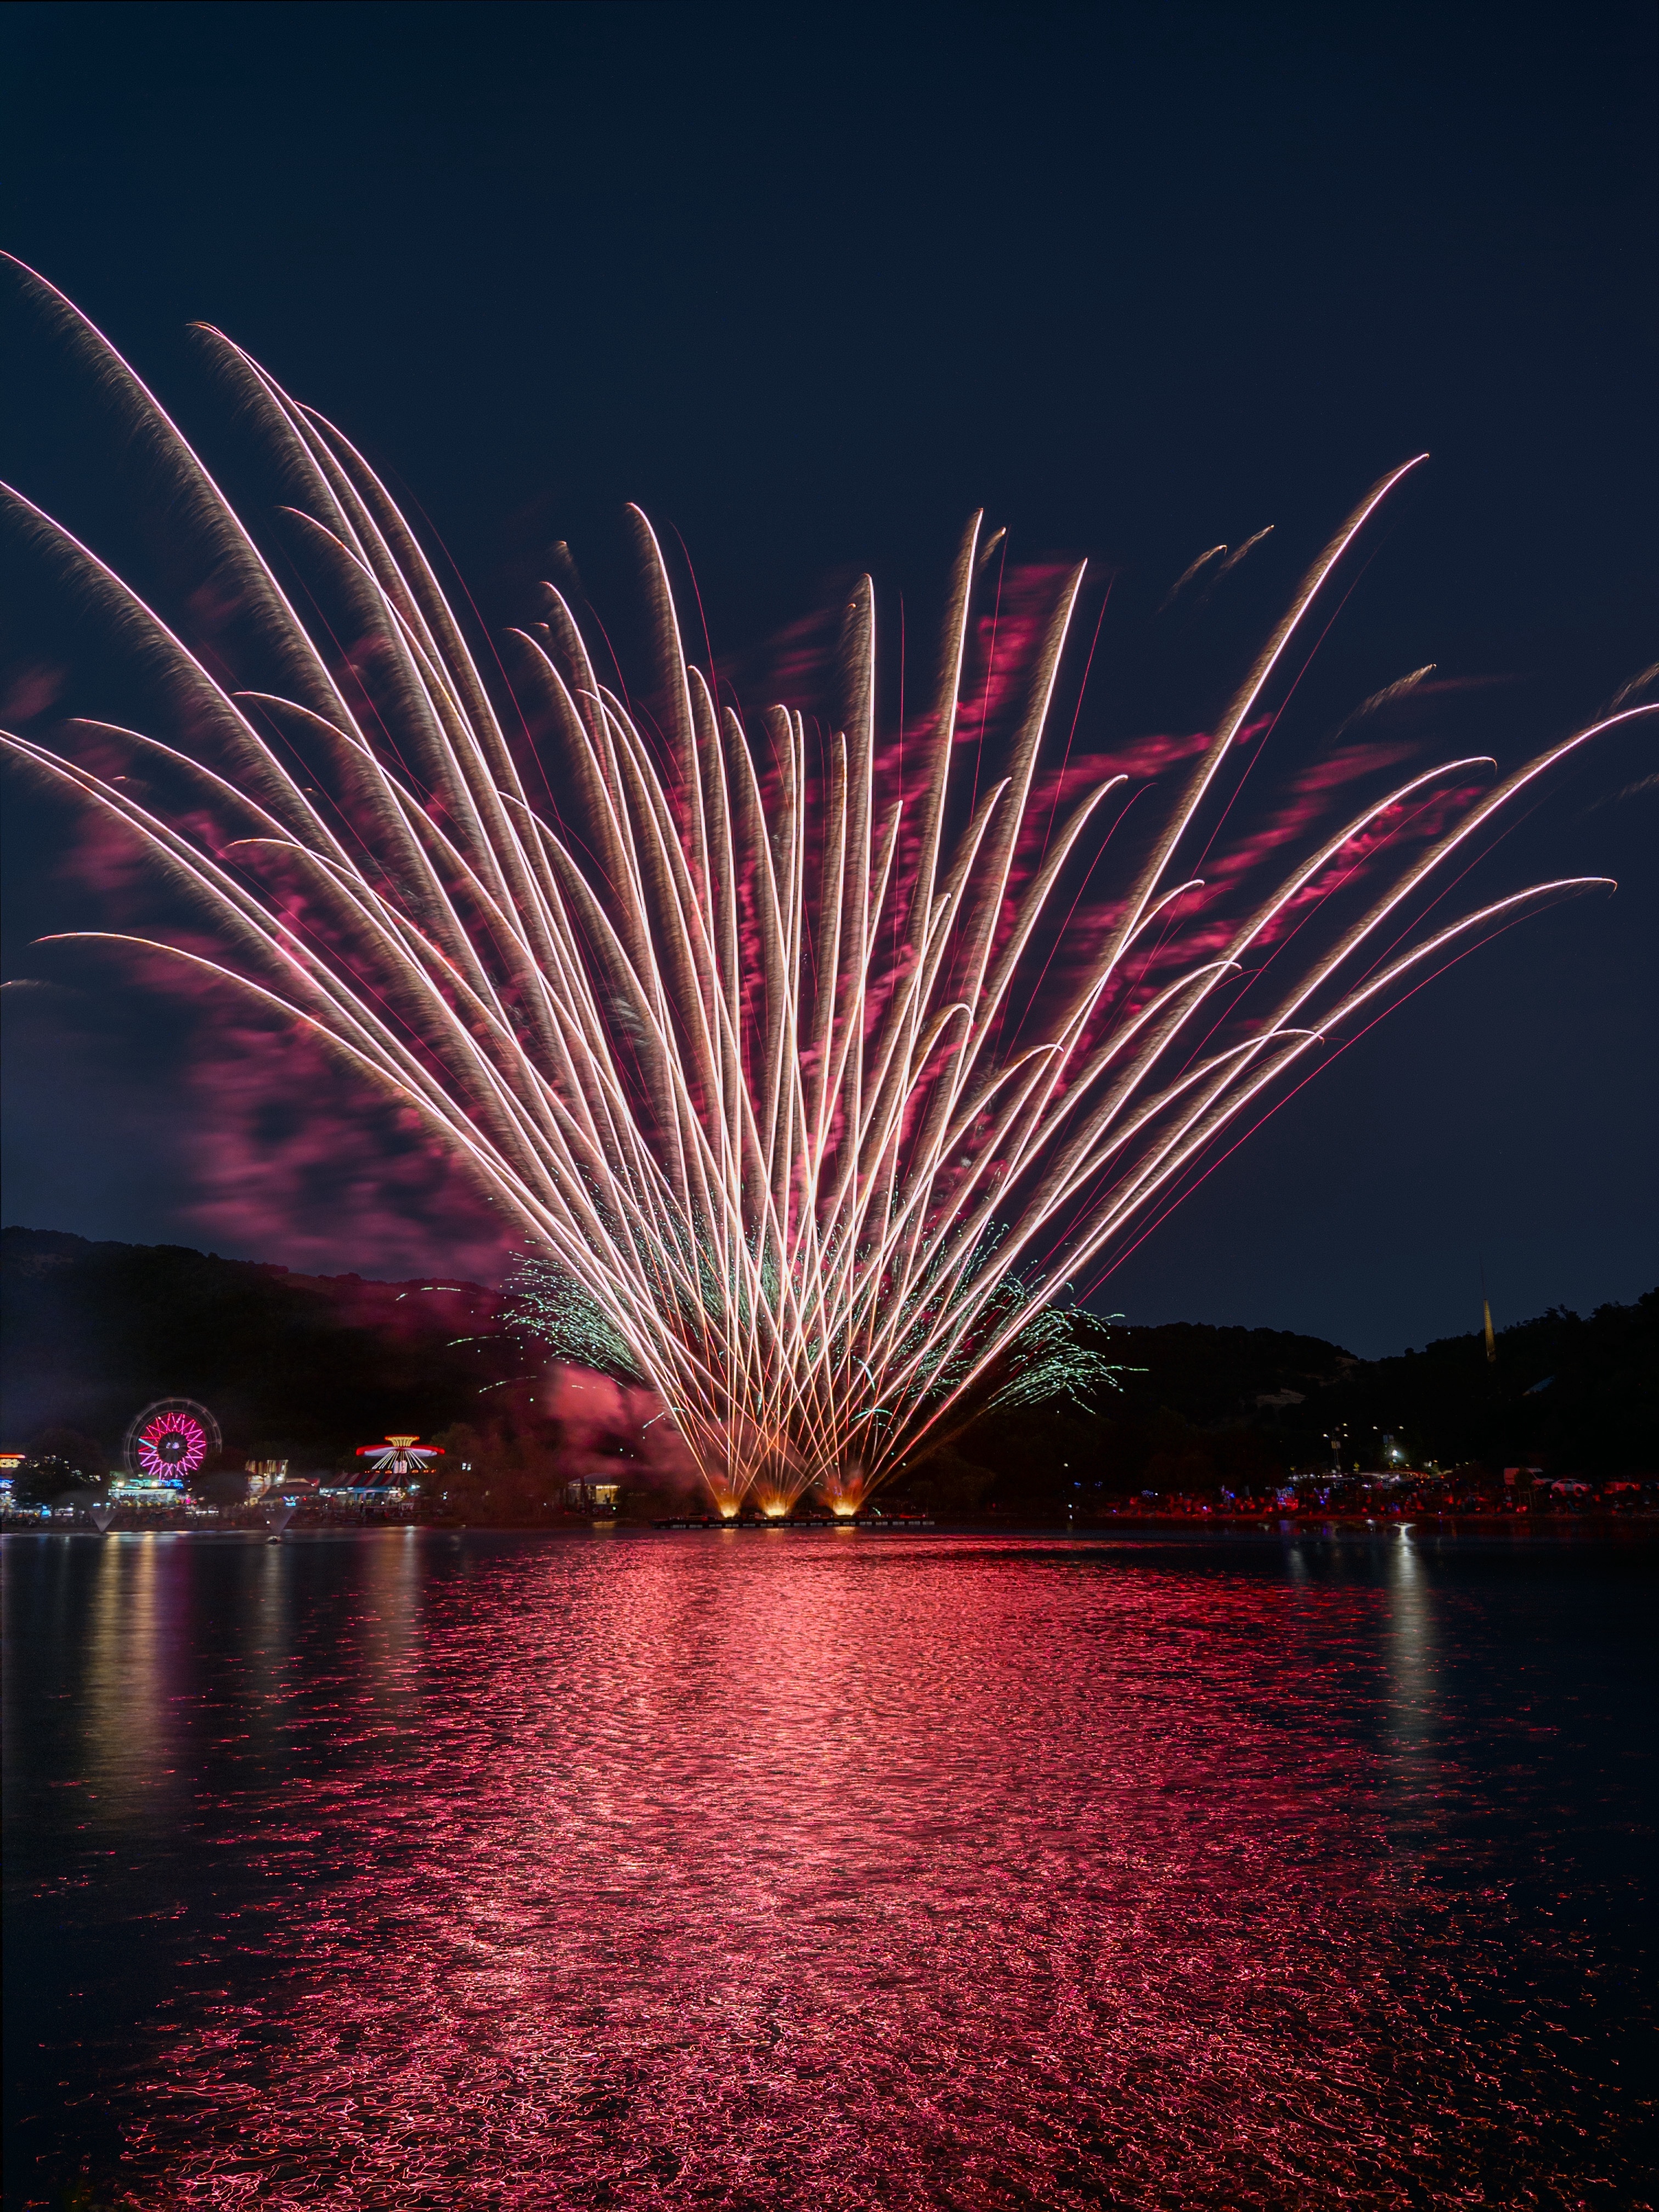
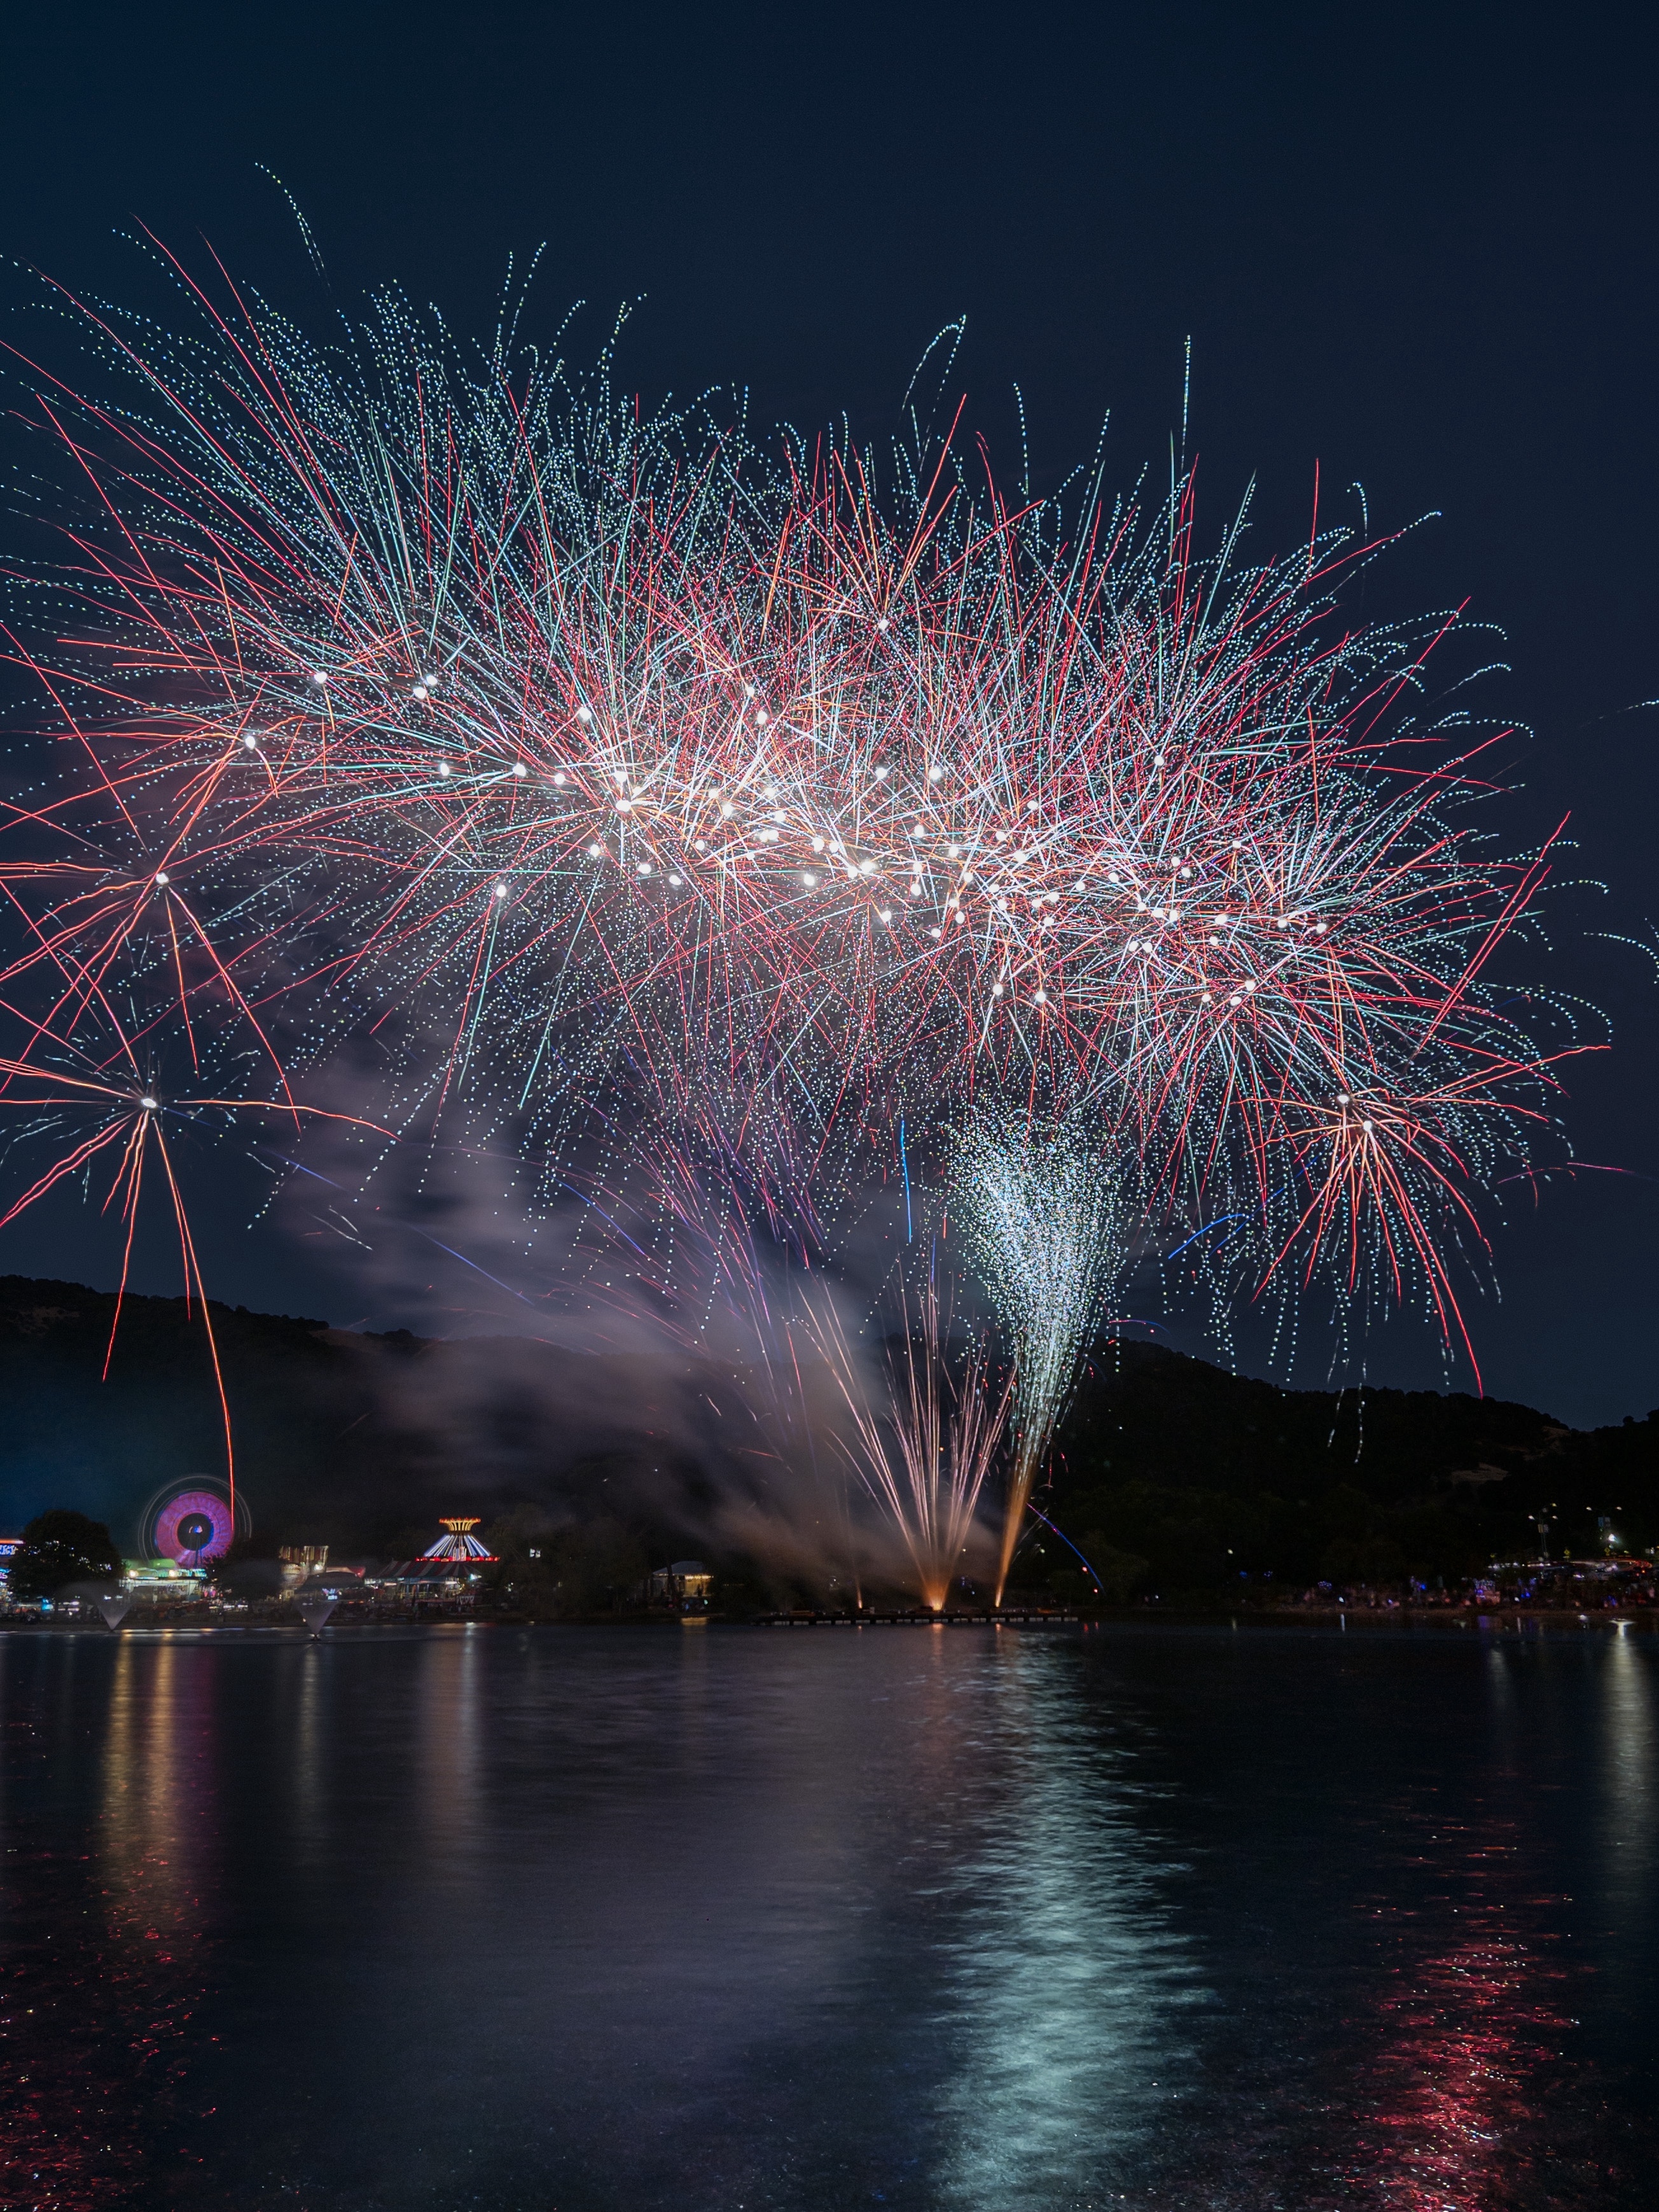
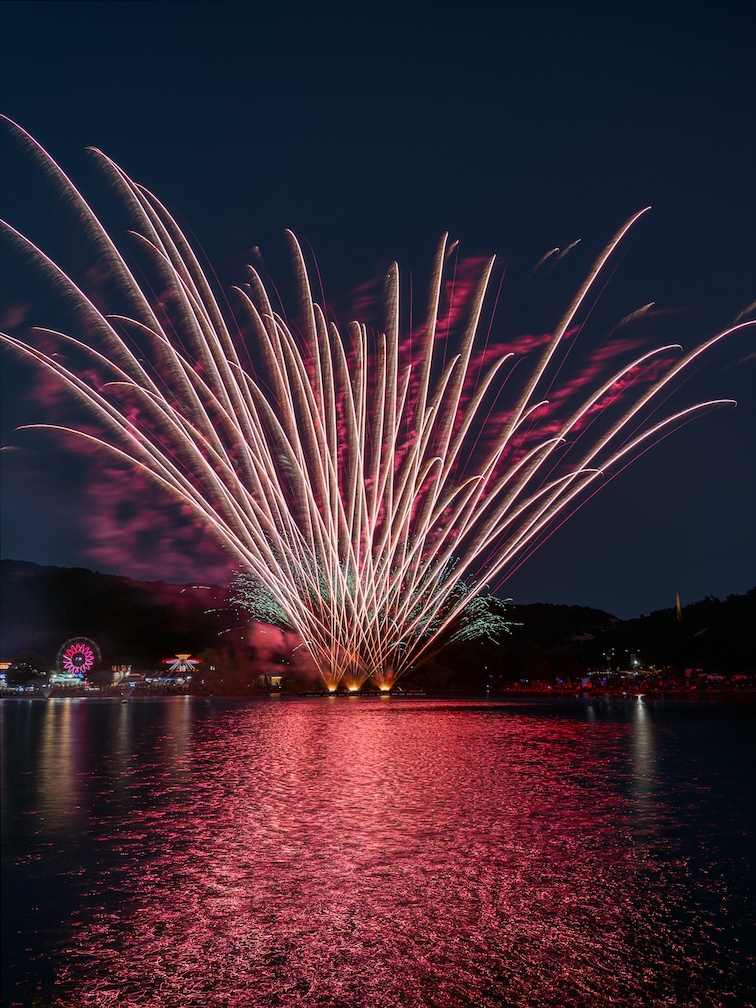
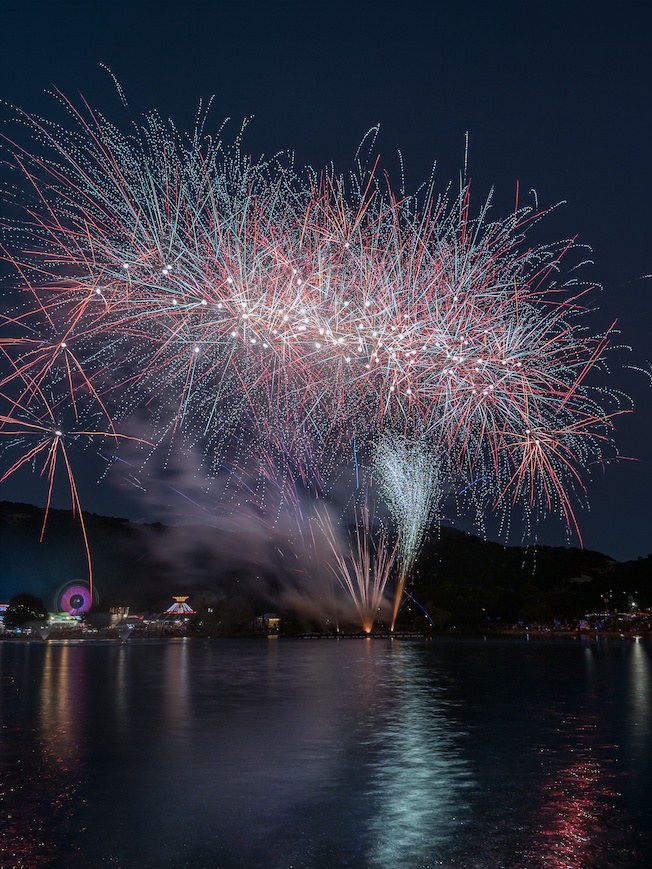
Fireworks displays are another opportunity to turn moving lights into interesting
long exposure photographs. The pictures below were taken with the following Pro
Control exposure settings: shutter speed 1/4 s, ISO 64, Blend style, 8 frames per
capture (2 seconds total exposure time). We wanted the color of the fireworks to
be white on average rather than yellow or orange, so we chose a white balance of
3300 K, tint 0.
Fireworks are very bright, and you will likely need an ND filter to keep the
pictures from being strongly overexposed. We used one that reduces light by a
factor of 64 (6 stops / ND 1.8). Since fireworks are hot, they emit a lot of
infrared light. Most ND filters are transparent to infrared, and unlike the
human eye, the iPhone camera is slightly sensitive to infrared. This can leave
photos with a strong brick-red cast. To keep colors looking more natural we
attached an infrared-blocking filter to our phone, in addition to the ND filter.
With our chosen settings and the strong ND filter the night sky and the landscape
behind the fireworks came out completely black. To counter this, we took a
separate picture of the background at dusk, before it got completely dark. Later
we combined the fireworks and the background in Photoshop. The Photoshop
documents each have three layers: the background, a curves layer to adjust the
brightness of the background, and the fireworks. Setting Photoshop's layer
blending mode for the fireworks layer to “linear dodge (add)” has the effect of
adding the fireworks’ brightness to the picture without dimming the background.
|
Fireworks photographed using Blend style and Pro Controls for focus, ISO, shutter
speed and white balance. A 6-stop ND filter reduced overexposure of the light
trails, and an IR blocking filter stopped infrared light leaking through the ND
filter. See the text for detailed instructions.
|
Light Painting
Light painting is a form of long-exposure photography where a dark scene
is illuminated with handheld light sources such as flashlights, light wands, or
strobe flashes. The light sources may also be used to draw glowing trails into
the picture. Here are two examples:
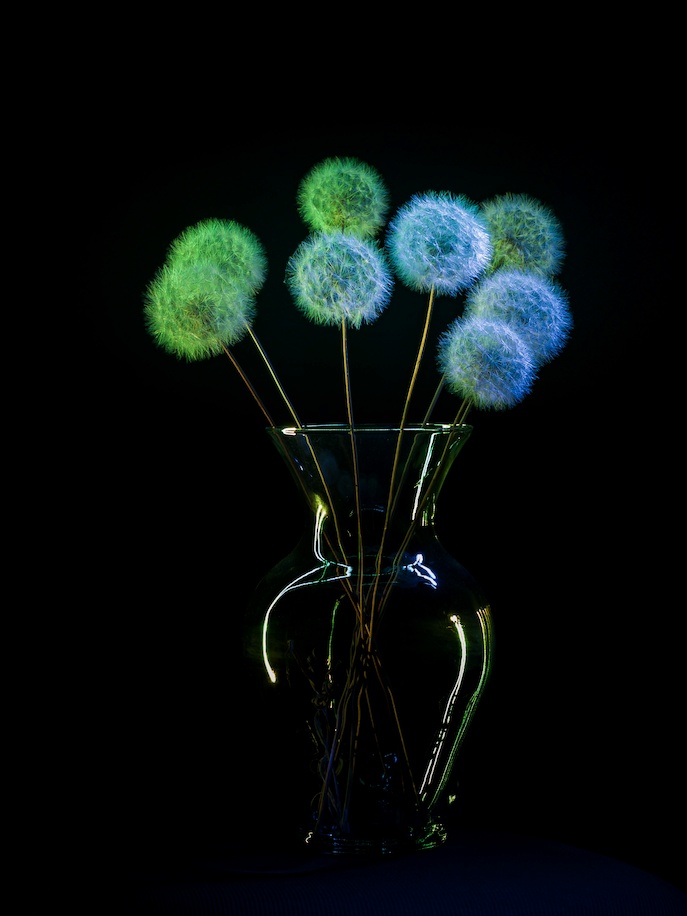
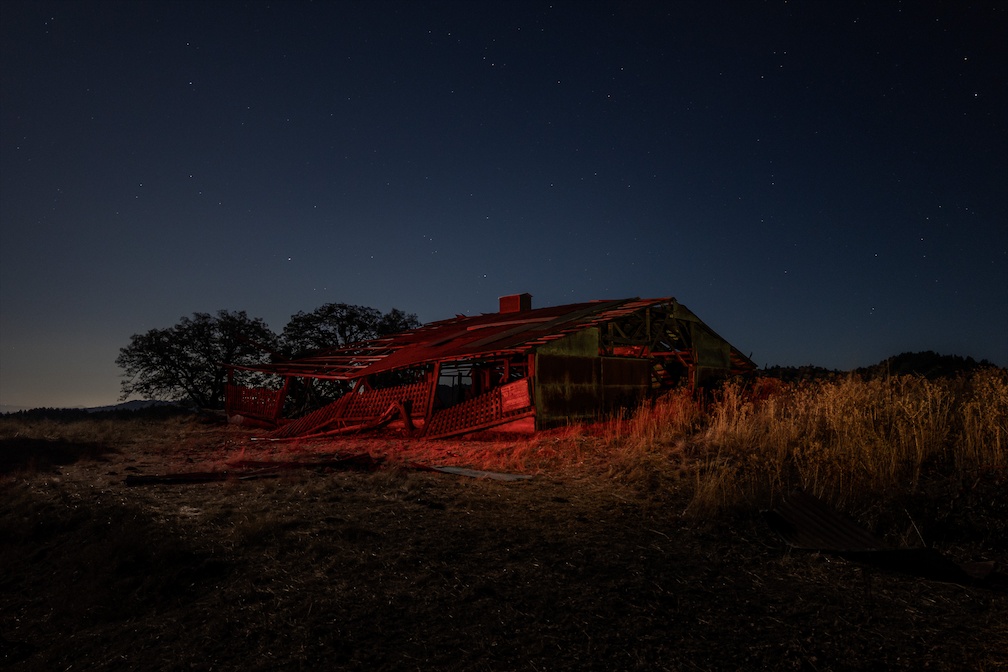
|
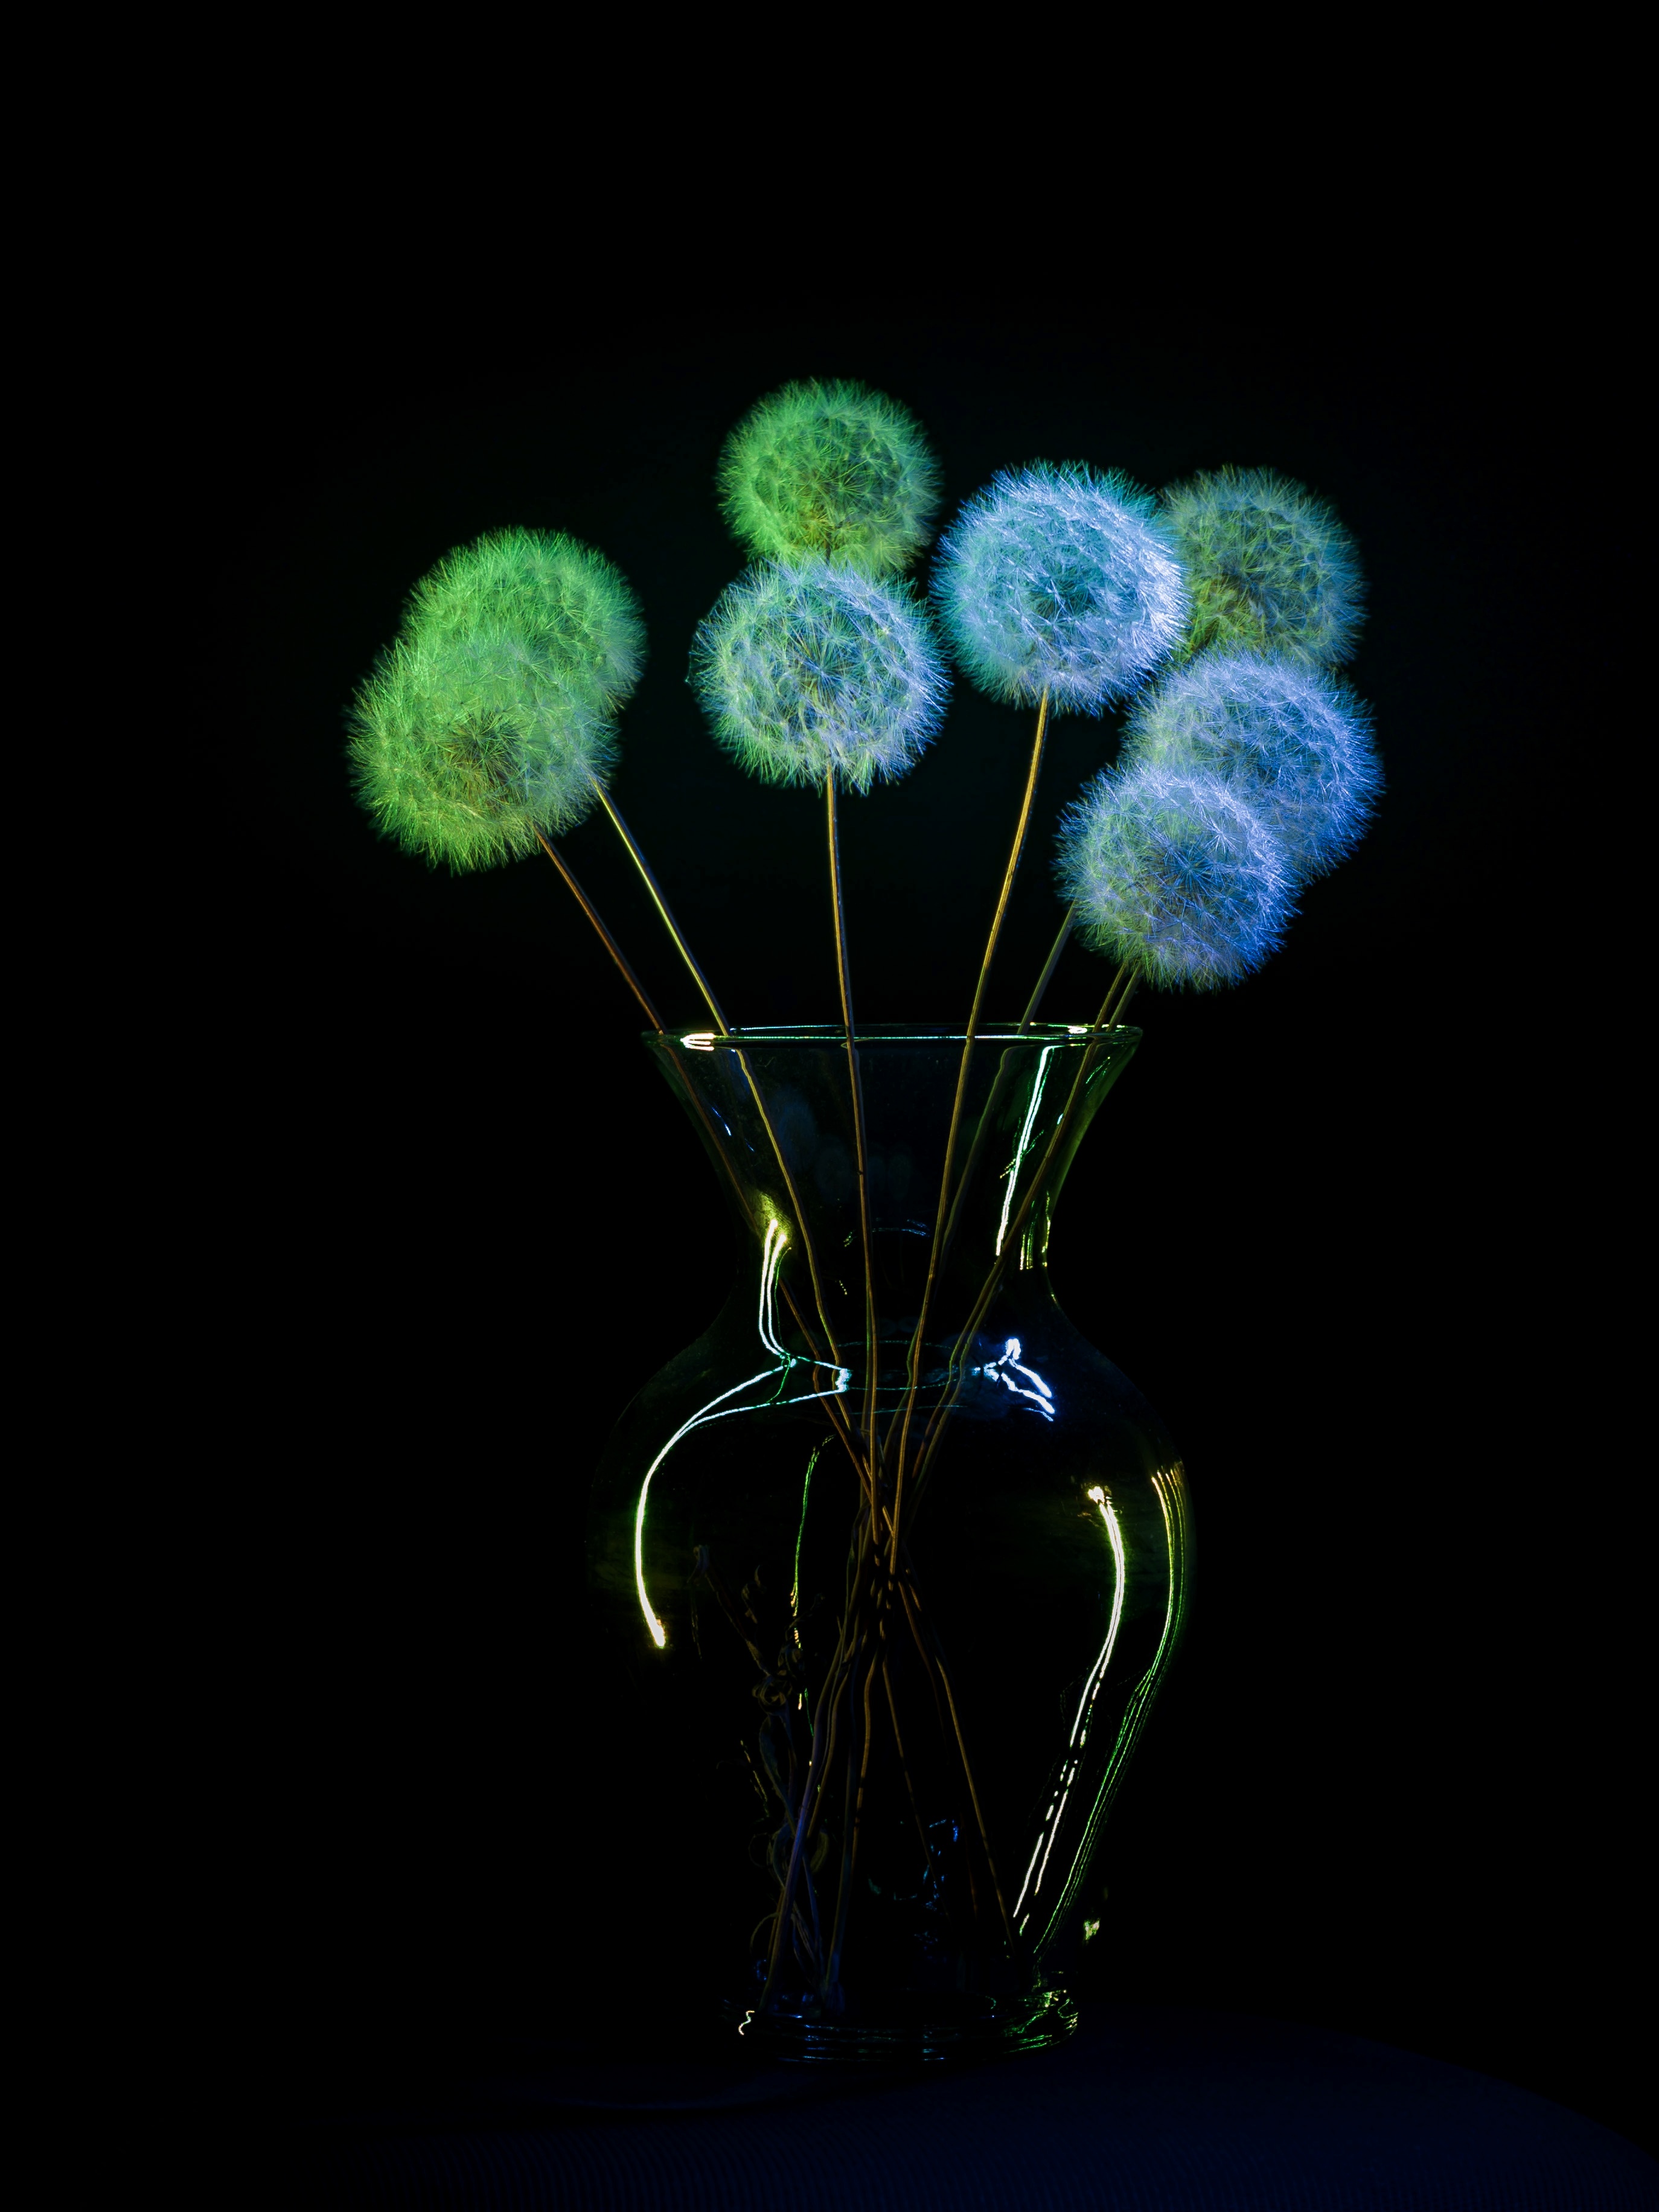
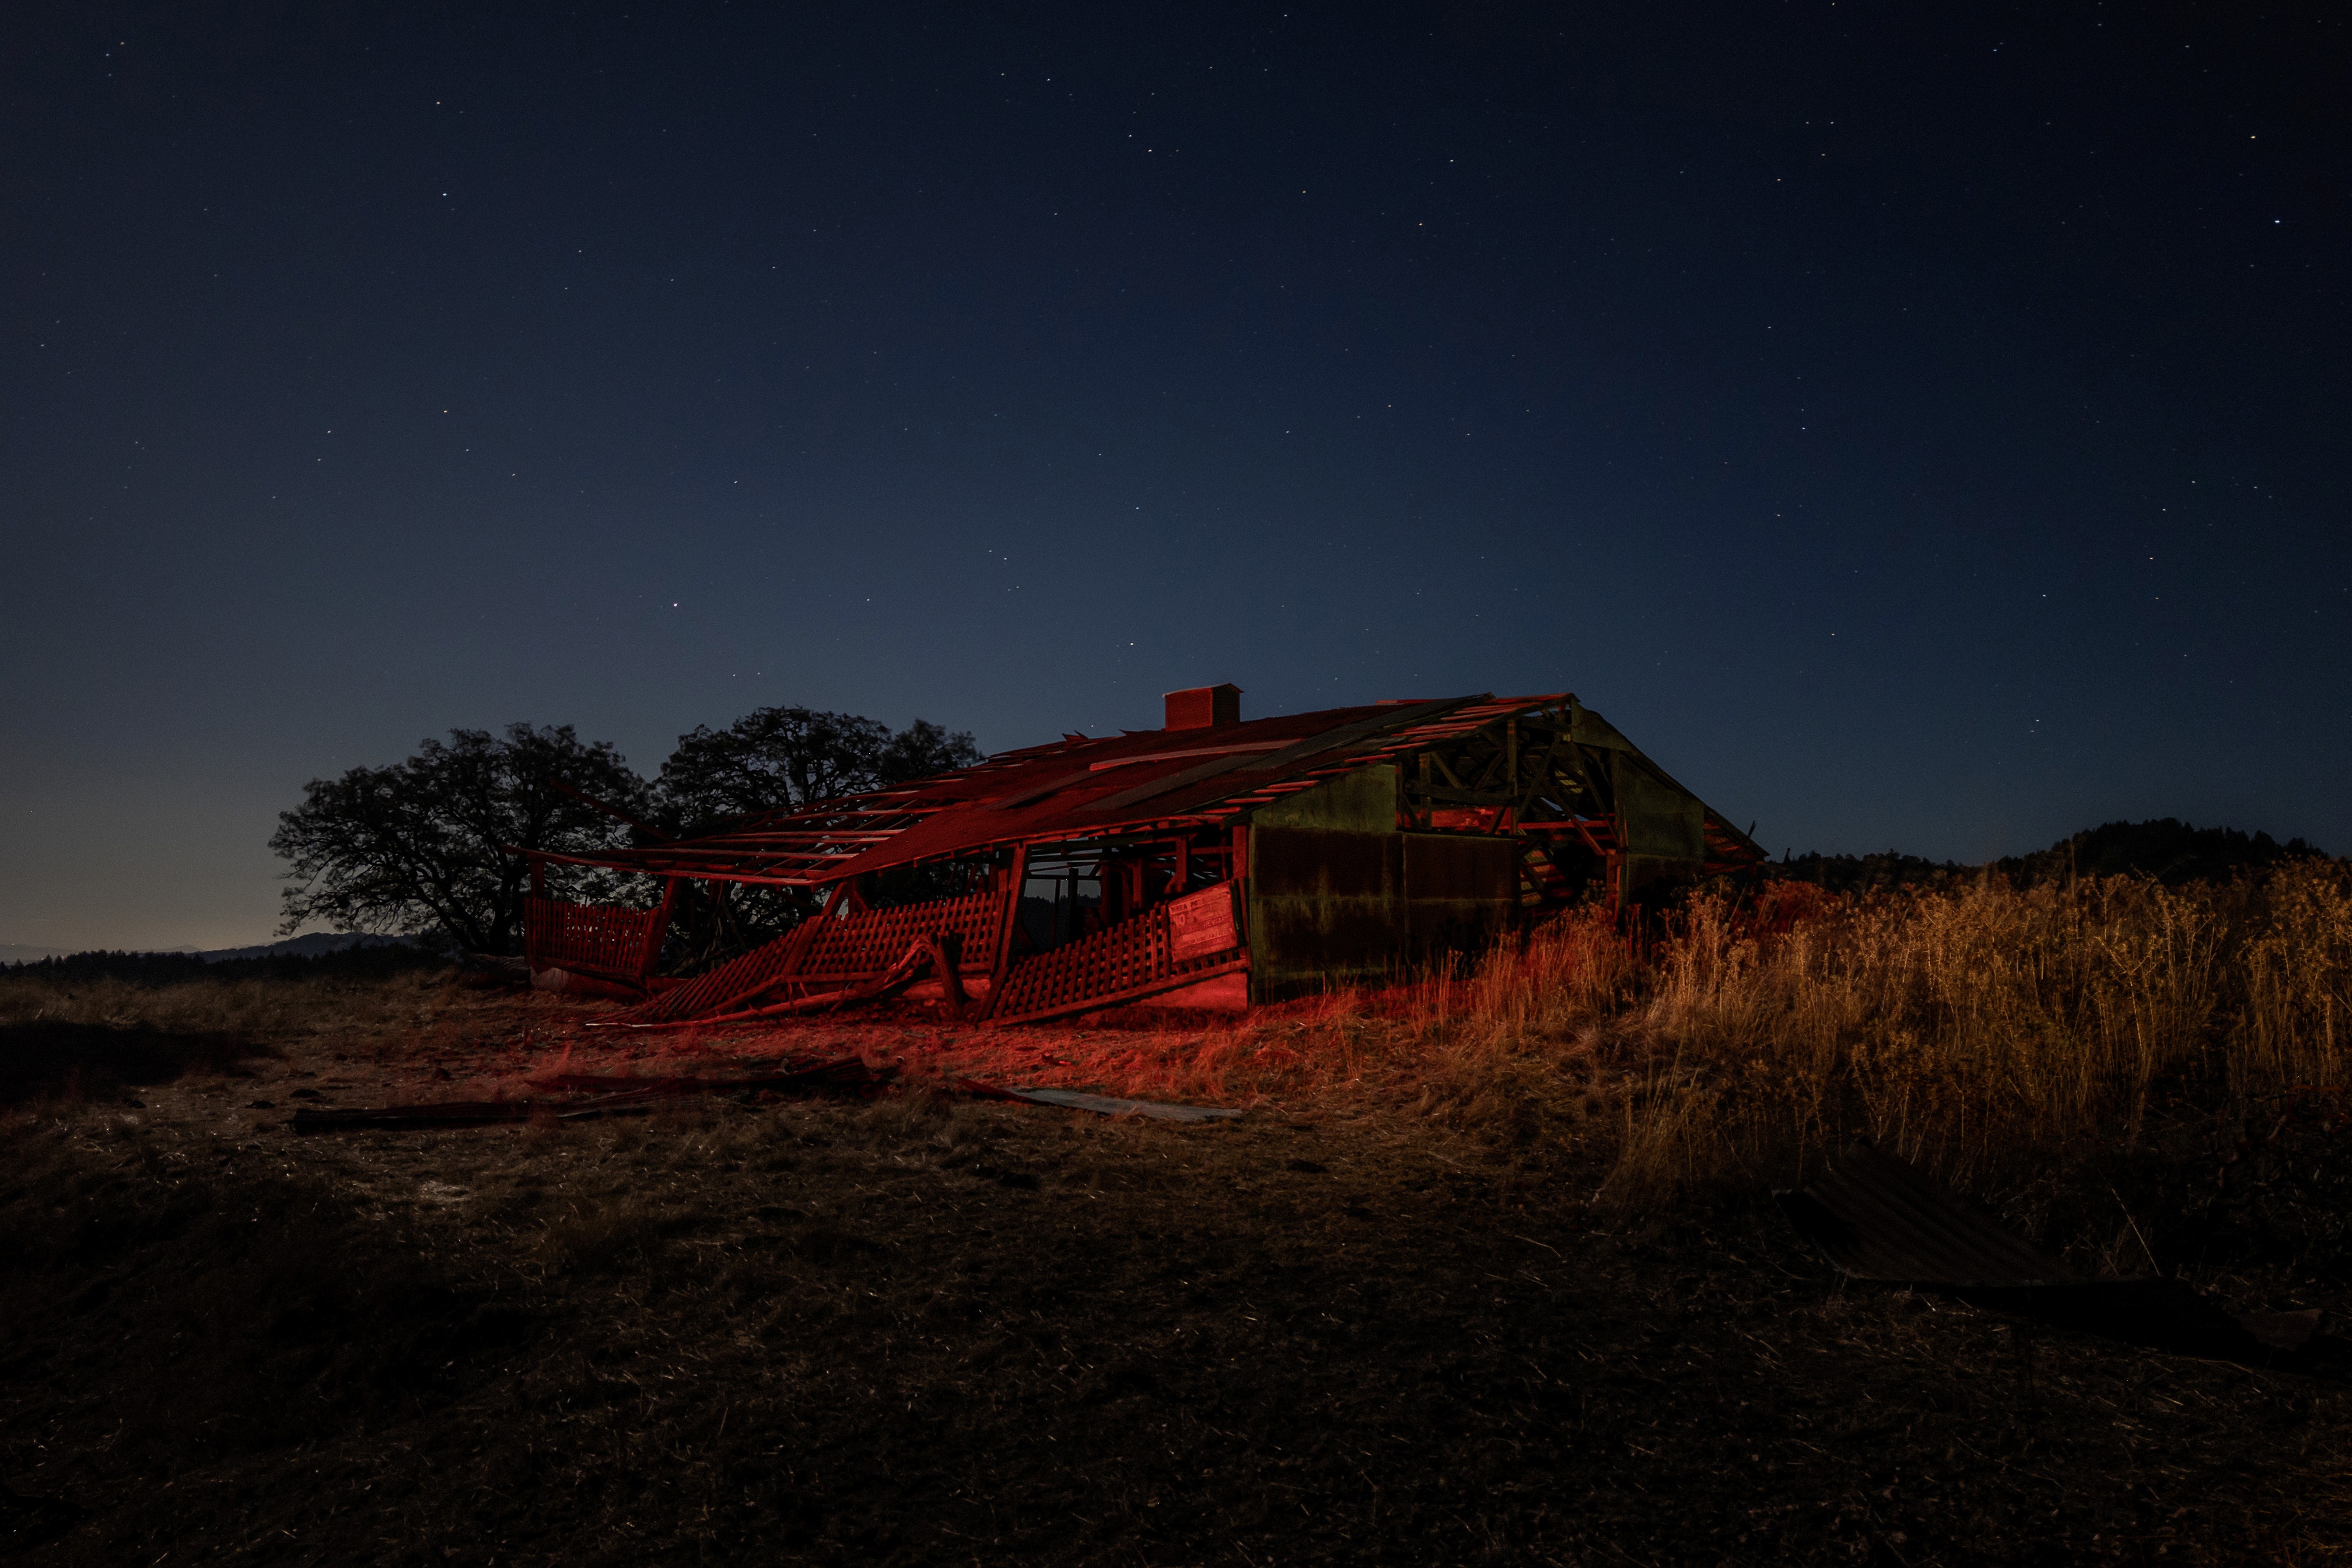
At left above is an image of light-painted dried dandelions, captured with Blend
Style and Pro Controls for focus, shutter speed and ISO. The scene was
illuminated using a handheld color-changing flashlight. At right above is an
example of mixing light painting and available light. The photo was taken on a
full-moon night, and the barn was illuminated with a hand-held flashlight. A
separate, shorter exposure was captured to avoid motion blur in the sky.
|
In the first example, the glass vase with the dried dandelion blowballs was
placed on a stool in front of a piece of black foam board. Our iPhone was set up
about 6 feet away from the vase. In Indigo, the phone’s 4× lens was selected,
and the following Long Exposure Pro Controls settings were dialed in: manual
focus, shutter speed 1/30 s, ISO 40, Blend style, number of frames ∞. After
darkening the room, we started the exposure and slowly moved a color-changing
flashlight around the vase, shining it at the blowballs and taking care to keep
the flashlight itself out of the picture. As with other types of long exposure
photographs, you’ll probably want to experiment to figure out how to get the most
interesting images. For example, try different light colors, and change how you
move your flashlight, illuminating your subject from the front, sides or the
back.
The second photo, of an old barn, was taken on a clear full moon night. The
scene was illuminated by the moon and an adjustable-color flashlight. The Pro
Controls settings were: manual focus, shutter speed 1 s, ISO 400, Blend style,
number of frames ∞. After starting the capture, the flashlight was set to yellow
and pointed at the right side of the barn for 20 seconds. Next, the photographer
walked to a spot left of the camera, switched the flashlight to red, and pointed
it again at the barn for about 20 seconds. After that the capture was stopped.
Overall, the capture process took about one minute, long enough for Earth’s
rotation to turn the stars above the barn into little streaks instead of points.
To fix this, a second photo, without artificial lighting, was taken with the
number of frames set to 15, for a total exposure time short enough to keep the
stars point-like. The two photos were then merged in Adobe Photoshop, replacing
the sky in the longer exposure with the sky from the shorter one. Photoshop’s
automatic sky selection tool made this process quick and easy.
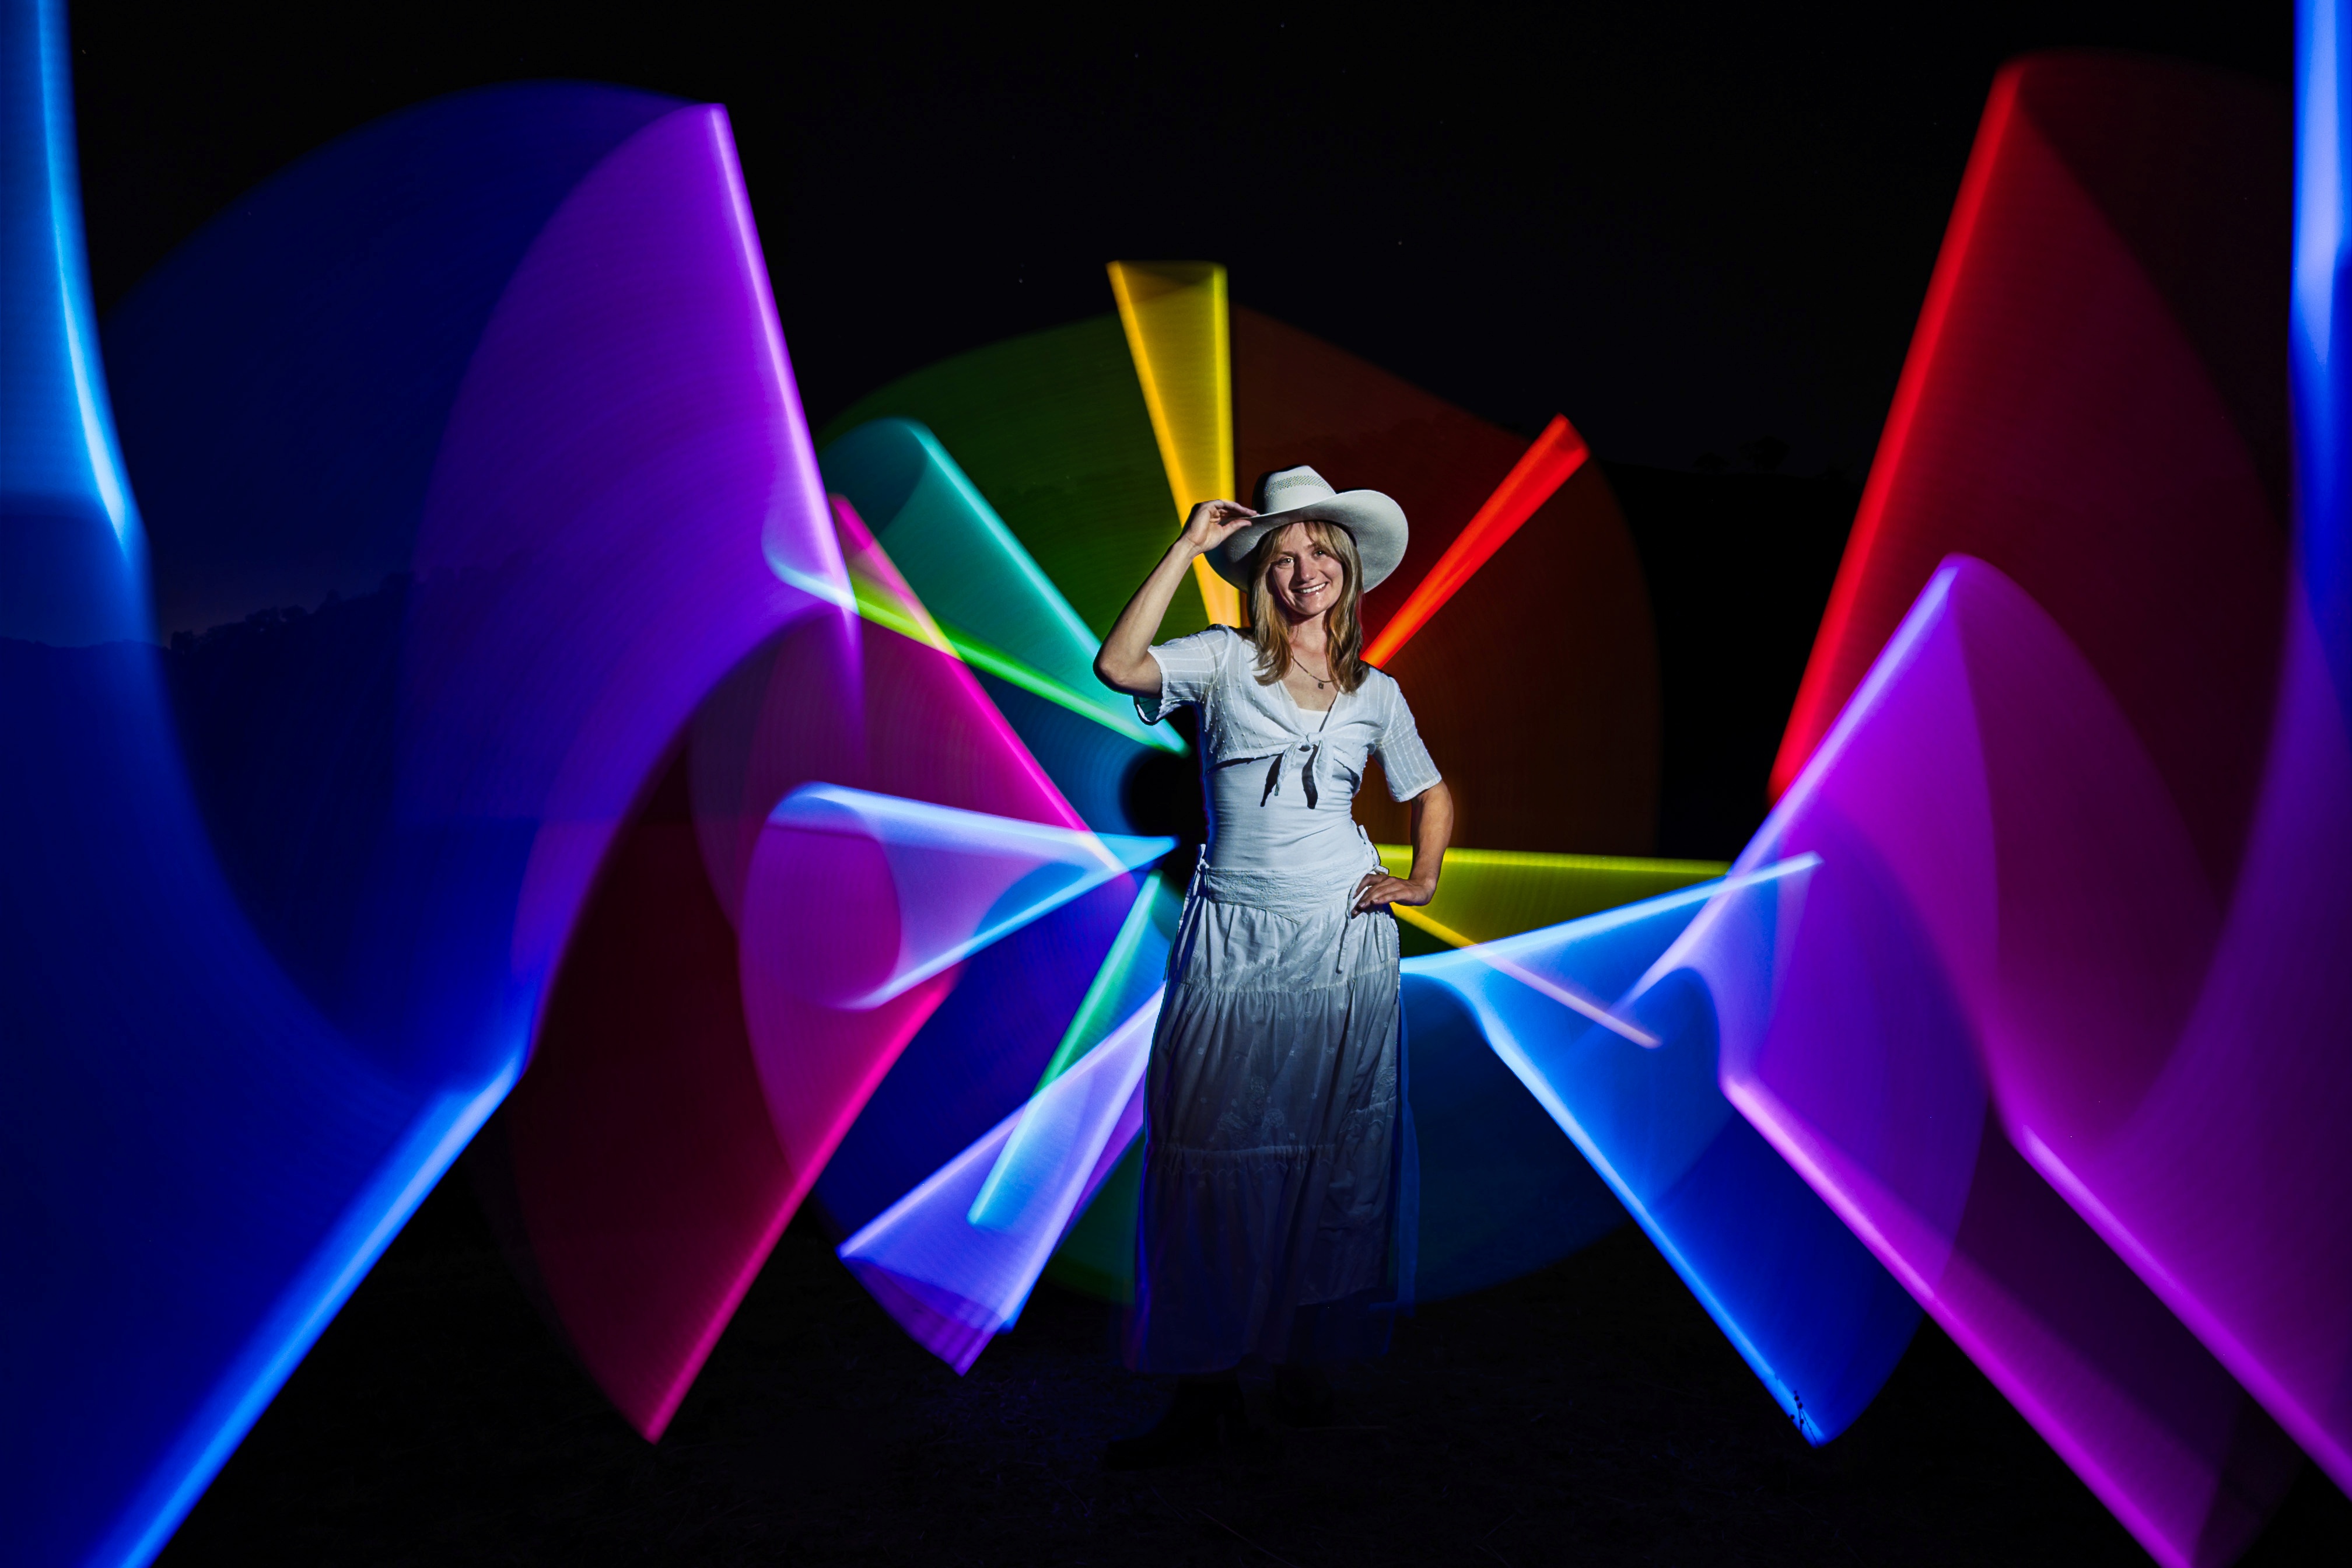
Light painting becomes really interesting when the light sources themselves show
up in the picture, being moved around to draw glowing patterns. Susan Magnano, a
professional photographer who frequently does light painting, used Indigo’s Long
Exposure mode to create the image at left below and the title picture of this
blog. Both photos were taken outdoors at night. Susan used a few different
lighting tools: a strobe flash (also known as a camera flash or speedlight) that
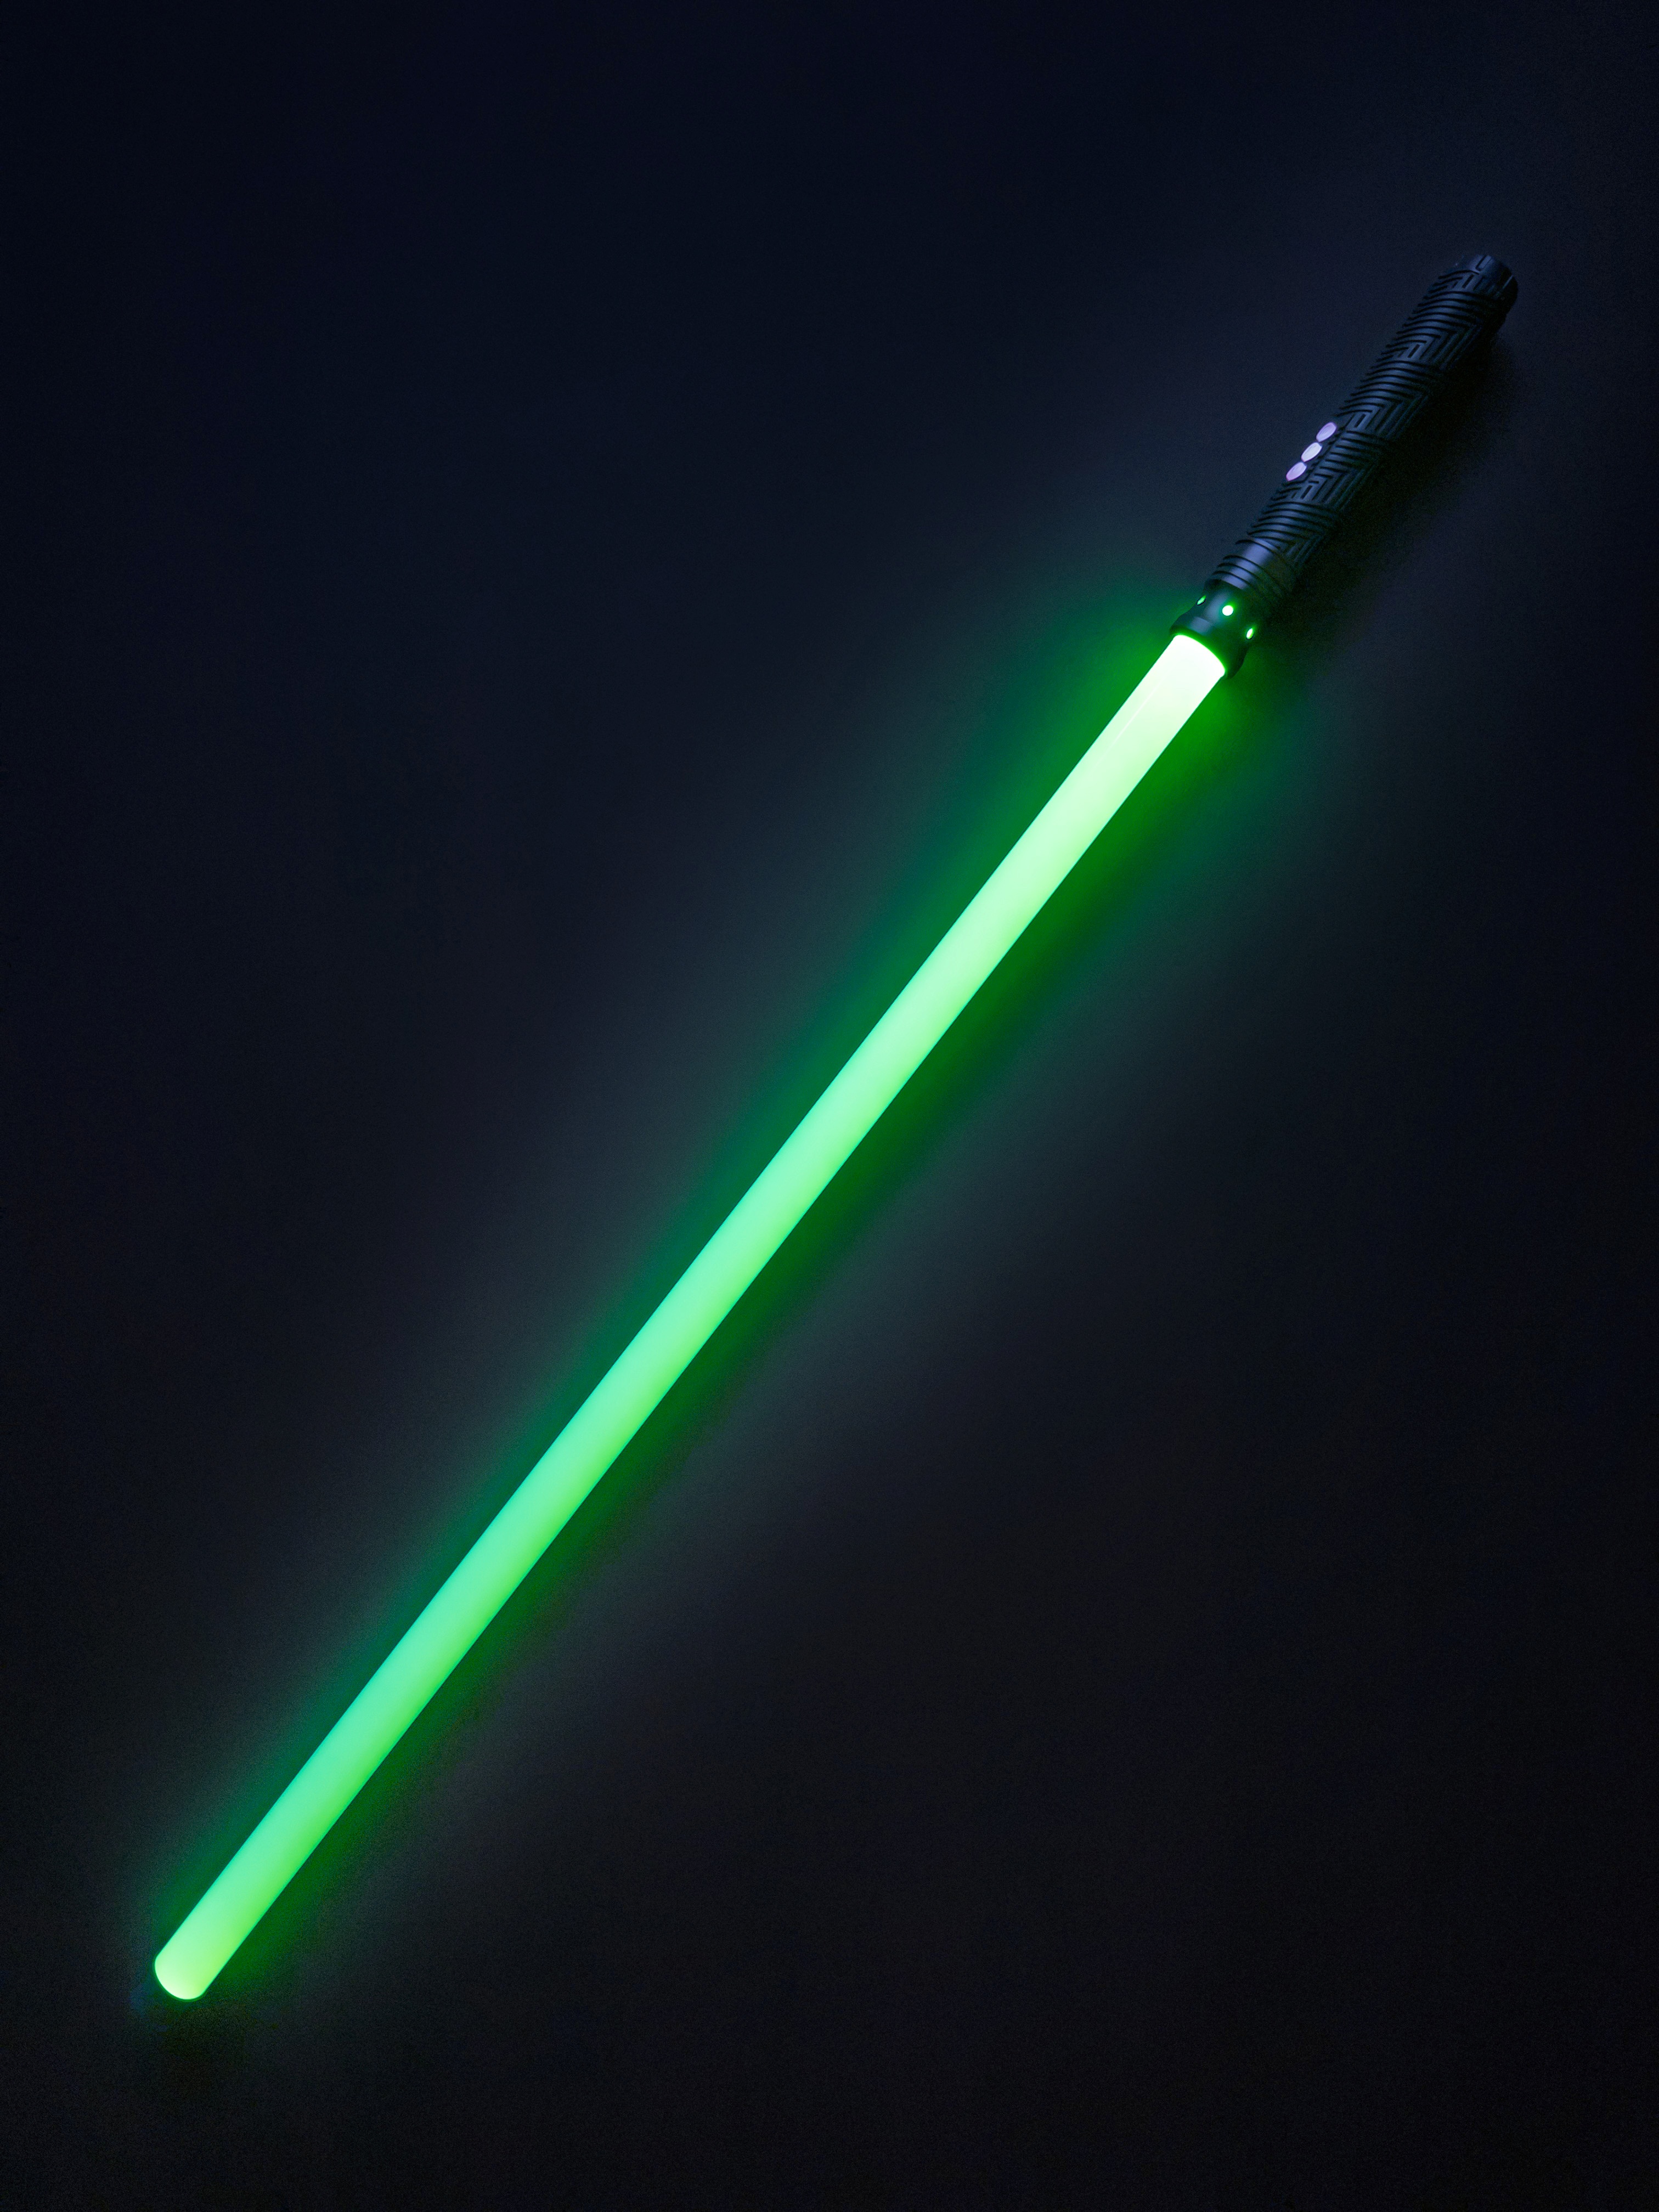
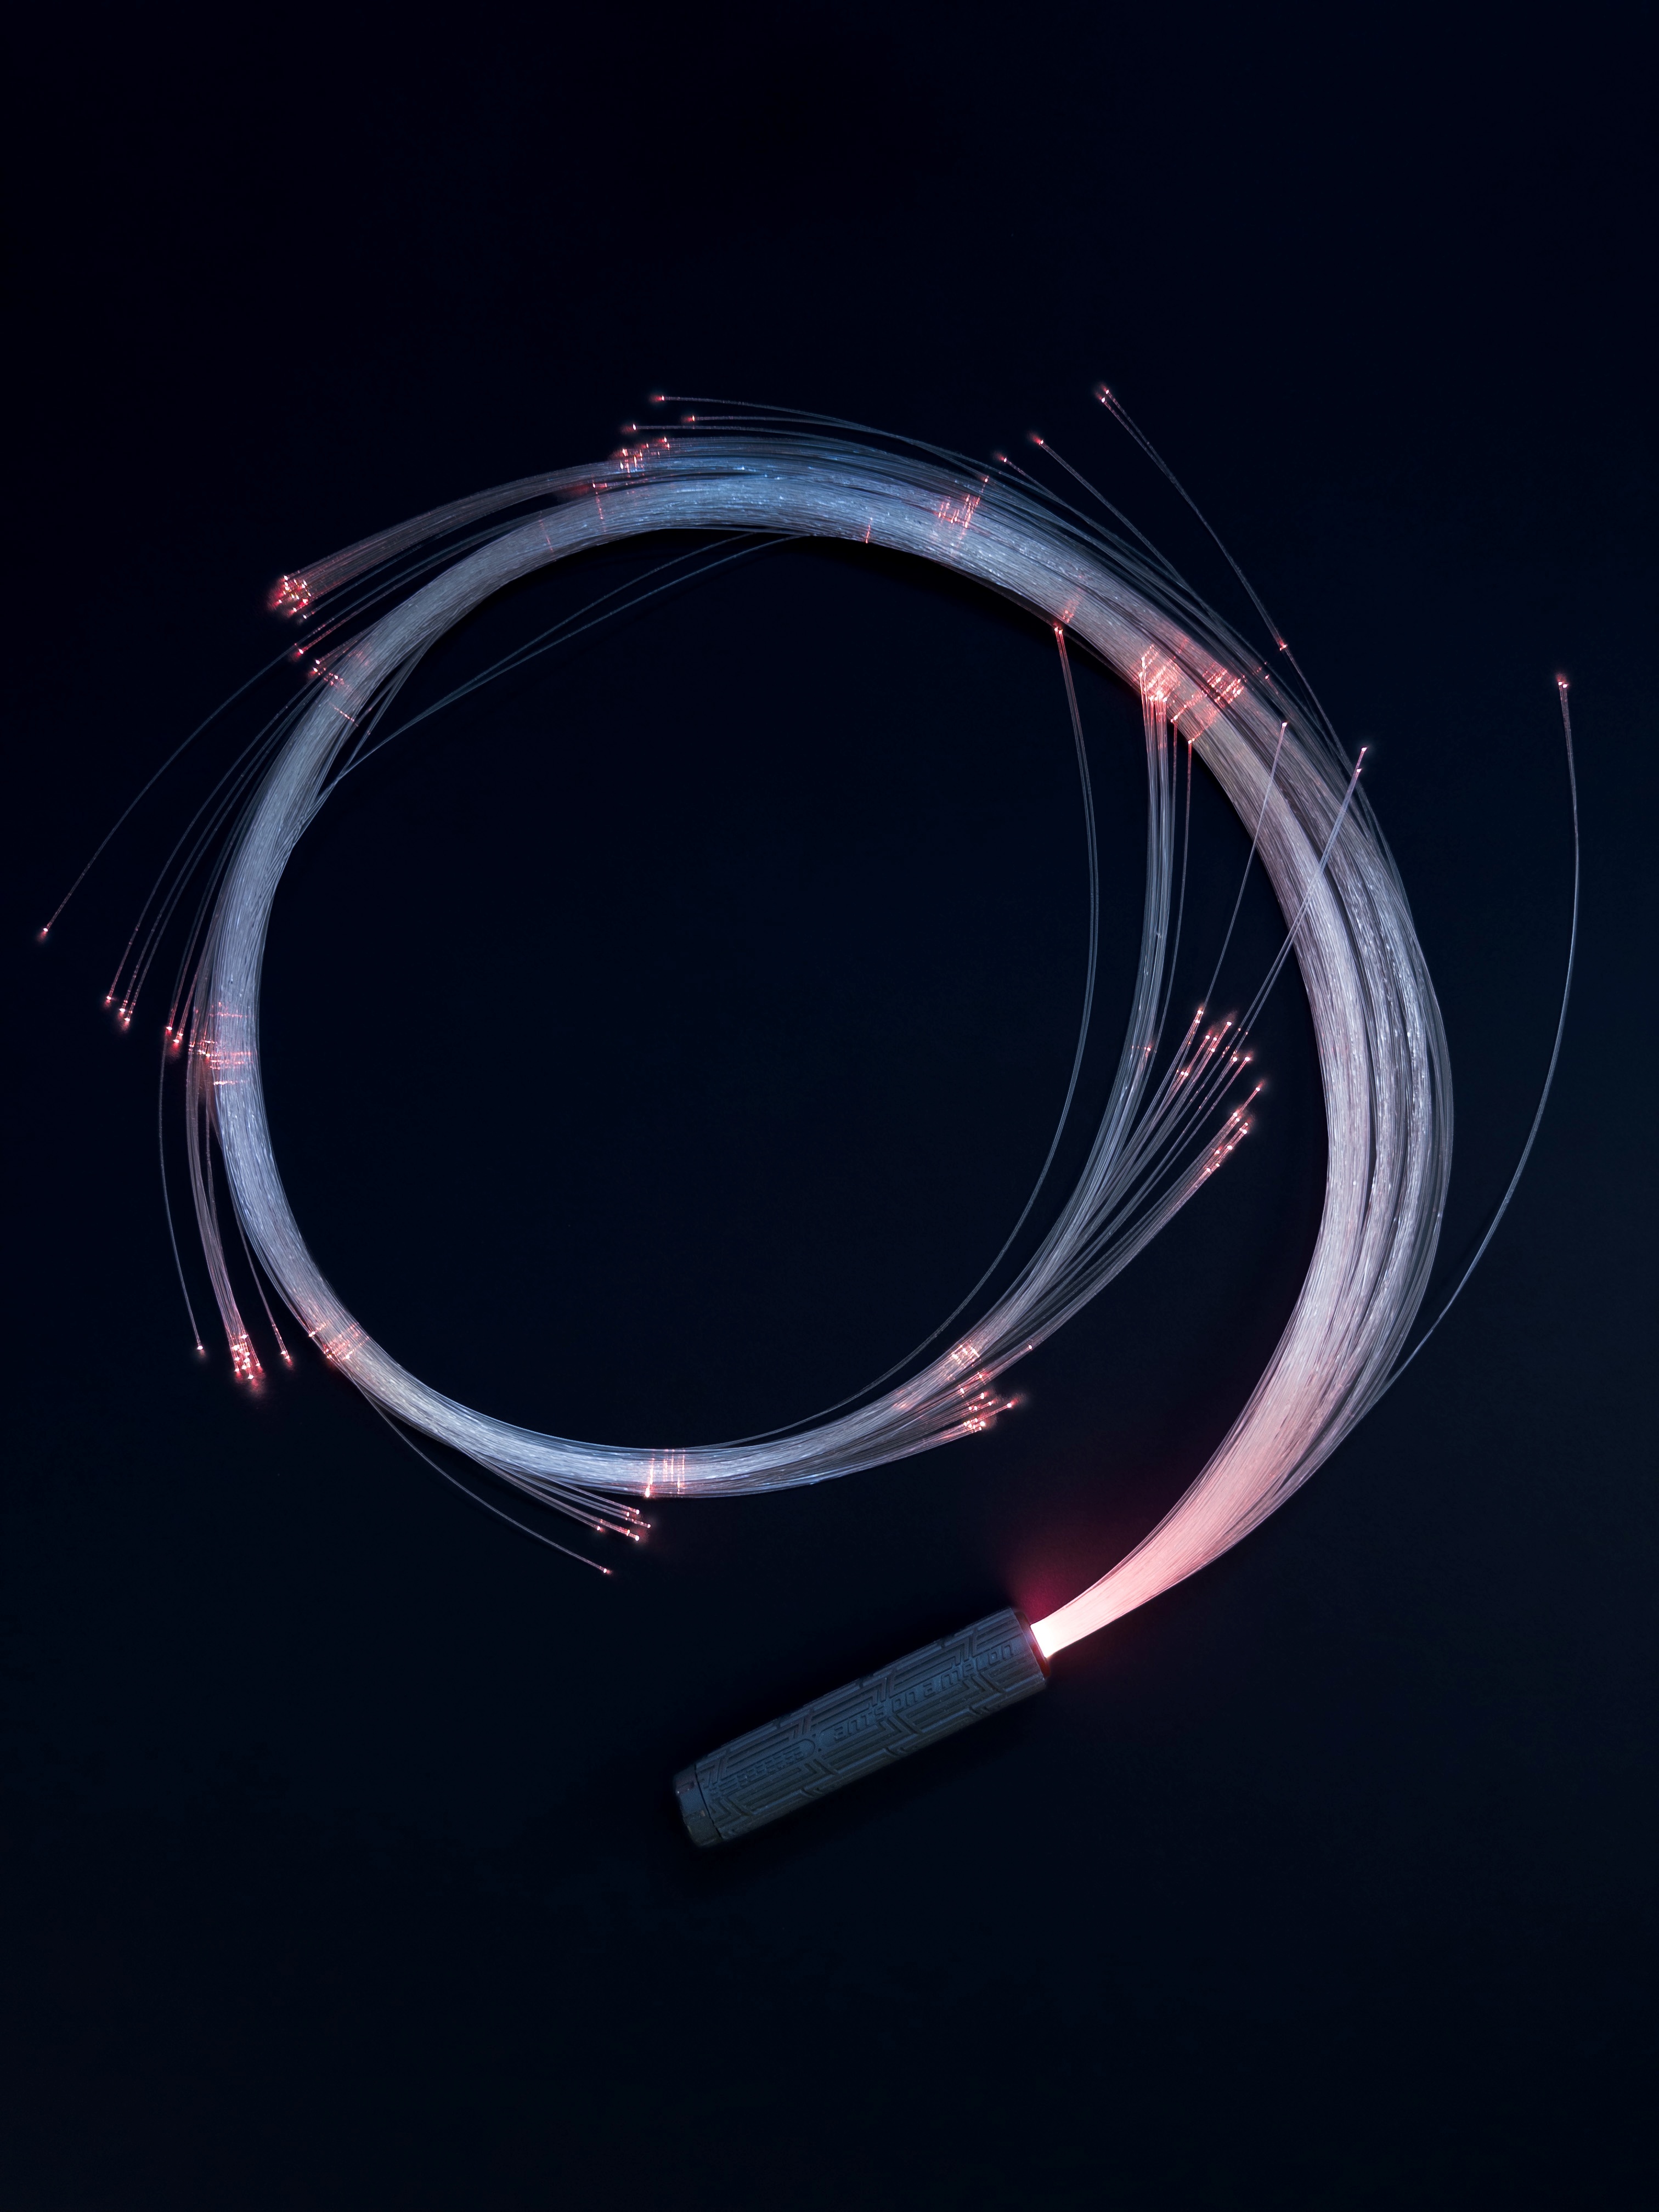
emits a brief, intense flash of white light, a color-changing light wand, shown
below at center, and a fiberoptic whip, shown below at right.
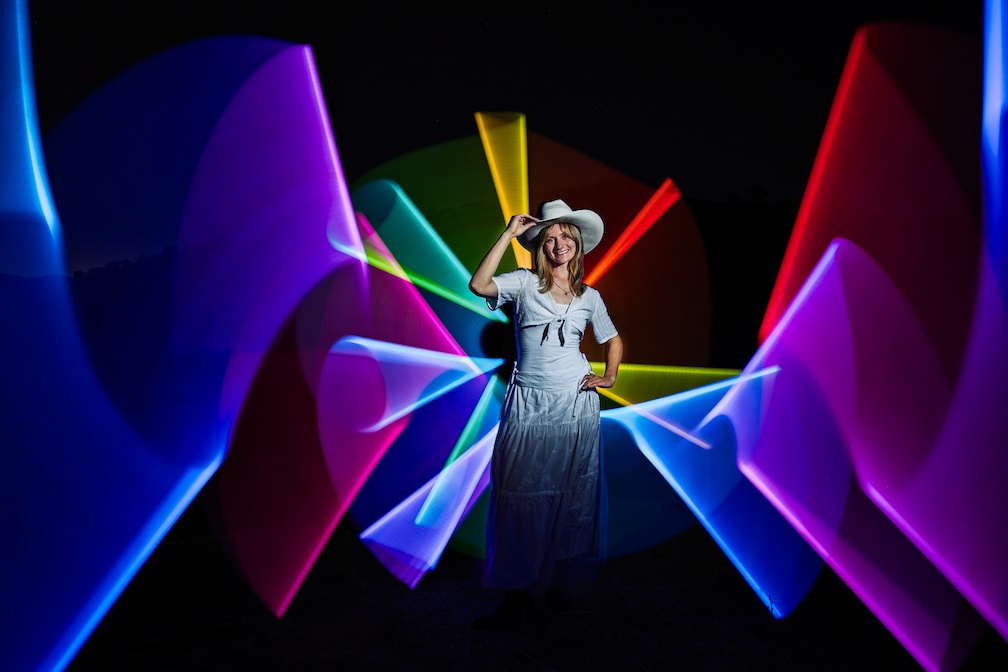
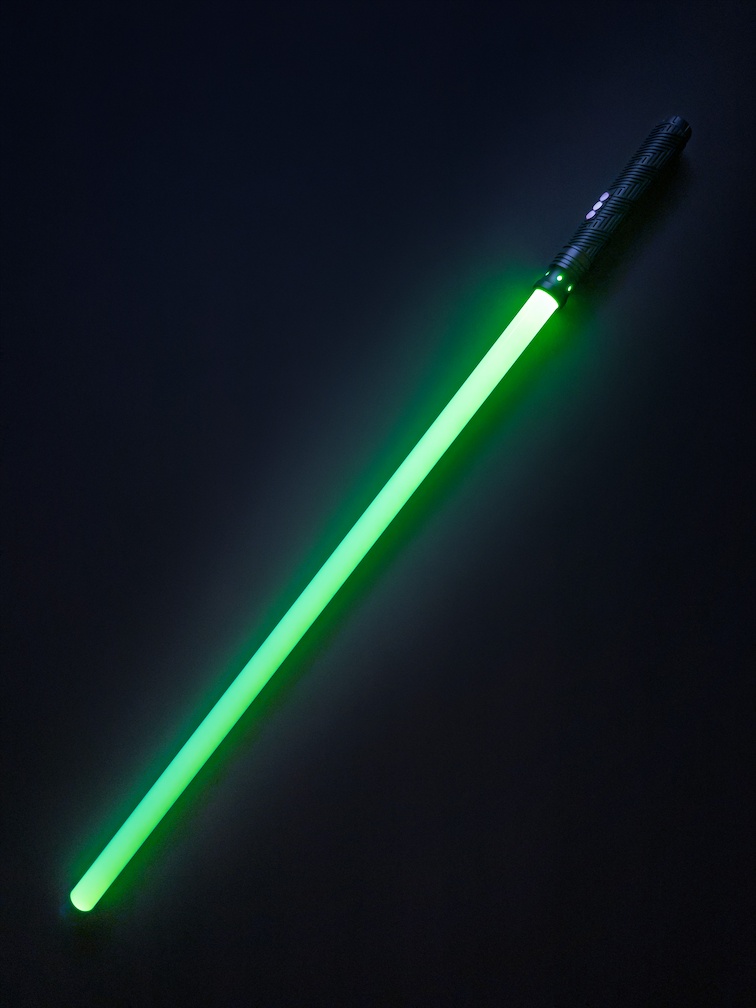
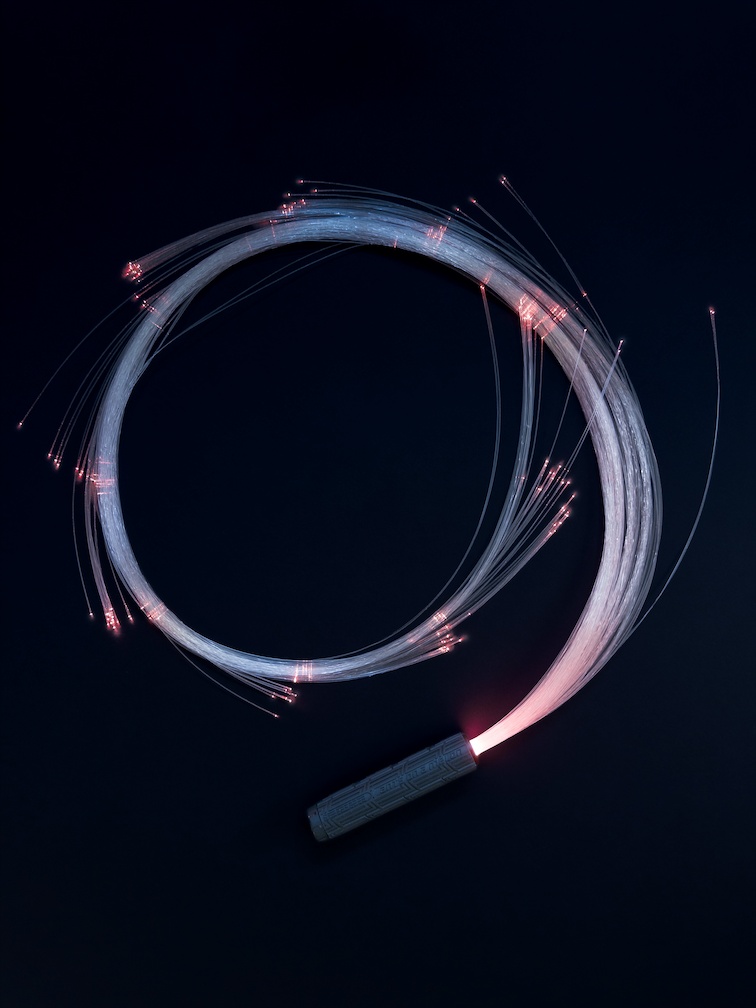
|
At left is a light-painted night-time scene by Susan Magnano, captured with Blend
mode and Pro Controls for focus, shutter speed and ISO. The glowing patterns
behind the model were drawn with the color-changing light wand shown at center.
At right is the fiberoptic whip used to create the title picture at the top of
this blog. This whip is a bundle of a few hundred transparent fibers attached to
a flashlight. When the flashlight is turned on, the free ends of the fibers glow
brightly.
|
Susan used the following Pro Controls settings to take these photos: manual
focus, shutter speed 1 s, ISO 64, Blend style, number of frames ∞. Sophia, the
model, assumed a pose in front of the camera as directed by Susan. Sophia then
stood as still as possible. Once an assistant pressed the shutter button to
start the long exposure, Susan walked into the picture and drew colorful patterns
into the air around Sophia, using either the light wand or the fiberoptic whip.
Susan then fired the strobe flash, pointing it at Sophia to light up her face.
After that the assistant stopped the exposure. Note that Susan was able to walk
through the picture during the capture without becoming visible in the final
photos. She just had to avoid standing between the camera and her light painting
tools, or between Sophia and the camera while firing the strobe flash.
Freezing Motion
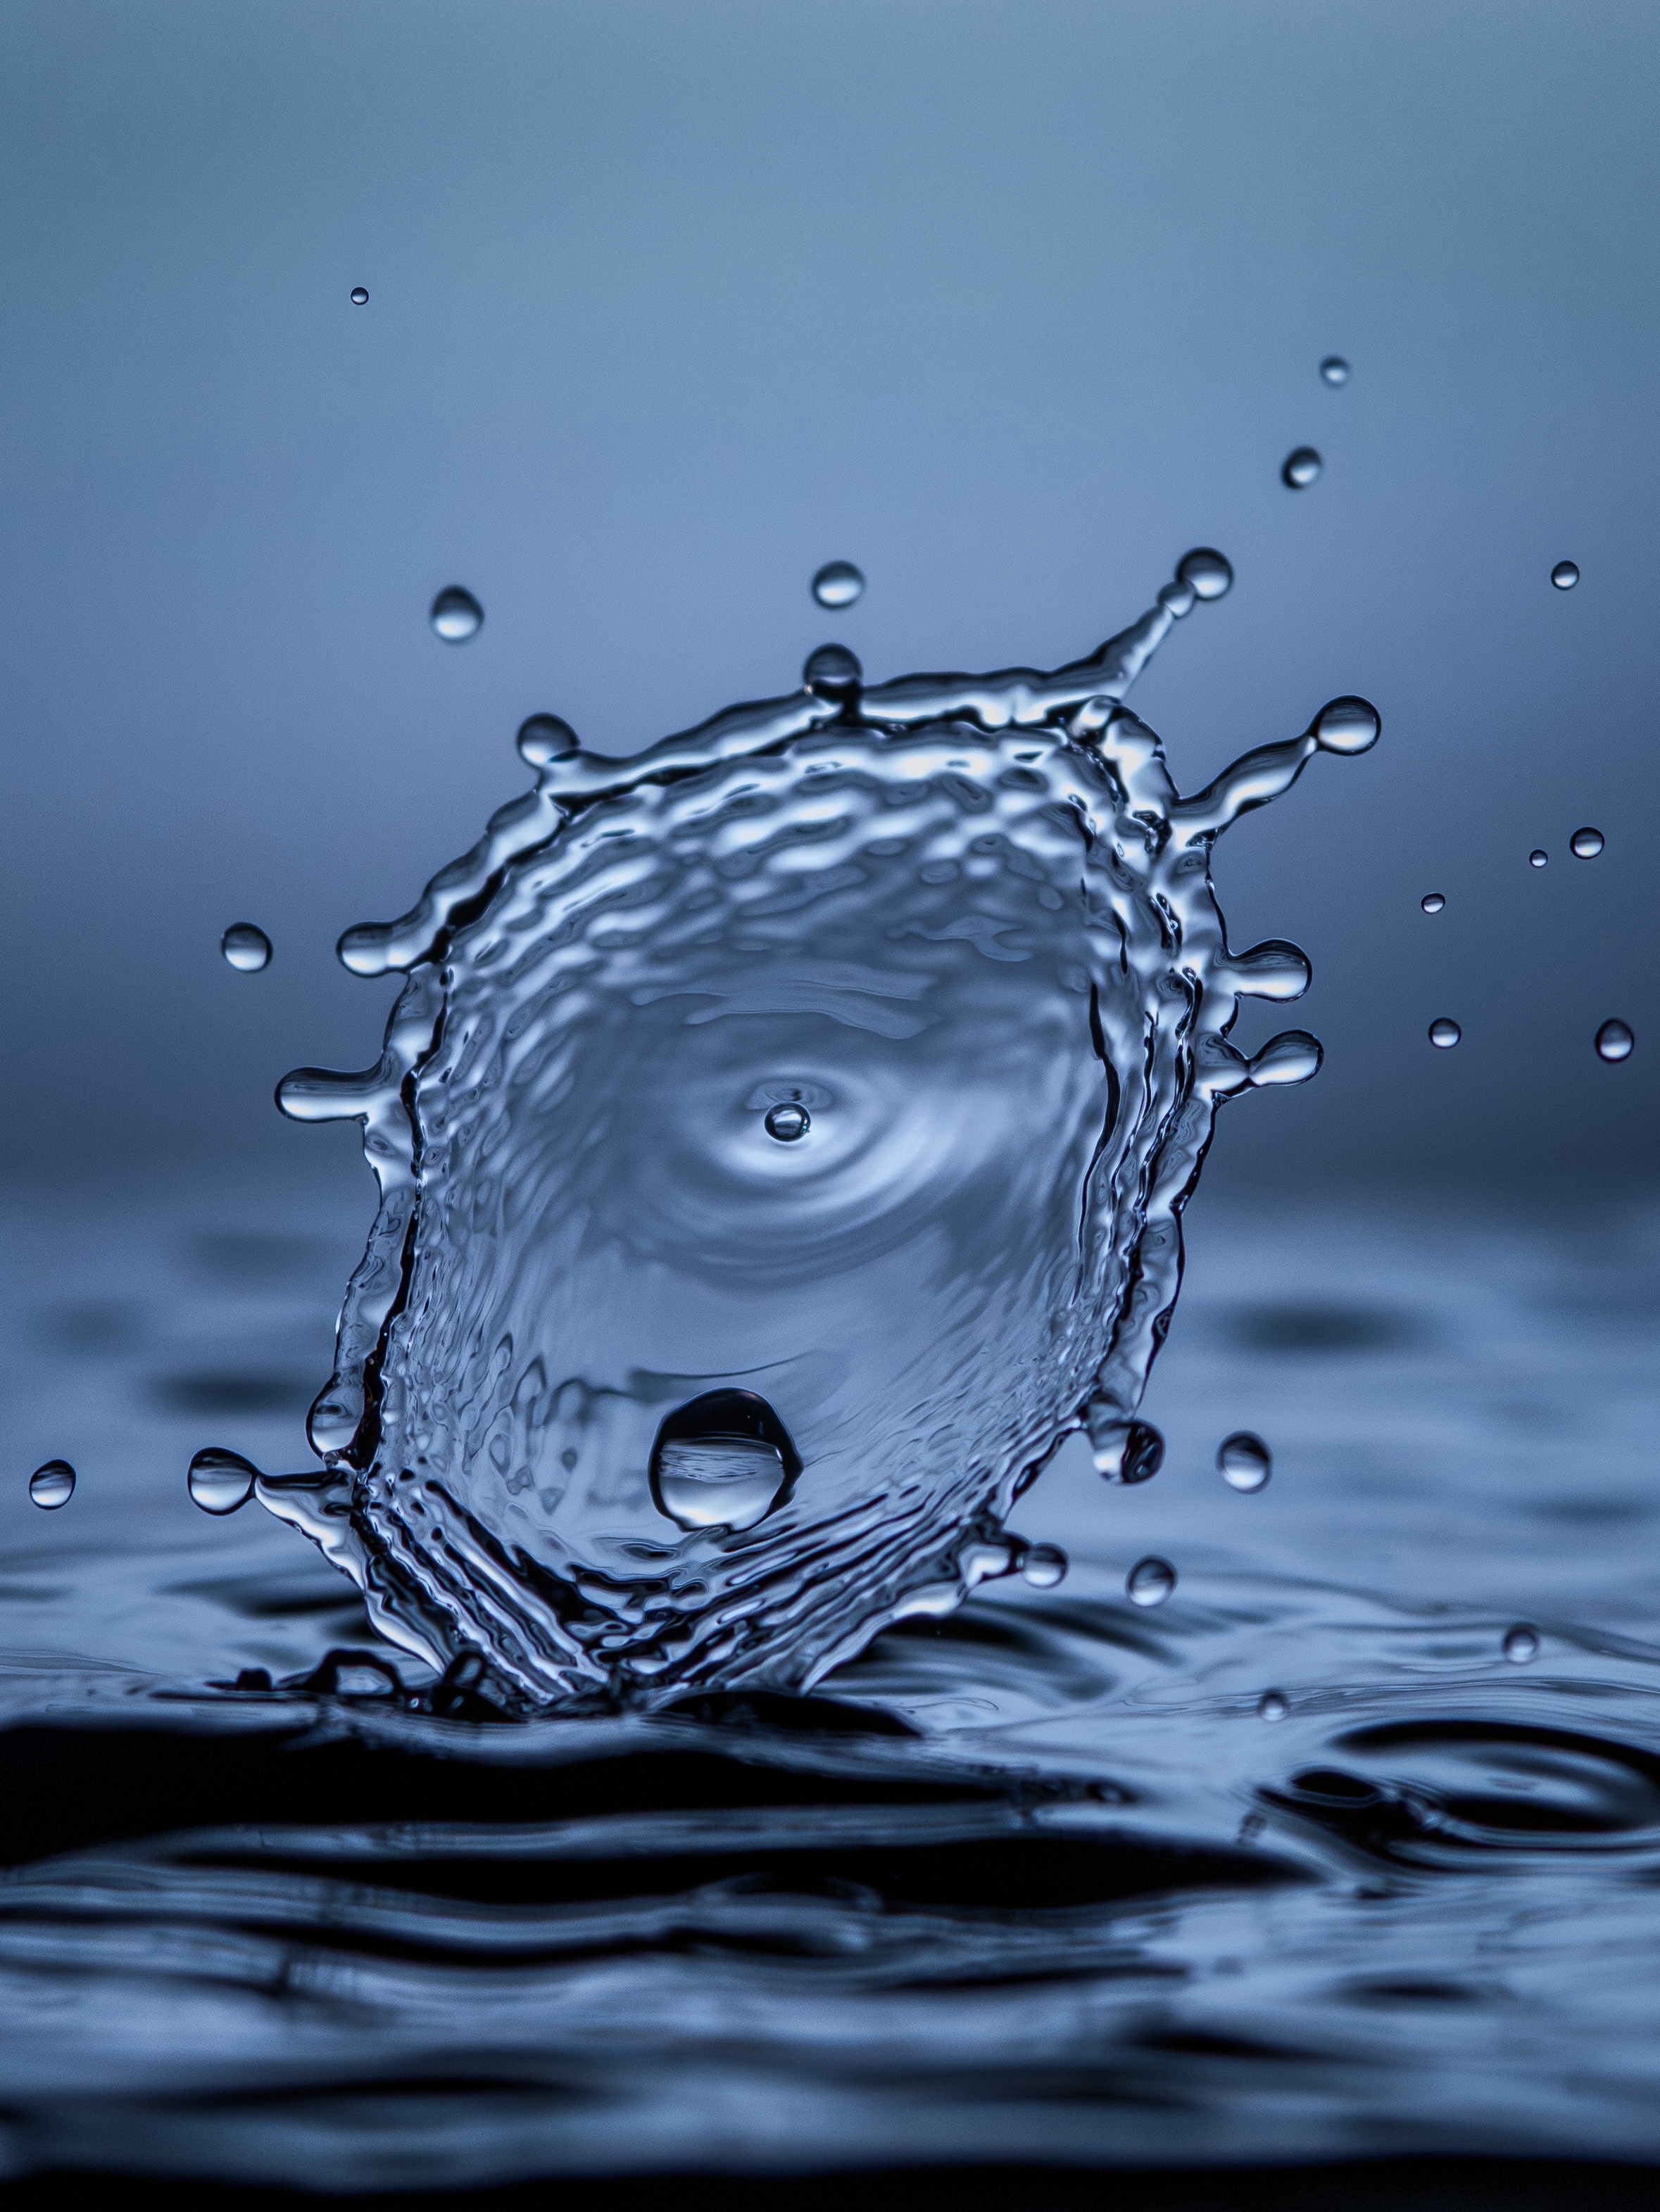
If you have access to a strobe flash, then, somewhat counterintuitively, you can
use Long Exposure to freeze fast motion. Enable Pro Controls, set the shutter
speed to 1 s, and the number of frames to 1. In a dark environment, start the
exposure, then start the event you want to capture, and simultaneously set off
the flash, as shown at left below.
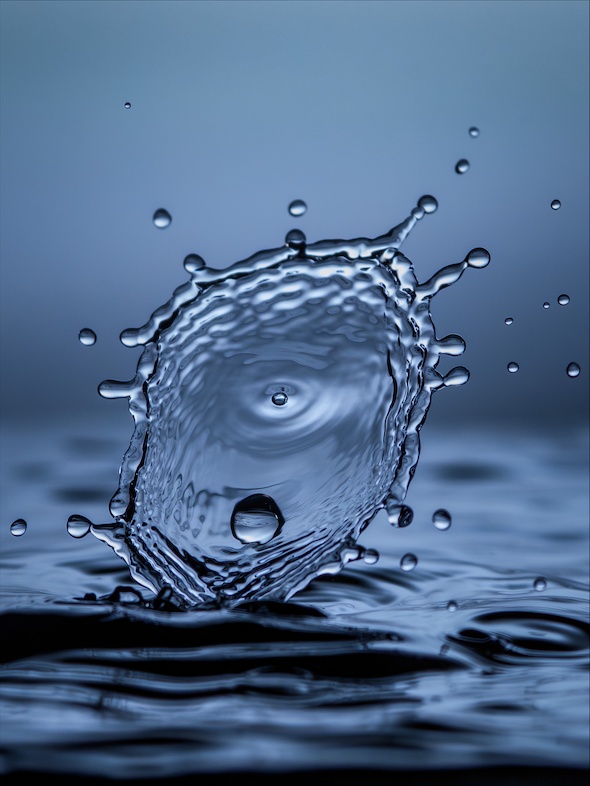
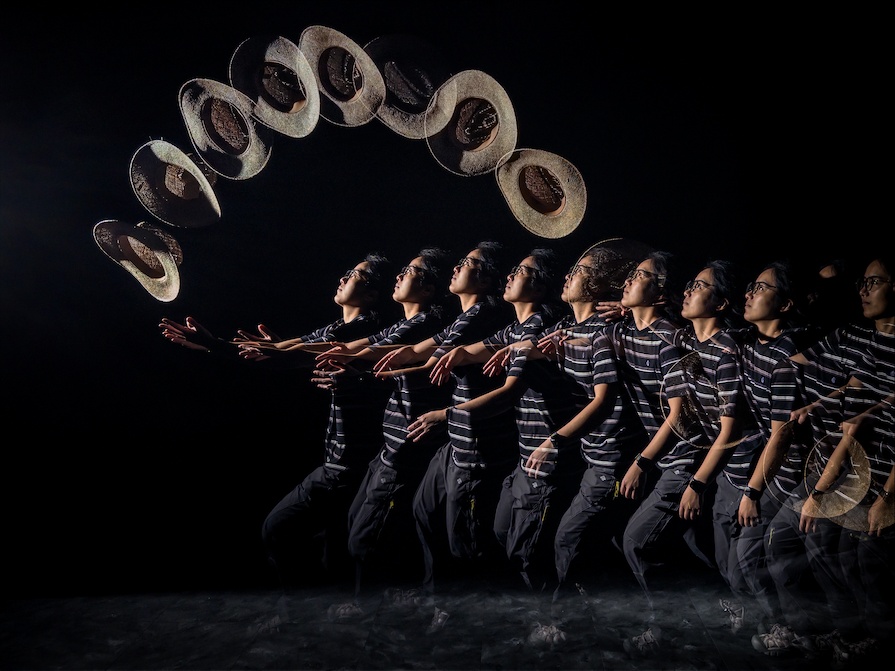
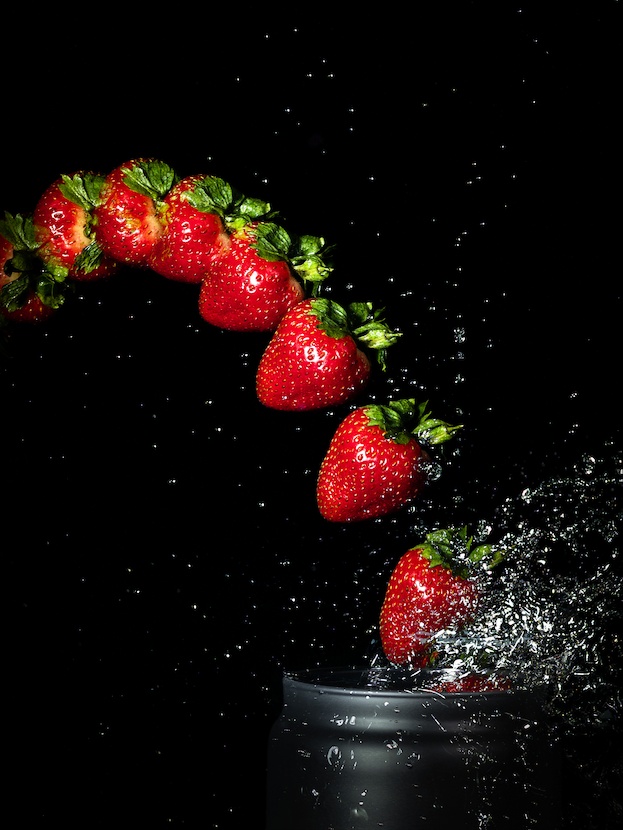
|
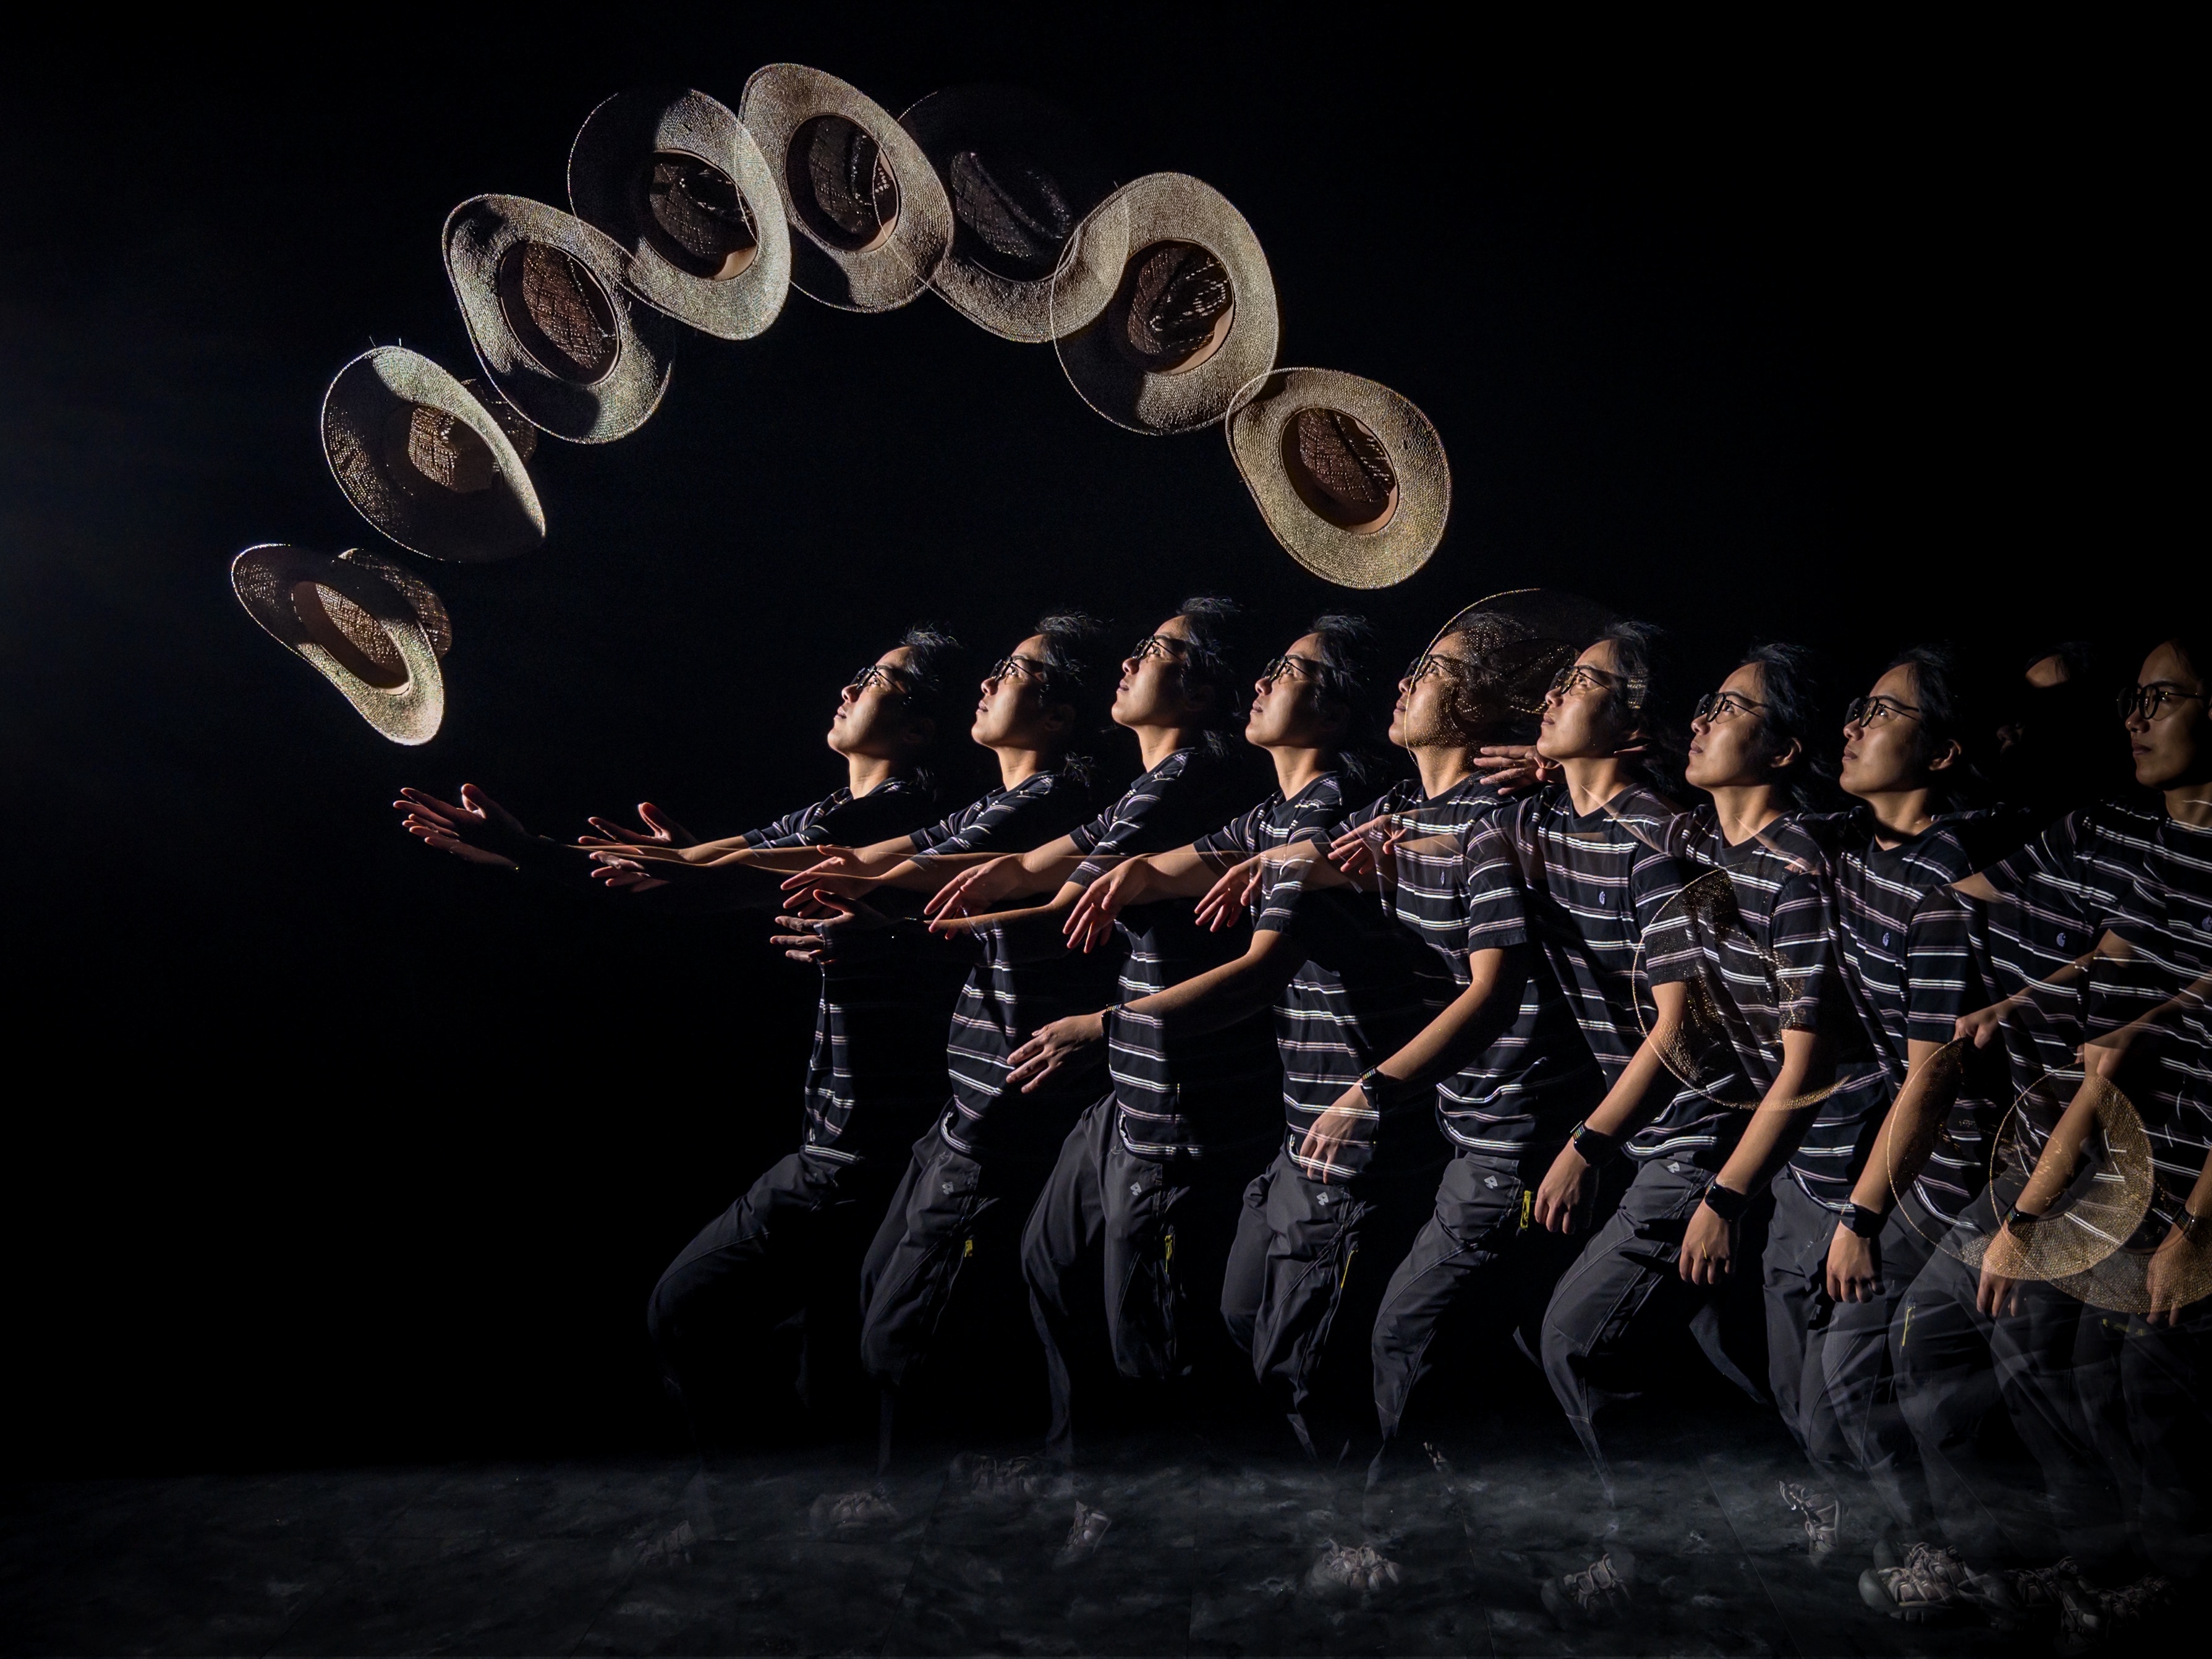
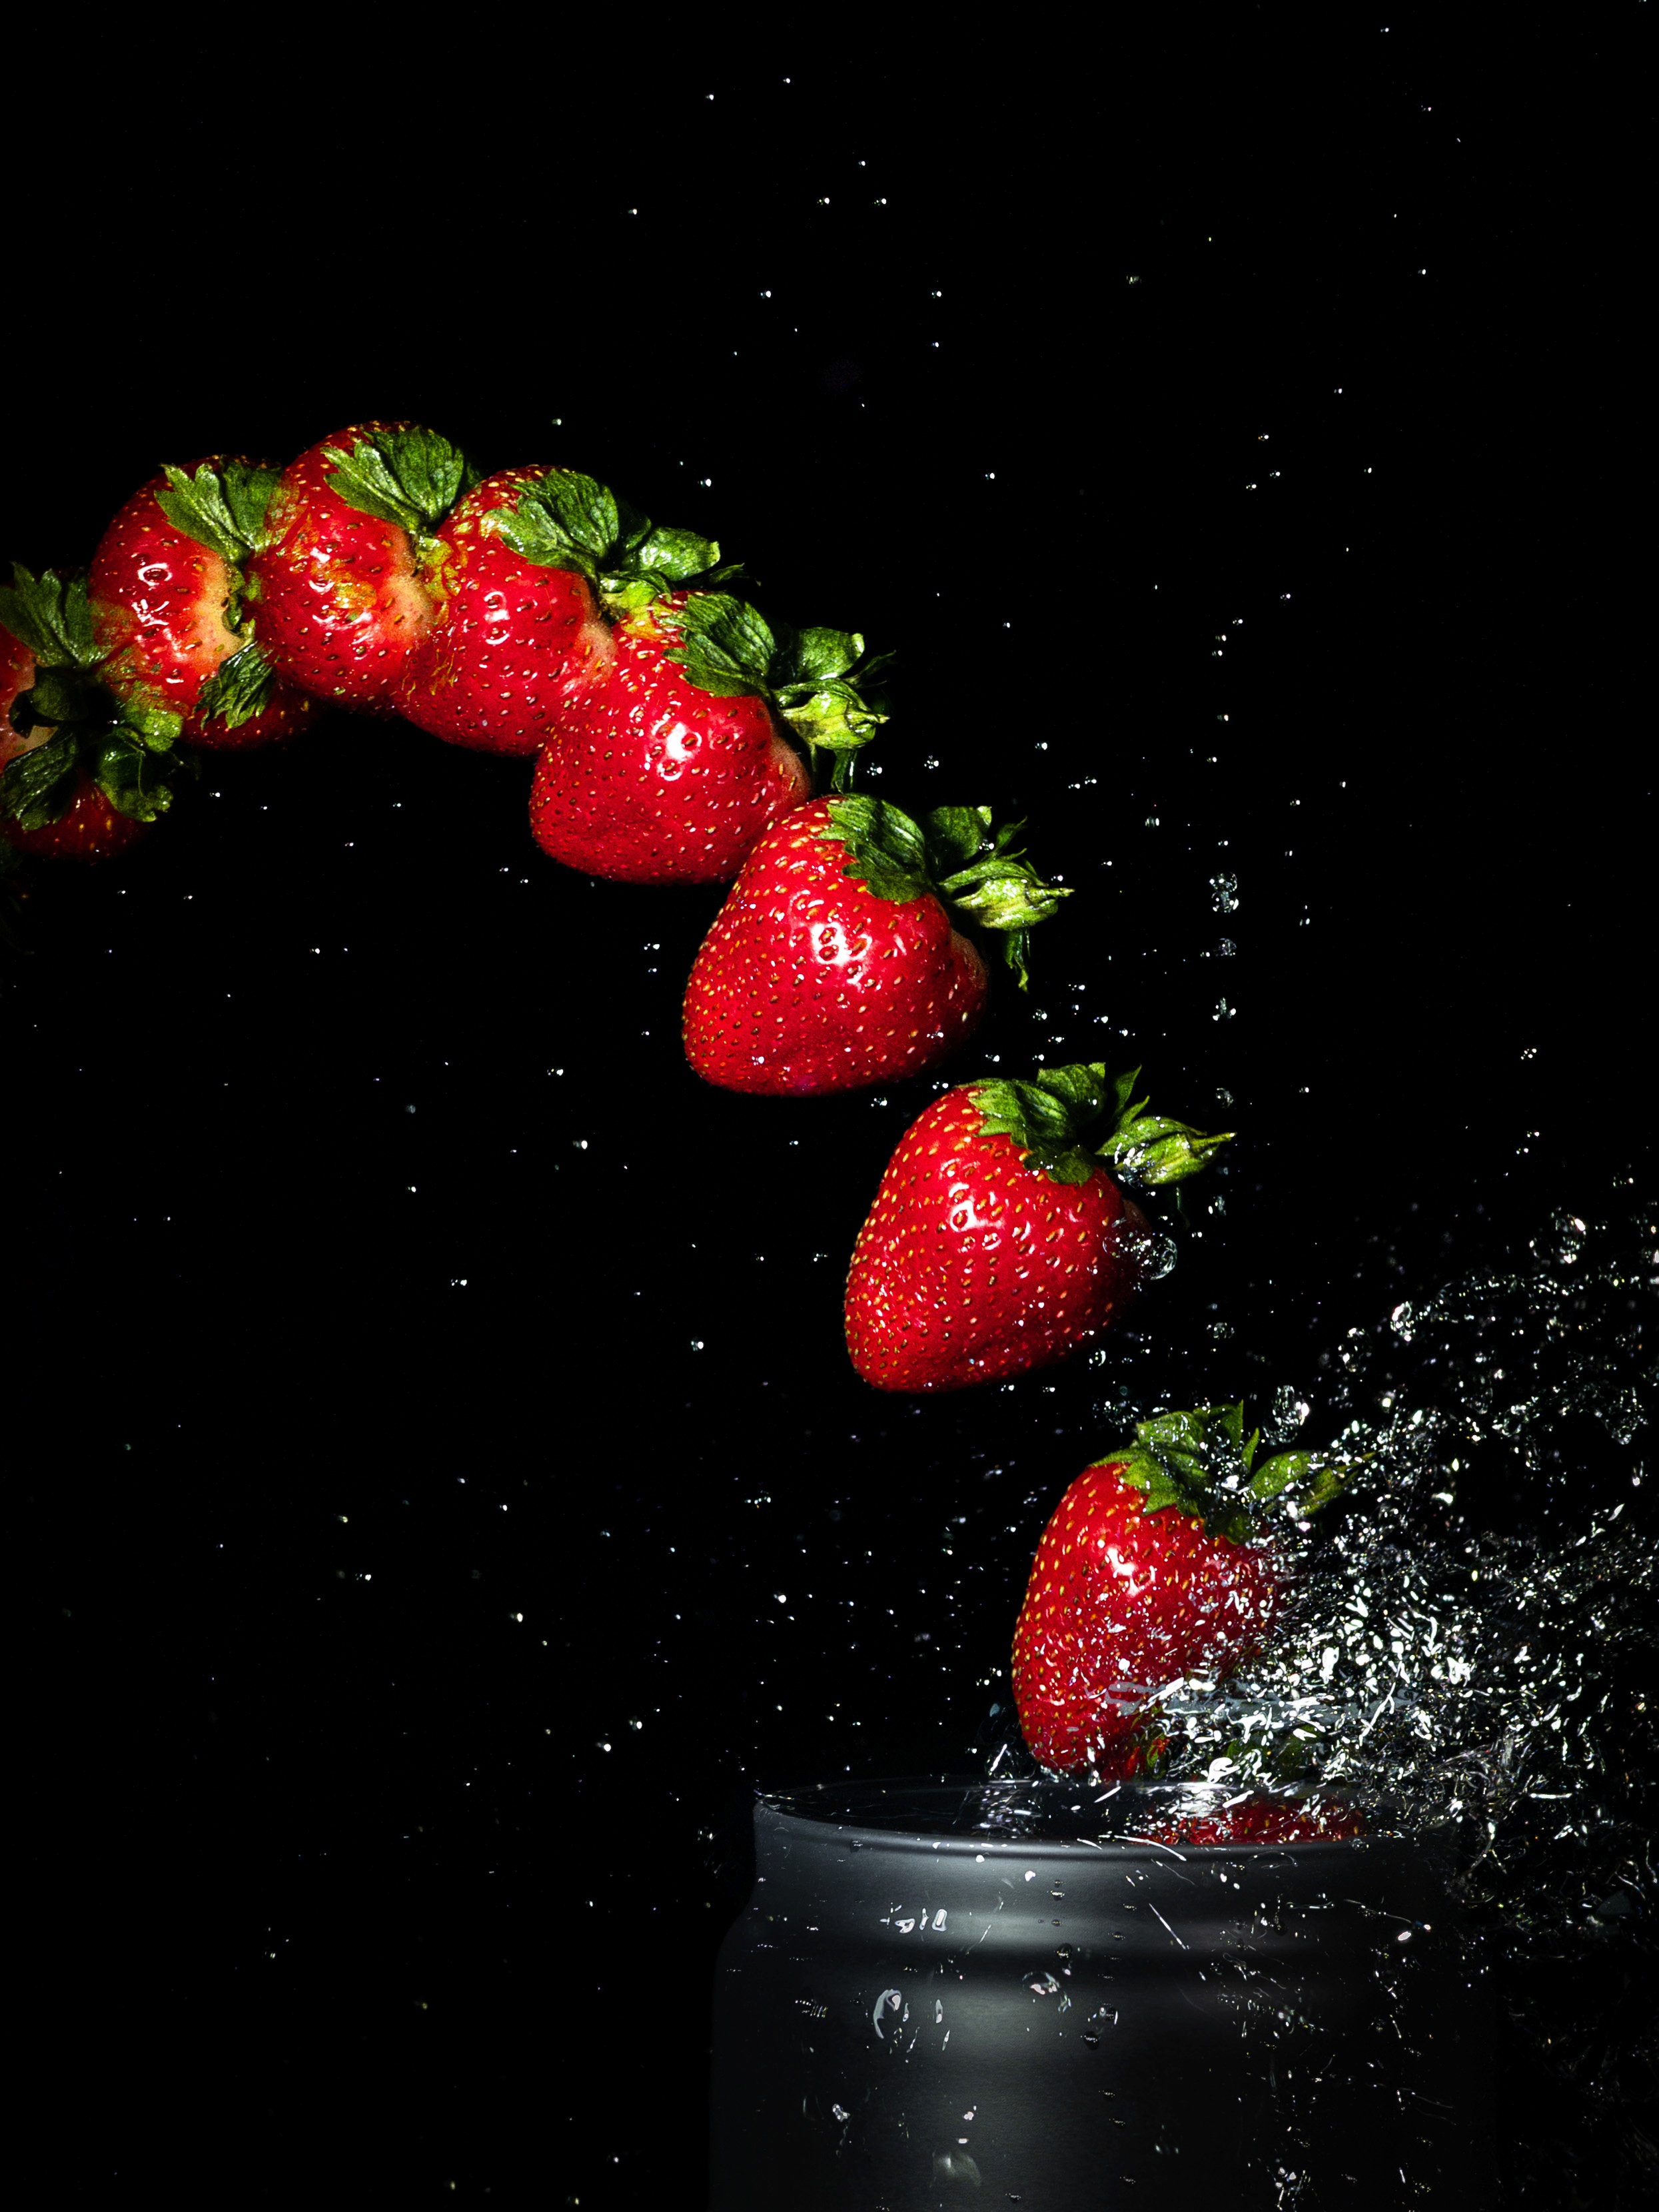
Some examples of freezing motion. At left we use Long Exposure and a
short-duration strobe flash to create an ultrashort exposure effect on a splash
of water. At center we use a strobe flash firing at 1/8 s intervals to create a
multiple-exposure effect as a model throws a hat in the air and then catches it.
At right we produce a multiple-exposure effect similar to the previous picture,
but captured using a continuous light source rather than a strobe flash. Blend
style is used together with a very fast shutter speed, while a strawberry is
tossed into a bowl of water.
|
If your strobe is able to produce a series of flashes at regular intervals, then
a variation of this technique can produce a multiple-exposure effect that shows
how an event develops over time. In the center image above, while our model
tossed a hat in the air, we fired a series of 12 flashes 1/8 s apart. The Camera
settings for this shot were: manual focus, shutter speed 1 s, ISO 64, Blend
style, number of frames 4.
To make this type of multiple-exposure shot work, the background should be
completely black. We took our picture indoors in a darkened room with black
walls, a black ceiling and a dark gray floor. The flash was positioned just
outside the left edge of the picture, and we set up black screens to block light
from the flash that would otherwise shine onto the walls or directly into the
camera. Taking the picture required three people: One person operated the
camera. After pressing the shutter button, they announced the start of the
exposure. At that point our model stepped into the frame from the right and
threw her hat, while the third person started the sequence of flashes.
If you don’t have a strobe flash, you can get a similar effect by brightly
lighting your subject and choosing a fast shutter speed. Long Exposure will
capture 30 frames per second where the subject’s motion is frozen in each one.
For the photo at right above, we set the shutter speed to 1/4000 s and tossed a
strawberry into a bowl filled with water. No flash was used, but we lit the
scene with two very bright lamps.
Try It Yourself
Project Indigo's Long Exposure feature was developed by Mohammad Haque and Yuting
Yang, with help from the entire Nextcam team. While the feature is less
automatic than what phone photographers might be used to, it opens up a variety
of creative possibilities.
The album
mentioned at the beginning of this blog post contains a selection of long
exposure images, including the ones shown here. We hope they inspire you to
experiment and take great pictures of your own.
Meanwhile, we are thinking about possible future directions for Long Exposure.
For example, is it possible to capture water-to-silk and similar shots without a
tripod? Does it make sense to add exposure bracketing to help capture scenes
with a very large dynamic range? Or can we use Long Exposure in extreme low
light conditions, taking pictures of the Milky Way and the stars in a moonless
night sky? Stay tuned.
As with all our technologies, we're always looking for feedback. A good place for
this is in our public forum. We'd love to see the results you get with our Long
Exposure feature, and we'd like to hear your suggestions for improving it.